

Build a LAN File Sharing System: Day 2 - Downloads, drag-and-drop, progress bars, and PIN protection
Yesterday we could push files onto the laptop. Today the tool becomes a real two-way sharing tool with drag-drop, downloads, progress bars, and PIN protection.
Yesterday you built the upload half — a phone-scannable server anyone on the LAN could push files onto. Useful, but one-directional. If your friend wants files back off your laptop, they still have to email them or start a video call and hope screen-sharing works. And anyone on the same WiFi with the URL could upload themselves 200 GB of memes to your Downloads folder.
Today we fix all of that. Downloads work now, so any device can pull files off your laptop, not just push files onto it. Drag-and-drop replaces the tap-to-pick UI — drop files anywhere on the browser window and they upload in the background. Real progress bars show you exactly how far along that 200 MB video is. And a 4-digit PIN gate protects the server from your coffee-shop neighbor.
The underlying philosophy: you don’t need to install an app or trust a cloud company just to move files between devices on the same physical WiFi network. A single Python file — 700 lines total, everything inline — replaces AirDrop, Snapdrop, LocalSend, WeTransfer, and all the “send a file to yourself” workflows people use every day. Once you’ve built one of these, you’ll never install a file-transfer app again.
Projects in this week’s series:
Day 1: Upload server with QR code
Yesterday, we built the upload half — a FastAPI server that binds to 0.0.0.0 on the LAN, prints a QR code in the terminal that any phone camera can scan, and accepts uploads from a mobile-first page with <input type="file" multiple>. Files stream to disk 1 MB at a time so a 4 GB video doesn’t blow up memory. Filename safety via Path.name blocks path traversal, and collisions auto-rename to foo (1).jpg. All in one Python file, ~300 lines, no accounts, no cloud.
👉 Day 2 (Today): Downloads, drag-and-drop, progress bars, and PIN protection
The main page now has two halves: a drop zone up top for uploads, and a gallery below showing every file already uploaded. Drag files from your desktop onto the browser window, or tap the drop zone on mobile to open your photo library — either way, each file gets its own live progress bar showing exactly how much has uploaded:
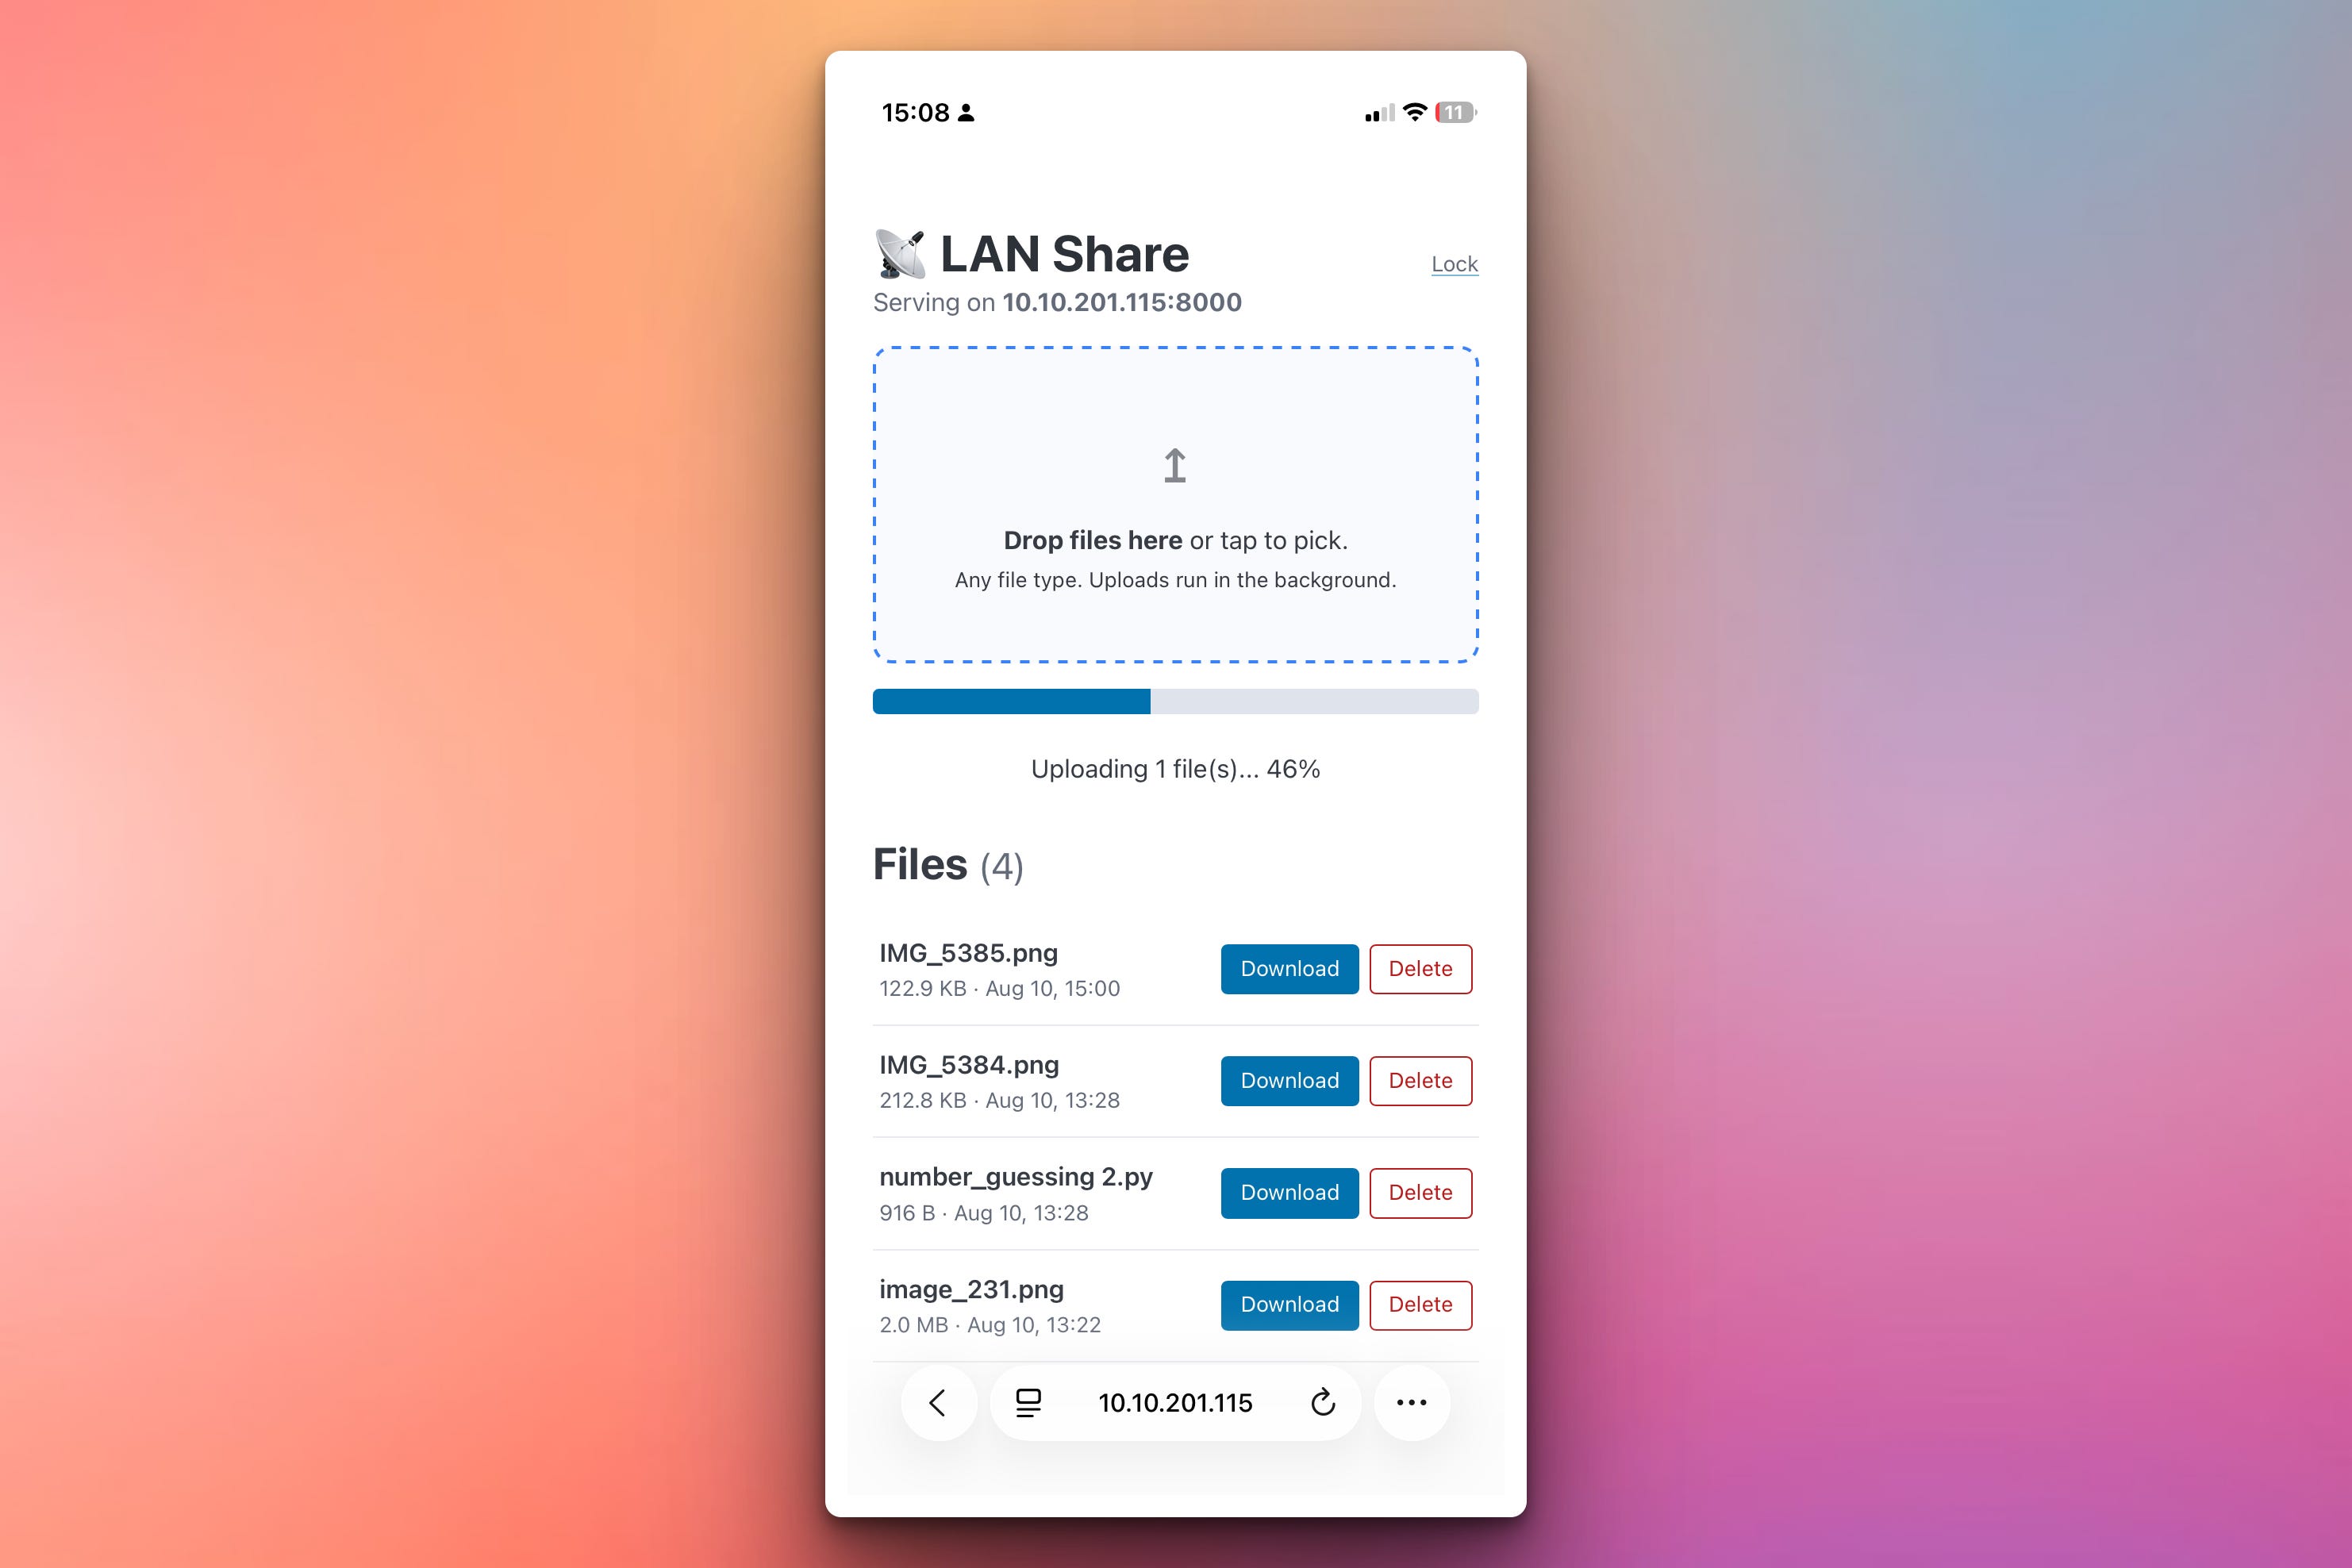
Once uploaded, files appear in the gallery with a thumbnail if it’s an image, or a document icon otherwise. Each card shows the filename, size, upload time (e.g., Aug 10, 15:00), and two buttons — Download and Delete. Tap Download and the file lands on your device. Tap Delete and it’s gone. This is what makes the tool actually two-way:
Before you see any of this, though, you have to enter the 4-digit PIN. You get the pin from the terminal when you run the .py script and you enter it in the app:
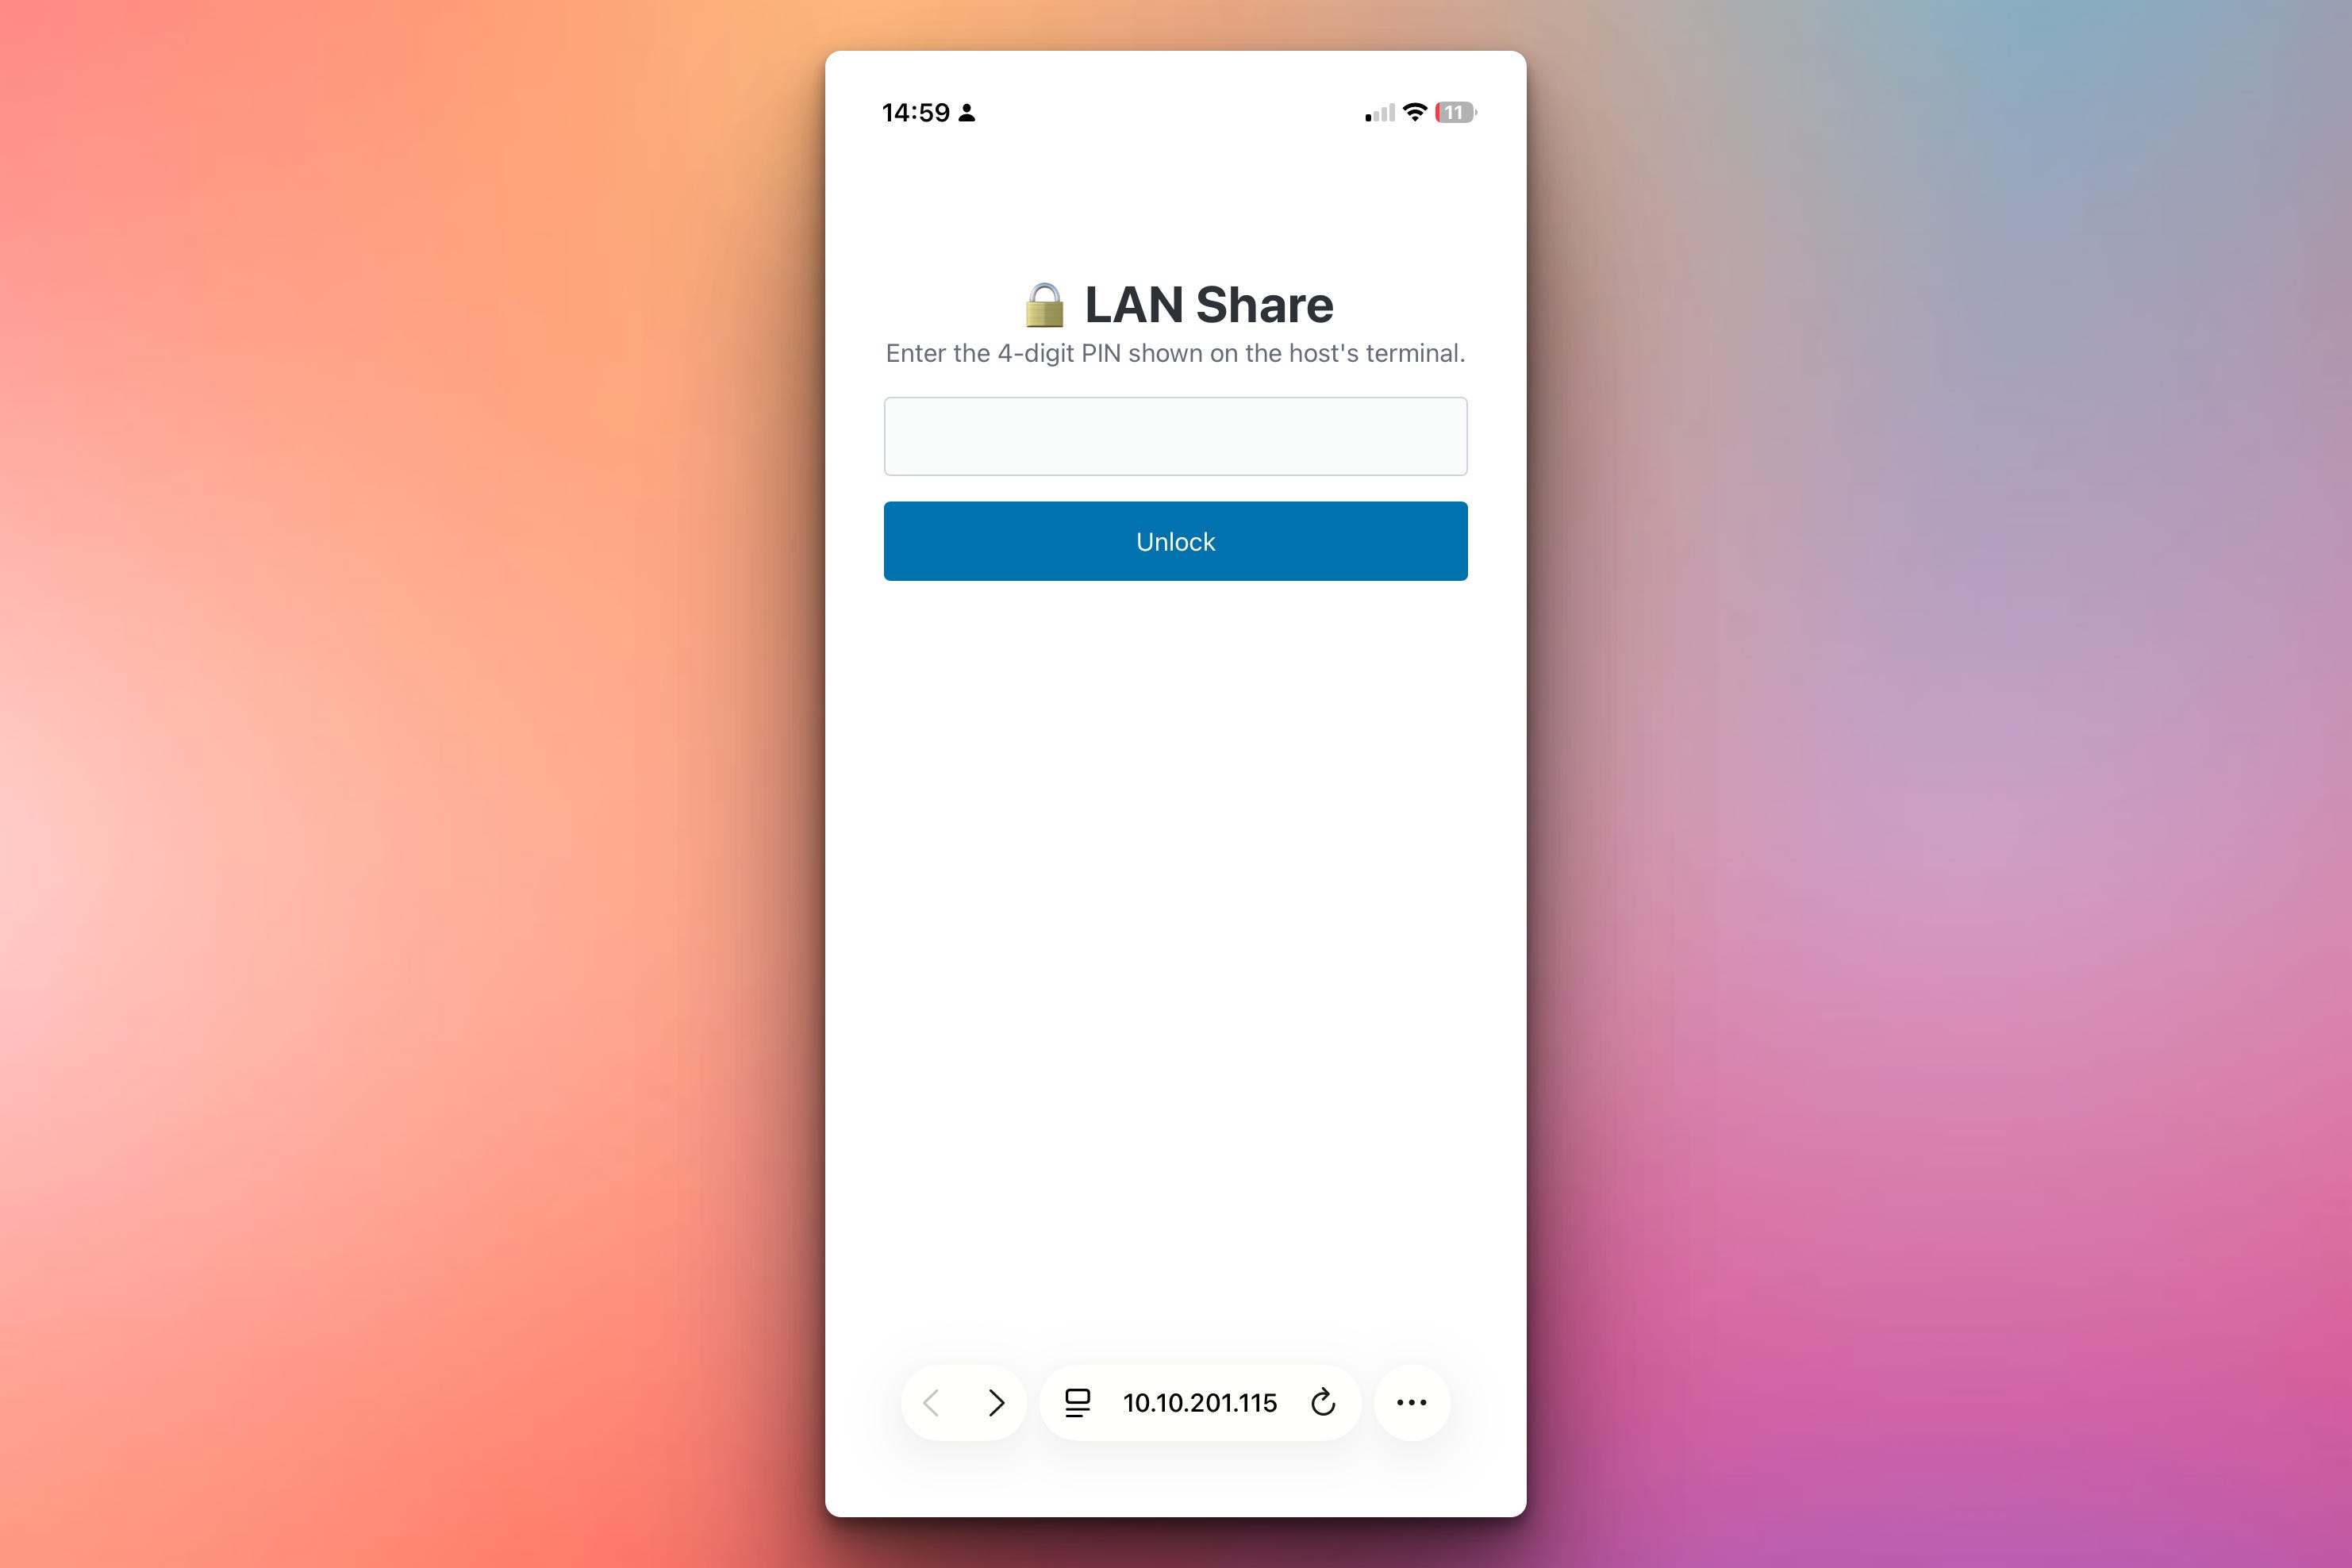
Every run, the server prints a fresh PIN in the terminal alongside the URL and QR code. Anyone opening the URL sees a PIN entry page first. After entering it correctly, a signed session cookie remembers them for the rest of the run.
Every file now is in both your devices.
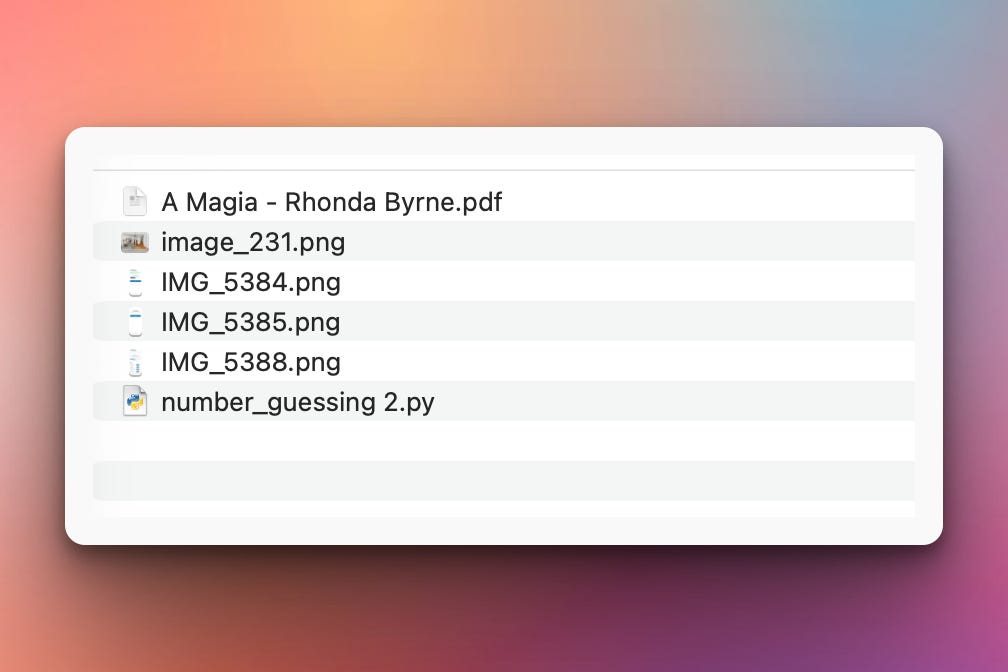
That way if you fire this up on coffee-shop WiFi, random strangers on the network can’t find the server and dump files onto your laptop. Only the people you actually tell the PIN to get in.
About the stack
Same base as yesterday — FastAPI, uvicorn, python-multipart, qrcode, rich. Two additions:
itsdangerous signs the session cookies that remember whether a browser has passed the PIN check. Same library we used in Week 28 for the Notes app. Signs data with a secret key, verifies it hasn’t been tampered with on the way back. If you know the key you can forge cookies; if you don’t, you can’t. The secret key gets regenerated on every server restart, which is what we want — sessions don’t need to survive across restarts.
Vanilla JavaScript, inline in the HTML template. About 80 lines. Handles drag-and-drop, XHR uploads, and progress bars. No React, no Vue, no build step, no node_modules. This is one of those cases where the amount of JS you need is small enough that reaching for a framework would slow things down, not speed them up.
Setup Instructions
Install the extra dependency on top of Day 1:
pip install itsdangerous
Everything else you already have from yesterday. Run:
python lanshare_full.py                       # save to ~/lanshare/
python lanshare_full.py ~/Downloads           # save to your Downloads folder
python lanshare_full.py ~/photos --port 9000  # custom folder and port
The startup banner is the same as Day 1 plus the PIN — you’ll see something like PIN: 4712 in yellow above the QR code. Read that number to whoever wants access. On subsequent runs the PIN changes because it’s regenerated on startup — that’s a feature, not a bug.
Understanding the PIN Gate
The whole “who is allowed in” system is three functions and a dependency:
signer = URLSafeSerializer(SECRET_KEY)

def make_session_cookie():
    return signer.dumps({"ok": True})

def is_authed(request):
    token = request.cookies.get(SESSION_COOKIE)
    if not token:
        return False
    try:
        return bool(signer.loads(token).get("ok"))
    except BadSignature:
        return False

def require_auth(request):
    if not is_authed(request):
        raise AuthRequired()
Login is POST /login with the PIN in a form field. If it matches, we set a cookie whose value is signer.dumps({"ok": True}) — a short signed string. Any subsequent request that includes this cookie passes the PIN check. If someone tries to fake the cookie by hand, signer.loads raises BadSignature and they get bounced back to /login.
The AuthRequired exception + @app.exception_handler pattern is what makes protection clean at the route level. Every protected route just adds one line:
@app.get("/")
async def home(_: None = Depends(require_auth)):
    ...
If the request is unauthed, require_auth raises AuthRequired, the exception handler catches it and returns a redirect to /login. The route body never runs. This is the exact same pattern from the Notes app in Week 28, extended here from “who are you” (username/password) down to “are you the person I told the PIN to” (single shared secret).
A note on brute force: 10,000 possible PINs might sound weak, but on a LAN with 5-10 devices, nobody is running a distributed brute-force attack. If you’re worried about a hostile actor on the same coffee-shop network trying 10,000 PINs, add a rate limiter — but for personal use it’s overkill.
Understanding Drag-and-Drop
The HTML5 drag-and-drop API is one of those things that sounds complicated but comes down to four event handlers:
const dropzone = document.getElementById('dropzone');

// Prevent the browser opening dropped files in a new tab (default behavior).
['dragenter', 'dragover', 'dragleave', 'drop'].forEach(ev => {
  document.body.addEventListener(ev, e => e.preventDefault());
});

dropzone.addEventListener('dragover', () => dropzone.classList.add('dragover'));
dropzone.addEventListener('dragleave', () => dropzone.classList.remove('dragover'));
dropzone.addEventListener('drop', e => {
  dropzone.classList.remove('dragover');
  if (e.dataTransfer && e.dataTransfer.files.length) {
    uploadFiles(e.dataTransfer.files);
  }
});
The dragover handler adds a CSS class that changes the border color and background — that’s the visual feedback showing the drop zone is active. The drop handler reads e.dataTransfer.files (a FileList object identical to what an <input type="file"> gives you), and passes them to the same upload function.
The one weird thing everyone hits the first time: you have to preventDefault on those four events on the whole body, otherwise dropping a file onto the page anywhere-not-the-dropzone causes the browser to navigate to that file. That’s why we attach preventDefault handlers to the body itself.
On mobile, drag-and-drop doesn’t exist as a gesture — you can’t drag files out of a file manager. So we also make the dropzone clickable, and clicking it opens the same hidden <input type="file" multiple>:
dropzone.addEventListener('click', e => {
  if (e.target.tagName !== 'INPUT') fileInput.click();
});
Same UI element, two interaction modes — drag-and-drop on desktop, tap-to-pick on mobile. One dropzone works on everything.
Understanding Live Progress Bars
Standard HTML form submission gives you no upload progress info at all. The browser posts the whole thing and shows you the response when it’s done. For a 200 MB video that could take a minute, the user sees nothing happening.
The fix is XMLHttpRequest, specifically its upload.progress event. Modern JavaScript prefers fetch(), but fetch() doesn’t expose upload progress at all — the spec still hasn’t shipped it. So for progress bars we have to reach for the older XHR API:
const xhr = new XMLHttpRequest();
const fd = new FormData();
fd.append('files', file, file.name);

xhr.upload.addEventListener('progress', e => {
  if (!e.lengthComputable) return;
  const pct = Math.round((e.loaded / e.total) * 100);
  bar.value = pct;
  pctText.textContent = pct + '%';
});

xhr.open('POST', '/upload');
xhr.send(fd);
The upload.progress event fires many times per second while the file is being sent. e.loaded is bytes uploaded so far, e.total is total bytes. Divide, round, done. The <progress> HTML element is a first-class native progress bar — no CSS gymnastics needed to make it look good.
Doing multiple files at once? Each file gets its own XHR, its own progress row in the DOM, its own progress event stream. Uploads run in parallel because the browser handles multiple simultaneous XHRs to the same origin. The main constraint is the browser’s per-origin request limit (usually 6), which is more than enough for a personal file-transfer tool.
Understanding the File Gallery
The gallery is server-rendered HTML, updated by reloading the page after uploads complete. Every request to / reads the current contents of the upload directory, sorts by modification time, and renders one card per file:
@app.get("/")
async def home(_: None = Depends(require_auth)):
    files = sorted(
        [p for p in upload_dir.iterdir()
         if p.is_file() and not p.name.startswith(".")],
        key=lambda p: p.stat().st_mtime,
        reverse=True,
    )
    return HTMLResponse(MAIN_PAGE.format(
        gallery_html=render_gallery(files),
        ...
    ))
iterdir() is pathlib‘s way of listing a directory. Filter out hidden files (.DS_Store, .thumbs), sort by st_mtime descending, done. Newest first is the right default because that’s what you just uploaded.
Each card decides whether to show a thumbnail image or a document icon based on the file extension:
IMAGE_EXTENSIONS = {".jpg", ".jpeg", ".png", ".gif", ".webp", ".heic",
".bmp", ".svg", ".avif"}
if is_image(f.name):
thumb = f'<img src="/files/{name_escaped}" alt="" loading="lazy">'
else:
thumb = '<span class="icon">📄</span>'
For image thumbnails, we use the file itself as the <img src>. The browser downloads it, resizes it via object-fit: cover in CSS, and renders it. For a personal LAN tool with a few dozen files, this is fine. A production version would generate real thumbnails with Pillow, but that adds a dependency for very little UX gain at small scale.
The loading="lazy" attribute is important — it tells the browser to only load thumbnails as they scroll into view. Without it, opening a page with 100 images would trigger 100 simultaneous downloads.
Understanding Path Traversal on Downloads
Day 1 handled filename safety on uploads via Path(name).name. Day 2 adds two more attack surfaces: downloads (GET /files/{name}) and deletes (POST /files/{name}/delete). Both take a filename from the URL, and both could be tricked into escaping the upload directory if we weren’t careful.
We reuse the same safe_filename from Day 1, but also add a defense-in-depth check that resolves the final path to absolute form and confirms it’s still inside the upload directory:
def resolve_upload_path(upload_dir, name):
    candidate = (upload_dir / safe_filename(name)).resolve()
    upload_dir_r = upload_dir.resolve()
    try:
        candidate.relative_to(upload_dir_r)
    except ValueError:
        return None                    # escaped upload_dir - reject
    if not candidate.is_file():
        return None
    return candidate
safe_filename alone would probably be enough, but “probably enough” is not the right level of confidence for security-sensitive code.
The same helper protects the delete route. Without it, a malicious request would happily delete files outside the upload directory. With it, you get a 404 and nothing happens.
Understanding the JSON Upload Response
Day 1’s upload route returned a 303 redirect back to /?uploaded=N — the standard Post-Redirect-Get pattern for form submissions. That worked because Day 1 used a plain HTML form.
Day 2’s upload runs from JavaScript via XHR, so the response can be JSON instead:
python
return JSONResponse({"ok": True, "saved": saved})The JavaScript doesn’t actually read the response body — it just checks xhr.status to know if the upload succeeded — but returning structured JSON is the right idiom for a JavaScript-driven endpoint, and gives us the option to expand the response later (thumbnails, previews, computed metadata) without breaking anything.
After all in-flight uploads finish, the JS reloads the page:
javascript
if (inFlight === 0) setTimeout(() => location.reload(), 600);The 600ms delay lets the “Done” text on the progress rows stay visible for a moment before the page refreshes to show the new gallery. Small polish, feels much better than an instant snap.
Practical Use Cases
Family photo dump at Christmas.
Everyone at the family gathering AirDrops or Google-Drives their photos to one shared album, taking 45 minutes and losing quality. Alternative: someone starts LAN Share on their laptop, projects the QR code on the TV, everyone in the room scans it, uploads their photos in full quality in 30 seconds. Downloadable back to any device afterwards.
Workshop or conference submissions.
Running a two-hour Python workshop and want everyone to submit their solutions? Way faster than a shared Google Drive. Everyone’s on the venue WiFi, they scan the QR code, PIN is projected on your slide, files land in one folder on your laptop. No Google accounts needed.
Getting files off a phone with no cable.
Phone lost its cable, doesn’t have iCloud, or the photos are too big for email? Start the server, scan the QR, upload the 4 GB video, downloaded to your laptop in whatever time the WiFi takes. Faster than trying to work around whatever cloud service compresses your file.
Sharing a big file between two computers on the same network.
Two laptops on the same WiFi, want to move a 15 GB dataset between them? USB drives, cloud upload, Ethernet cables all take longer than starting LAN Share and dragging the file. LAN transfer runs at whatever your WiFi supports — often over 100 MB/s.
Deploy it to your own VPS with a domain and HTTPS.
Point it at a real domain with a Let’s Encrypt certificate and you have a private file-transfer service accessible from anywhere. Send the link + PIN to anyone. No SaaS, no monthly fee, no size limit, no expiring links, no ads. Total setup cost: $5/month VPS + one weekend of learning nginx and Certbot.
What’s Next
Thursday’s post is a standalone tutorial on a specific piece of infrastructure — free, all subscribers get it. Details Thursday morning.
Next week we shift into a different kind of build — details on Tuesday.
Solution
Below you will find the downloadable solution.py file containing the correct solution.
Get the code here:
Keep reading with a 7-day free trial
Subscribe to Daily Python Projects to keep reading this post and get 7 days of free access to the full post archives.