

Build a Note Taking App with FastAPI and HTMX - Day 1: Sign up, log in, and take notes
Every Python course teaches you to build tools for yourself. This week you build one other people log into.

Today we will build an app that lets users sign up, log in and create and save notes. Each user has their own account. This is a great app you can use for yourself and customize it as you wish.
Two days, one file, zero JavaScript. You’ll build a working note-taking web app with real authentication — sign up, log in, protected pages, sessions, password hashing. Wednesday adds the innovative feature that makes it feel like Notion or Obsidian instead of a class project.
Projects in this week’s series:
👉 Day 1 (Today): Sign up, log in, and take notes
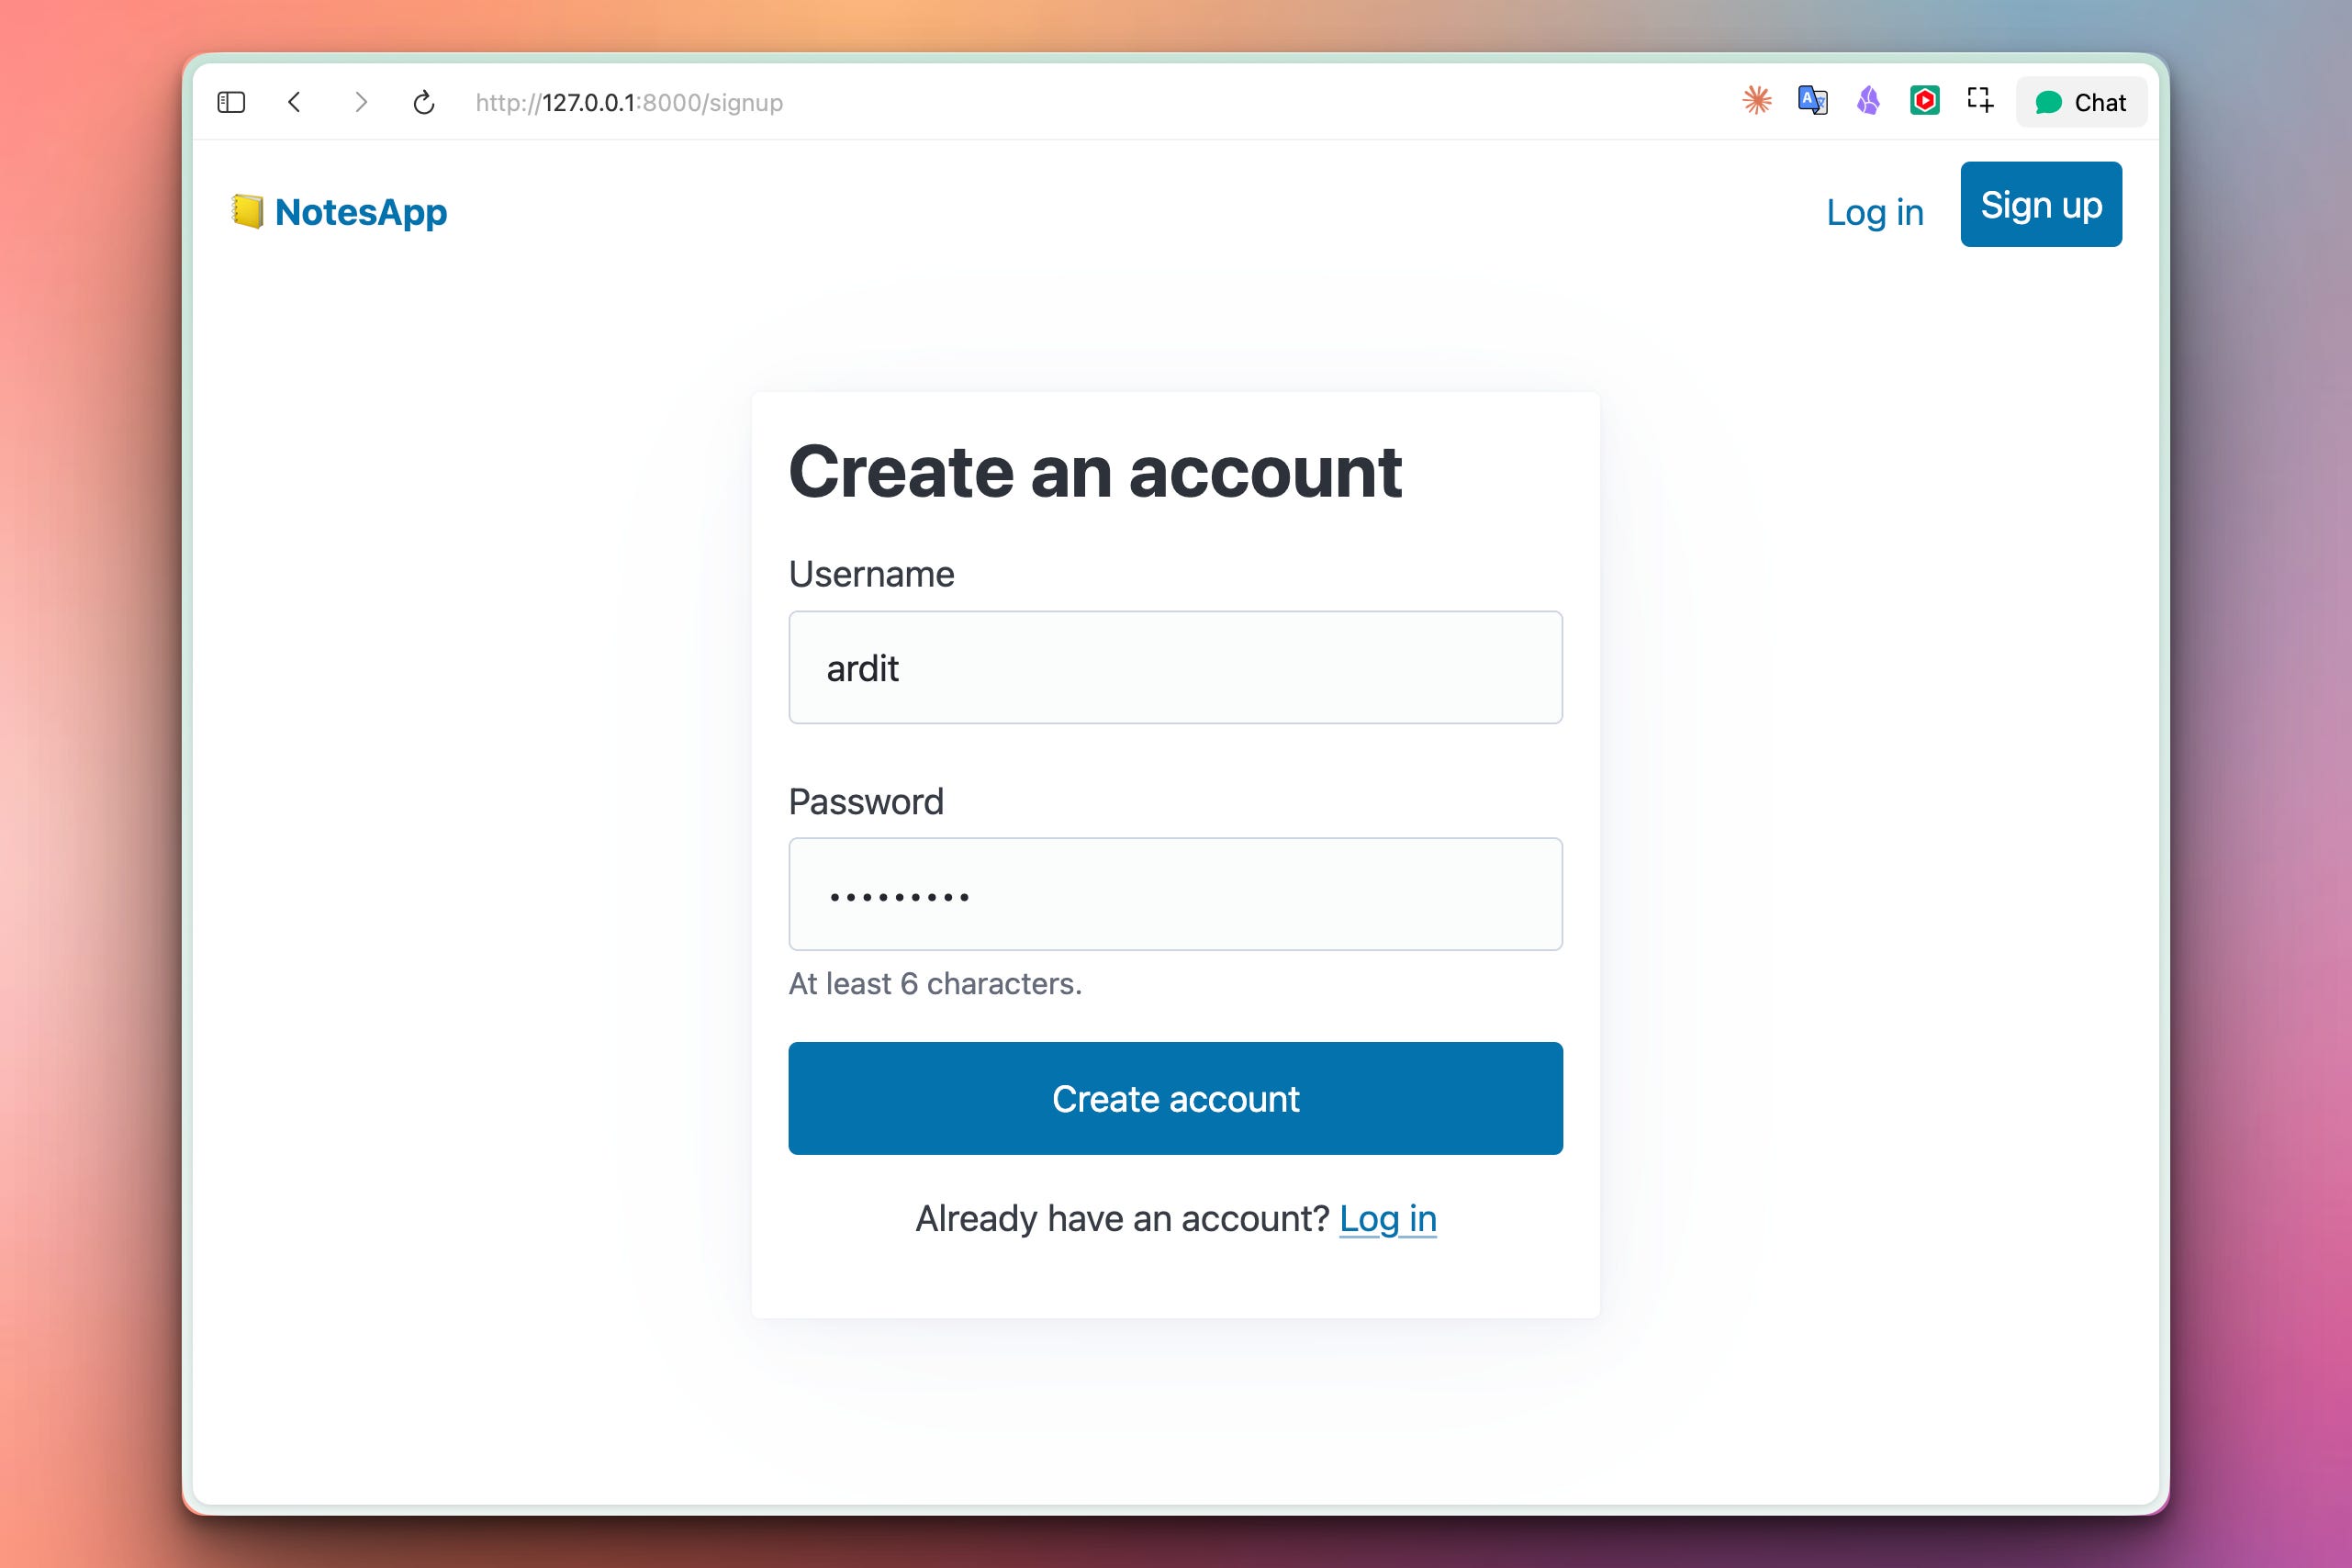
When the user visits the site, they see a clean signup / login page:
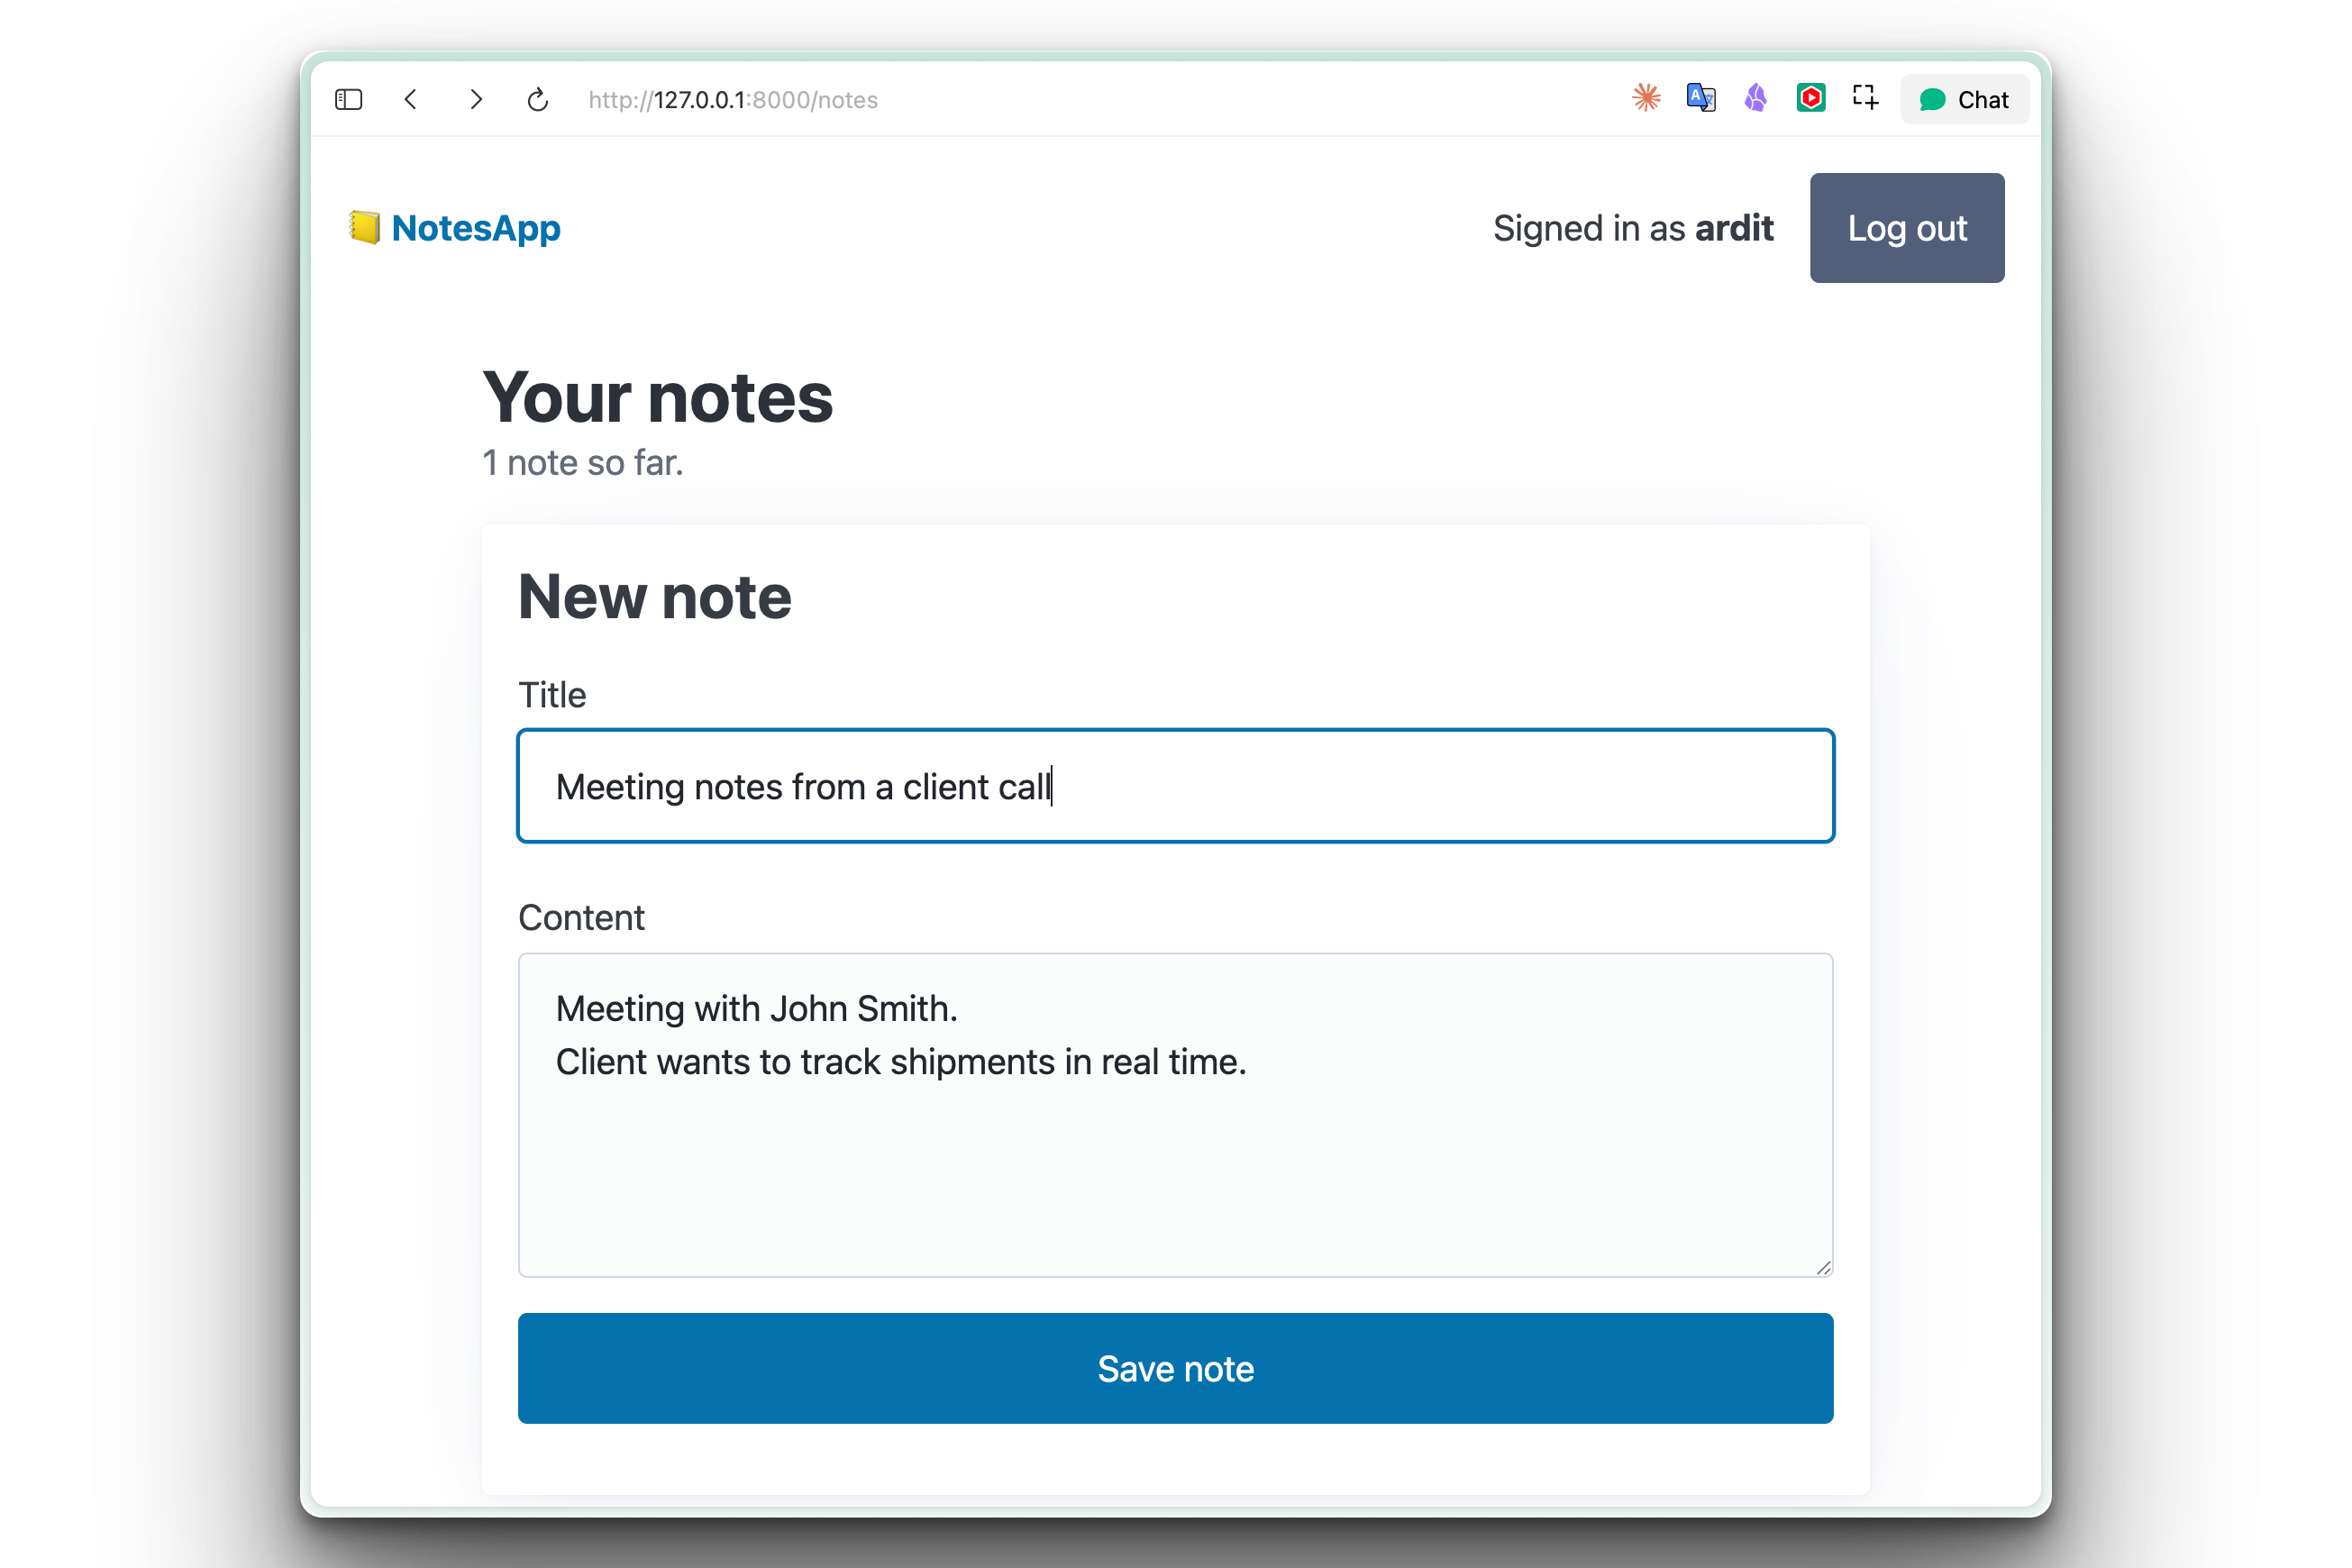
After creating an account, they land in their notes dashboard, with a form to add a note:
Once the user has some notes added they will see a list of all their existing ones:
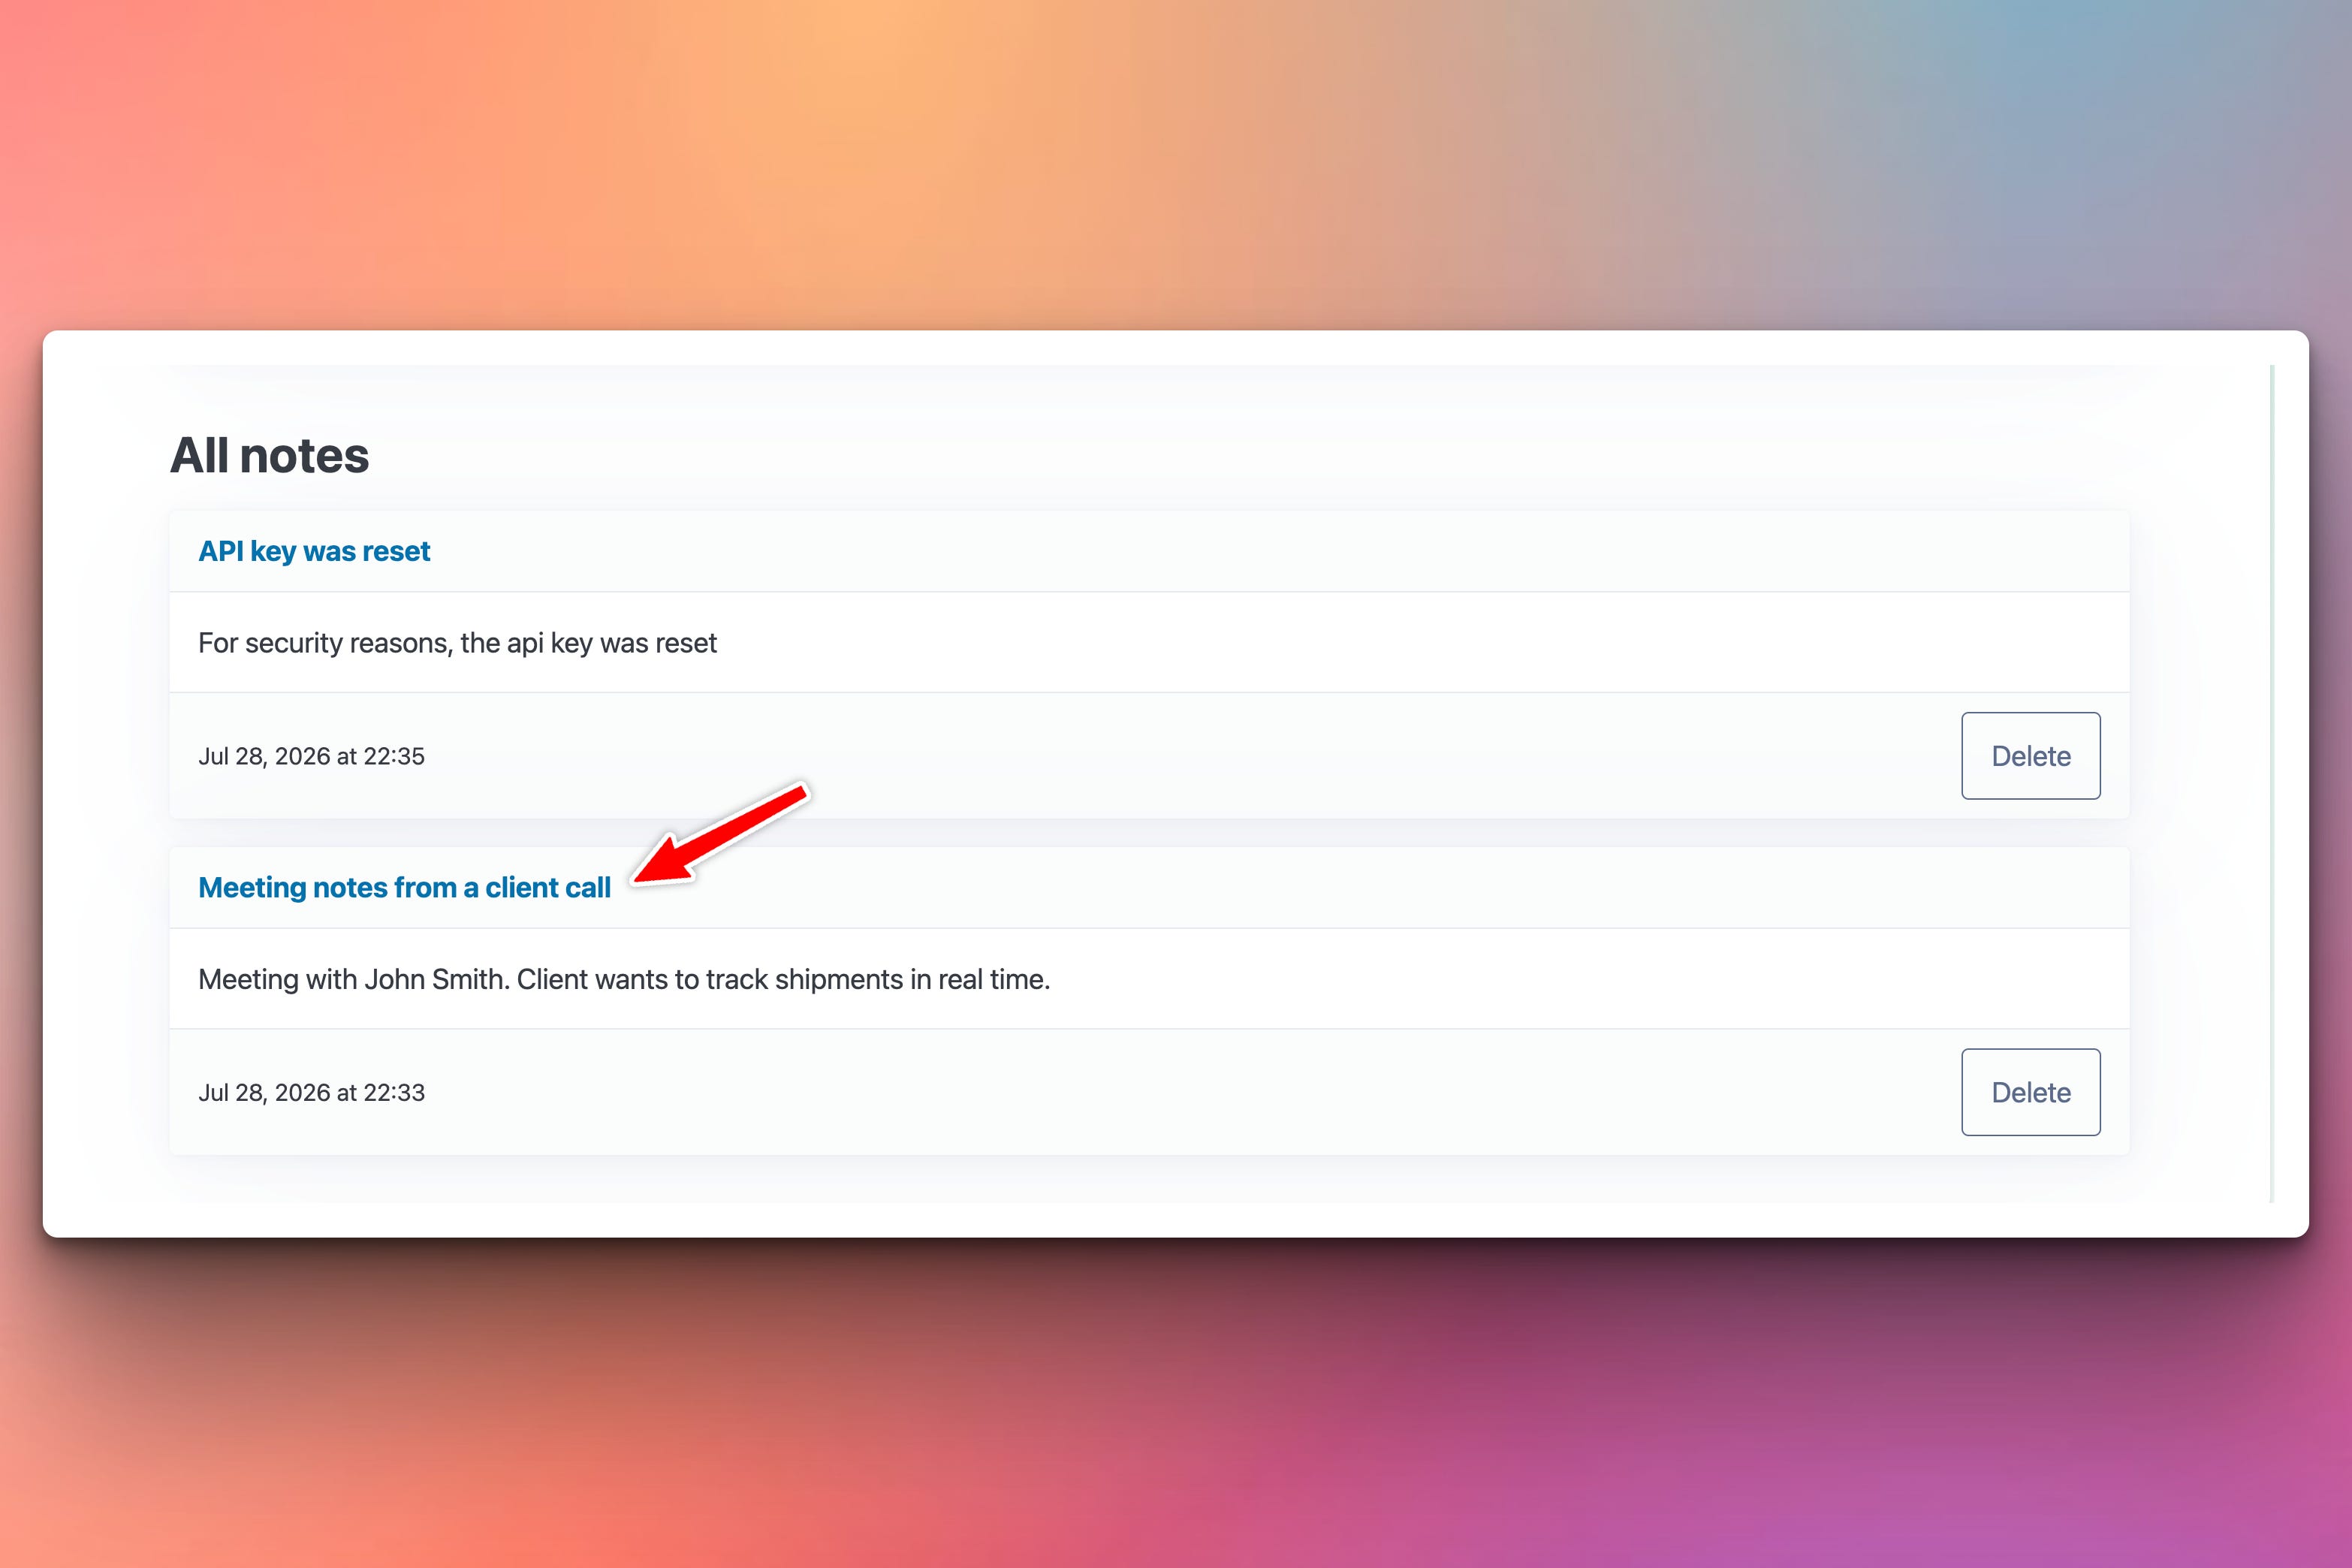
Each note has a delete button that removes it instantly, without a full page reload. Logging out clears the session, and trying to visit /notes while logged out bounces you back to the login page. Every user only sees their own notes — I can’t peek at yours, you can’t peek at mine.
Day 2 (Tomorrow): Wiki-links between notes + full-text search
Type [[groceries]] in one note and it becomes a live hyperlink.
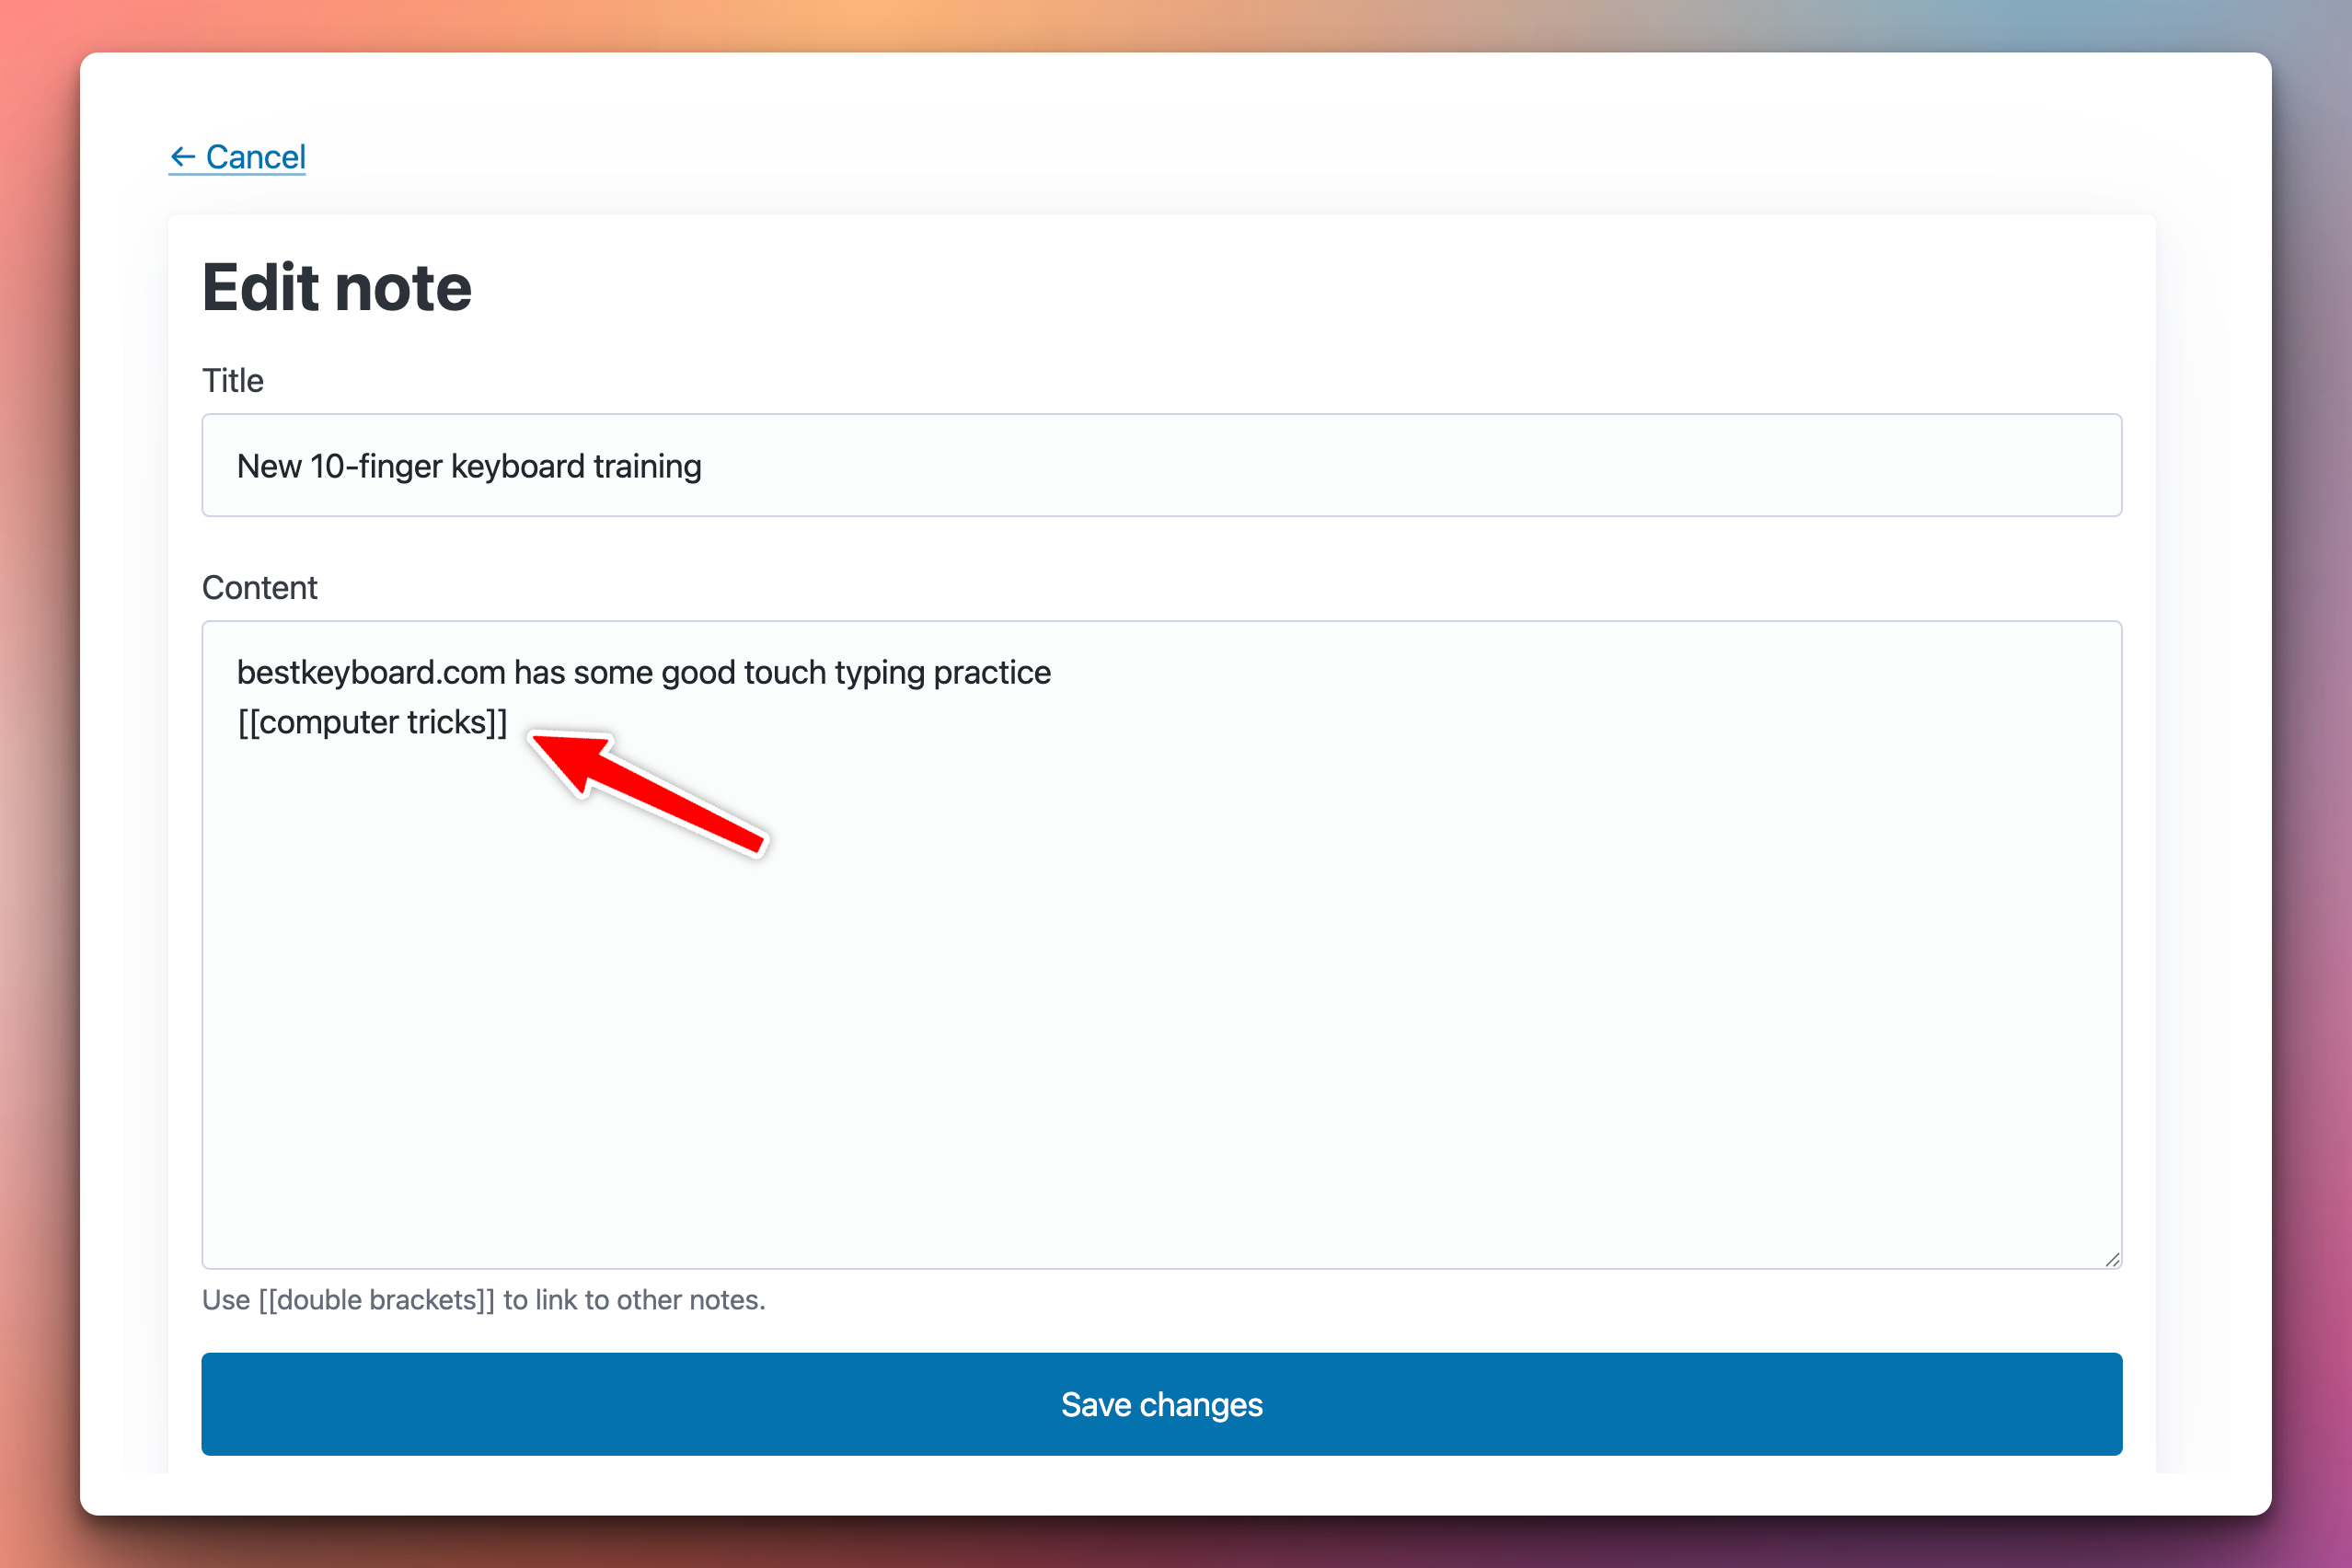
Click it, and you’re on the “groceries” note — with a backlinks section at the bottom showing every other note that mentions this one. Same pattern as Notion, Obsidian, and Roam Research:
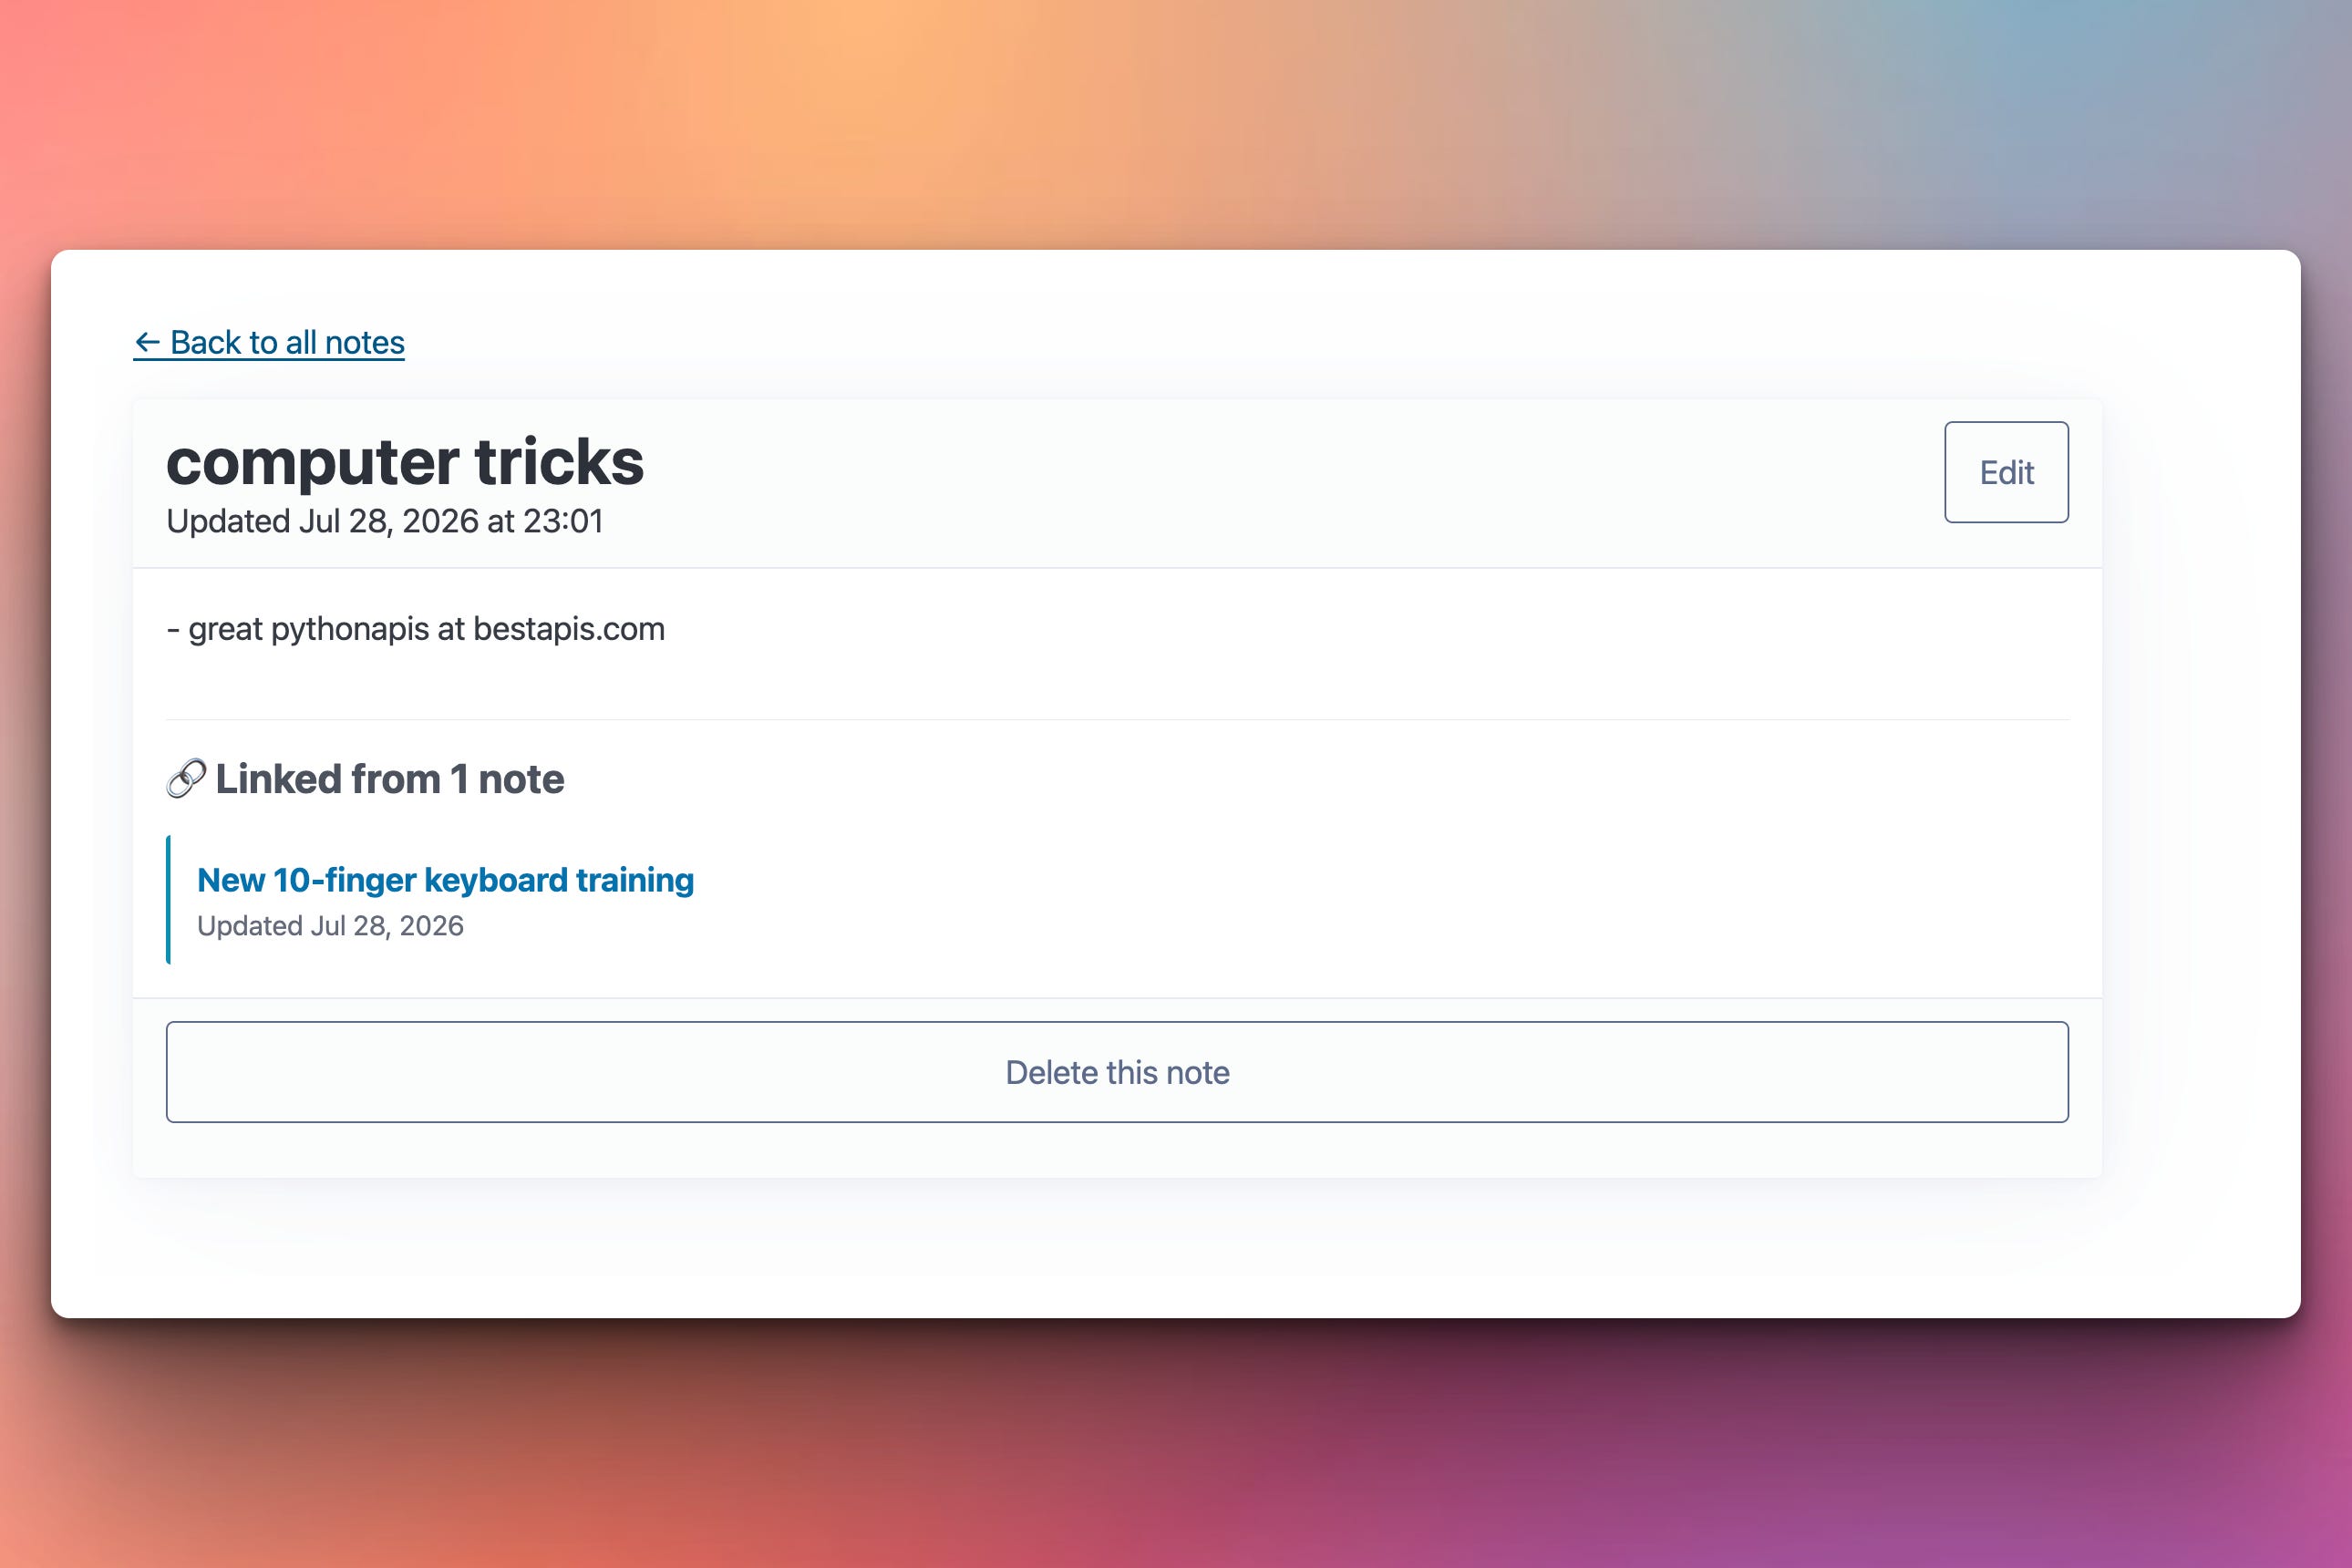
Plus a search bar in the nav that finds any word across all your notes as you type — powered by SQLite’s FTS5 full-text search extension, no external dependencies. Two novel features that turn a plain notes list into a real personal wiki.
Today’s Project
A working multi-user notes app with real authentication.
Users can sign up with a username and password. They can log in and log out. The password is stored hashed — even you as the app owner can’t read it. When they’re logged in, they see their own notes. When they’re not, they get bounced to the login page. And user A can never, ever see user B’s notes, no matter what URLs they try to hack.
Everything lives in one Python file. Routes, database models, HTML templates, security helpers — all in notes_app.py. Templates are strings inside the Python file, loaded through Jinja2’s DictLoader. CSS and interactivity come from CDN links — Pico.css handles styling, HTMX handles the delete-without-reload button. No .html files, no .css files, no .js files.
This is deliberate. Real web apps eventually get split into folders and modules, but that split hides the shape of the whole system from students learning it for the first time. Seeing every route, every model, every template in one file is worth more than “good practice” for now.
About the stack
We’re using a modern, deliberately-chosen stack. Not the biggest one, not the trendiest one — the one that gets us to a working web app fastest while teaching real concepts.
FastAPI is Python’s most popular modern web framework. Async by default, tiny footprint, gets out of your way. It surpassed Flask in weekly downloads in early 2024 and hasn’t looked back.
Jinja2 is the templating engine — it’s what Flask uses too. Templates look like HTML with {{ variables }} and {% if conditions %}. We put them inside our Python file as strings using Jinja2’s DictLoader, so the whole app is one file.
SQLAlchemy is Python’s most-used database toolkit. We use its ORM (Object-Relational Mapper) so we can write Python classes that map to database tables. Backend is SQLite — one file, no separate database server.
bcrypt hashes passwords. This is the standard for password storage — slow by design so brute-force attacks are impractical, and includes a random salt so identical passwords hash to different values.
itsdangerous signs session cookies. When a user logs in, we put their user ID in a cookie signed with a secret key. If anyone tampers with the cookie, the signature won’t verify and we reject it.
Pico.css is a classless CSS framework. That means you don’t have to write class="btn btn-primary" — you just write a plain <button> and it looks professional automatically. One CDN link in the HTML <head> and everything looks like a real product.
HTMX is the “modern web app without JavaScript” library. It adds attributes to HTML (hx-post="/notes/1/delete") that fetch responses and swap them into the page — like React, but written as HTML attributes. Zero JavaScript files in our project.
Project Task
Build a single-file FastAPI app that:
Has a signup page — validates the username (3-30 chars, not already taken) and password (min 6 chars)
Has a login page — verifies credentials against the hashed password
Sets a signed session cookie on successful signup/login
Has a
/logoutroute that clears the session cookieBounces logged-out users away from protected pages
Shows the logged-in user’s notes (only theirs — never anyone else’s)
Lets users create a new note (title + content)
Lets users view a single note
Lets users delete a note without a page reload, using HTMX
Stores everything in a local SQLite database via SQLAlchemy
Puts all HTML templates inside the Python file (Jinja2
DictLoader)Loads CSS and JavaScript from CDN — no local static files
Setup Instructions
Install dependencies:
pip install fastapi uvicorn jinja2 sqlalchemy bcrypt itsdangerous python-multipart
Seven packages. uvicorn is the web server that runs our FastAPI app. python-multipart is required by FastAPI to parse HTML form submissions (signup, login, new note). The rest we’ve discussed.
Run it:
uvicorn notes_app:app --reload
The --reload flag restarts the server automatically whenever you save the file. Open http://127.0.0.1:8000 in your browser. You’ll see the login page. Click “Sign up”, create an account, and you’re in.
A note about the database: the first time you run the app, it creates a file called notes.db in the current directory. That’s your SQLite database — every user, every note lives inside it. Delete the file to start fresh; back it up if you don’t want to lose your notes.
Understanding Password Hashing
The single most important idea in this project.
Never store passwords in plain text. Even if you promise yourself the database is safe, you’re one leaked backup, one misconfigured cloud bucket, one disgruntled employee away from disaster. Every major breach in the news is either “they stored plain-text passwords” or “they stored badly hashed passwords.”
The right approach: store a cryptographic hash of the password. A hash is a one-way function — you can compute it from the password, but you cannot recover the password from it. When a user logs in, you hash whatever they typed and compare it to the stored hash. Match = correct. No match = wrong.
But not just any hash. Fast hashes like SHA-256 are the wrong choice for passwords — an attacker who steals your database can compute billions of hashes per second and brute-force weak passwords in minutes. You need a slow hash, deliberately designed to be expensive to compute.
bcrypt is that hash. It’s slow by design — takes ~100ms per hash, which is invisible to a legitimate user but makes brute-forcing impractical. It also includes a random salt per password, so even two users with the same password get different hashes.
Our code:
import bcrypt

def hash_password(password: str) -> str:
    return bcrypt.hashpw(password.encode(), bcrypt.gensalt()).decode()

def verify_password(password: str, hashed: str) -> bool:
    return bcrypt.checkpw(password.encode(), hashed.encode())
Three details worth noting:
bcrypt.gensalt()generates a random salt every call. That’s why two identical passwords produce different hashes. Never reuse a salt..encode()on input,.decode()on output — bcrypt works in bytes, we work in strings.bcrypt.checkpwis constant-time. It compares in a way that doesn’t leak how much of the hash matched — otherwise an attacker could time your responses and gradually learn parts of the hash.
There’s one bcrypt quirk worth knowing: it silently ignores anything past the first 72 bytes. So bcrypt.hashpw("A" * 100) and bcrypt.hashpw("A" * 72) produce the same hash. Newer versions of the bcrypt library raise an error instead of silently truncating — we defensively truncate to 72 bytes ourselves:
BCRYPT_MAX_BYTES = 72

def _prepare_password(password: str) -> bytes:
    """Encode as UTF-8 and truncate to bcrypt's 72-byte limit safely."""
    encoded = password.encode("utf-8")
    return encoded[:BCRYPT_MAX_BYTES]
Truncating on the byte boundary (not the character boundary) handles emoji and non-Latin scripts safely — a multi-byte character never gets split in the middle.
Understanding Session Cookies
Once a user logs in, how do we remember them for the next request? HTTP is stateless — every request is independent, the server has no memory of who’s who. We need to give the browser something to send with every subsequent request.
The universal answer: cookies. When the user logs in, we set a cookie in their browser. Every future request from that browser includes the cookie, and we use it to identify the user.
But cookies live in the browser, which means anyone — including malicious extensions, XSS attacks, or the user themselves — can read and modify them. We can’t just put user_id=1 in a cookie and trust it. Anyone could edit that to user_id=2 and impersonate any user.
The fix is signing. We store the user ID in the cookie, but we sign it with a secret key that only the server knows. When the cookie comes back, we verify the signature. If it’s been tampered with, the signature won’t match and we reject it.
itsdangerous is the standard Python library for this. Two functions:
from itsdangerous import URLSafeSerializer, BadSignature

signer = URLSafeSerializer(SECRET_KEY)

def create_session_token(user_id: int) -> str:
    return signer.dumps({"user_id": user_id})

def read_session_token(token: str) -> Optional[int]:
    try:
        return signer.loads(token)["user_id"]
    except (BadSignature, KeyError, TypeError):
        return None
signer.dumps(data) returns a signed string — the data is not encrypted, just signed. Anyone can read what’s in it, but nobody can change it without knowing the secret key.
signer.loads(token) verifies the signature and returns the data if valid. If someone tampered with the cookie, it raises BadSignature and we return None — the user is treated as not logged in.
The security of the whole app depends on SECRET_KEY staying secret. Anyone who knows it can forge cookies for any user. In production, load it from an environment variable and never commit it to git.
Understanding Protected Routes
Some routes should only work if the user is logged in — /notes, /notes/new, etc. FastAPI’s dependency injection makes this clean:
def get_current_user(
    request: Request,
    db: Session = Depends(get_db),
) -> Optional[User]:
    token = request.cookies.get(SESSION_COOKIE)
    if not token:
        return None
    user_id = read_session_token(token)
    if not user_id:
        return None
    return db.query(User).filter(User.id == user_id).first()


class AuthRequired(Exception):
    pass


def require_user(user: Optional[User] = Depends(get_current_user)) -> User:
    if not user:
        raise AuthRequired()
    return user


@app.exception_handler(AuthRequired)
async def auth_required_handler(request: Request, exc: AuthRequired):
    return RedirectResponse("/login", status_code=302)
Then any route that requires login just adds user: User = Depends(require_user) to its signature:
@app.get("/notes")
async def notes_list(user: User = Depends(require_user), ...):
    # If we got here, user is guaranteed to be logged in.
    ...
The pattern: require_user runs before the route body. If there’s no session, it raises AuthRequired. The exception handler catches it and redirects to /login. Neat separation of concerns — the routes never have to check if user is None.
Understanding HTMX for the Delete Button
The delete button on the notes list uses HTMX to remove the note without reloading the whole page. In the template:
<button
  hx-post="/notes/{{ note.id }}/delete"
  hx-target="#note-{{ note.id }}"
  hx-swap="outerHTML swap:0.2s"
  hx-confirm="Delete this note? This cannot be undone.">
  Delete
</button>
Four attributes:
hx-post— send a POST request to this URL when clickedhx-target— find this element on the page (the note’s article tag)hx-swap— replace the target with the server’s response (with a 0.2s fade)hx-confirm— show a browser confirmation dialog first
Server side, we detect HTMX requests by checking a header they include:
@app.post("/notes/{note_id}/delete")
async def delete_note(request: Request, note_id: int, ...):
    # ... delete the note ...

    if request.headers.get("HX-Request") == "true":
        # HTMX call: return empty HTML - it replaces the note card with nothing.
        return HTMLResponse("")
    else:
        # Regular form submit (from the detail page): redirect back to the list.
        return RedirectResponse("/notes", status_code=303)
Same route, two behaviors, cleanly separated. This “progressive enhancement” pattern is HTMX’s superpower — the app works fine without JavaScript, and gets nicer with it.
Understanding the Post-Redirect-Get Pattern
Notice we return status_code=303 after form submissions. This is a hard-won piece of web app wisdom called PRG (Post-Redirect-Get):
User submits a POST form (signup, create note, login, delete)
Server processes it, then redirects to a GET route
Browser shows the GET page
If we returned HTML directly from the POST route, and the user hit refresh, the browser would ask “Resubmit form?” and re-run the POST. Duplicate signups, duplicate notes, duplicate everything. PRG makes refresh safe — the browser only ever refreshes the GET.
Use 303 See Other specifically for POST → GET redirects. It’s the HTTP status code designed for exactly this pattern. 302 Found also works but has slightly different semantics for some HTTP clients.
Coming Wednesday
Type [[groceries]] in a note, and it magically becomes a hyperlink to your “groceries” note. Click through — and at the bottom of that note, a Backlinks section shows every other note that references it. Same pattern as Notion, Obsidian, and Roam Research. It’s what turns a pile of notes into a personal knowledge base.
Plus a search bar in the nav that finds any word across all your notes as you type, using SQLite’s built-in FTS5 full-text search extension (yes, SQLite has one — most people don’t know).
Wednesday’s the paid post — upgrade here if you’re not already a subscriber.
Solution
Below you will find the source code of this project which will produce the same output as shown in the screenshots in this post.
Get the source code here: