

Build a "Whisper Flow" Voice Dictation Clone: Day 1: CLI recorder + local Whisper transcription
Press a key, speak, watch text appear in whatever app you’re focused on — Slack, VS Code, terminal, Google Docs, anywhere.

Whisper Flow costs $12/month. Superwhisper is $9. Both do the same thing: press a key, speak, watch text appear in whatever app you’re focused on — Slack, VS Code, terminal, Google Docs, anywhere. Millions of people pay for this.
This week we build it in Python. Running fully on your machine. No cloud. No API keys. No subscription — ever.
Projects in this week’s series:
👉 Day 1 (Today): CLI recorder + local Whisper transcription
When the user runs the program, they get asked to press Enter to record their voice:
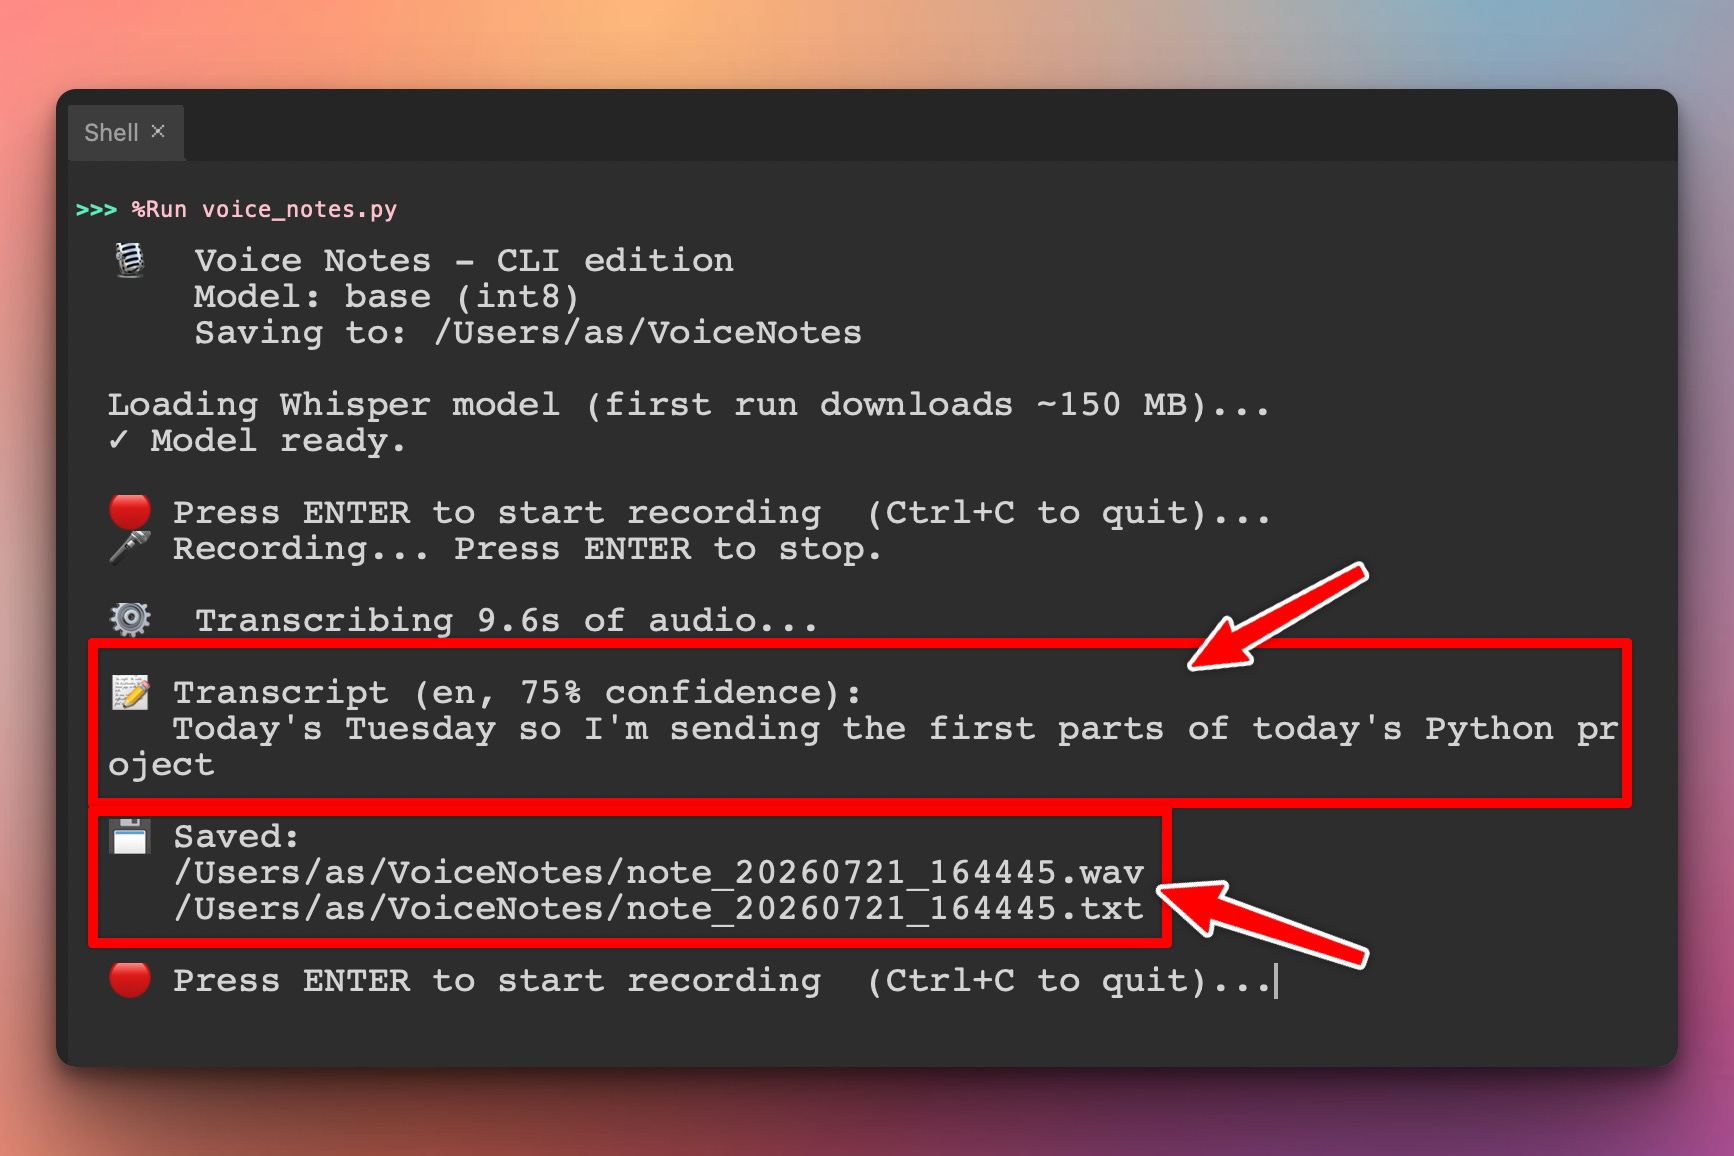
After pressing Enter again, the program will transcribe their voice, print out the transcribed text in the terminal and also indicate where the saved audio and transcribed file were saved.
Day 2 (Tomorrow): “Whisper Flow” mode — press Right Option anywhere, dictate anything
When the user presses and holds the Right Option / Right Alt key on their keyboard inside any app on their computer, the voice notes daemon starts recording on the background. On release of the button, the transcript is typed directly into whichever app has focus — here shown landing in a Slack message input as an example:
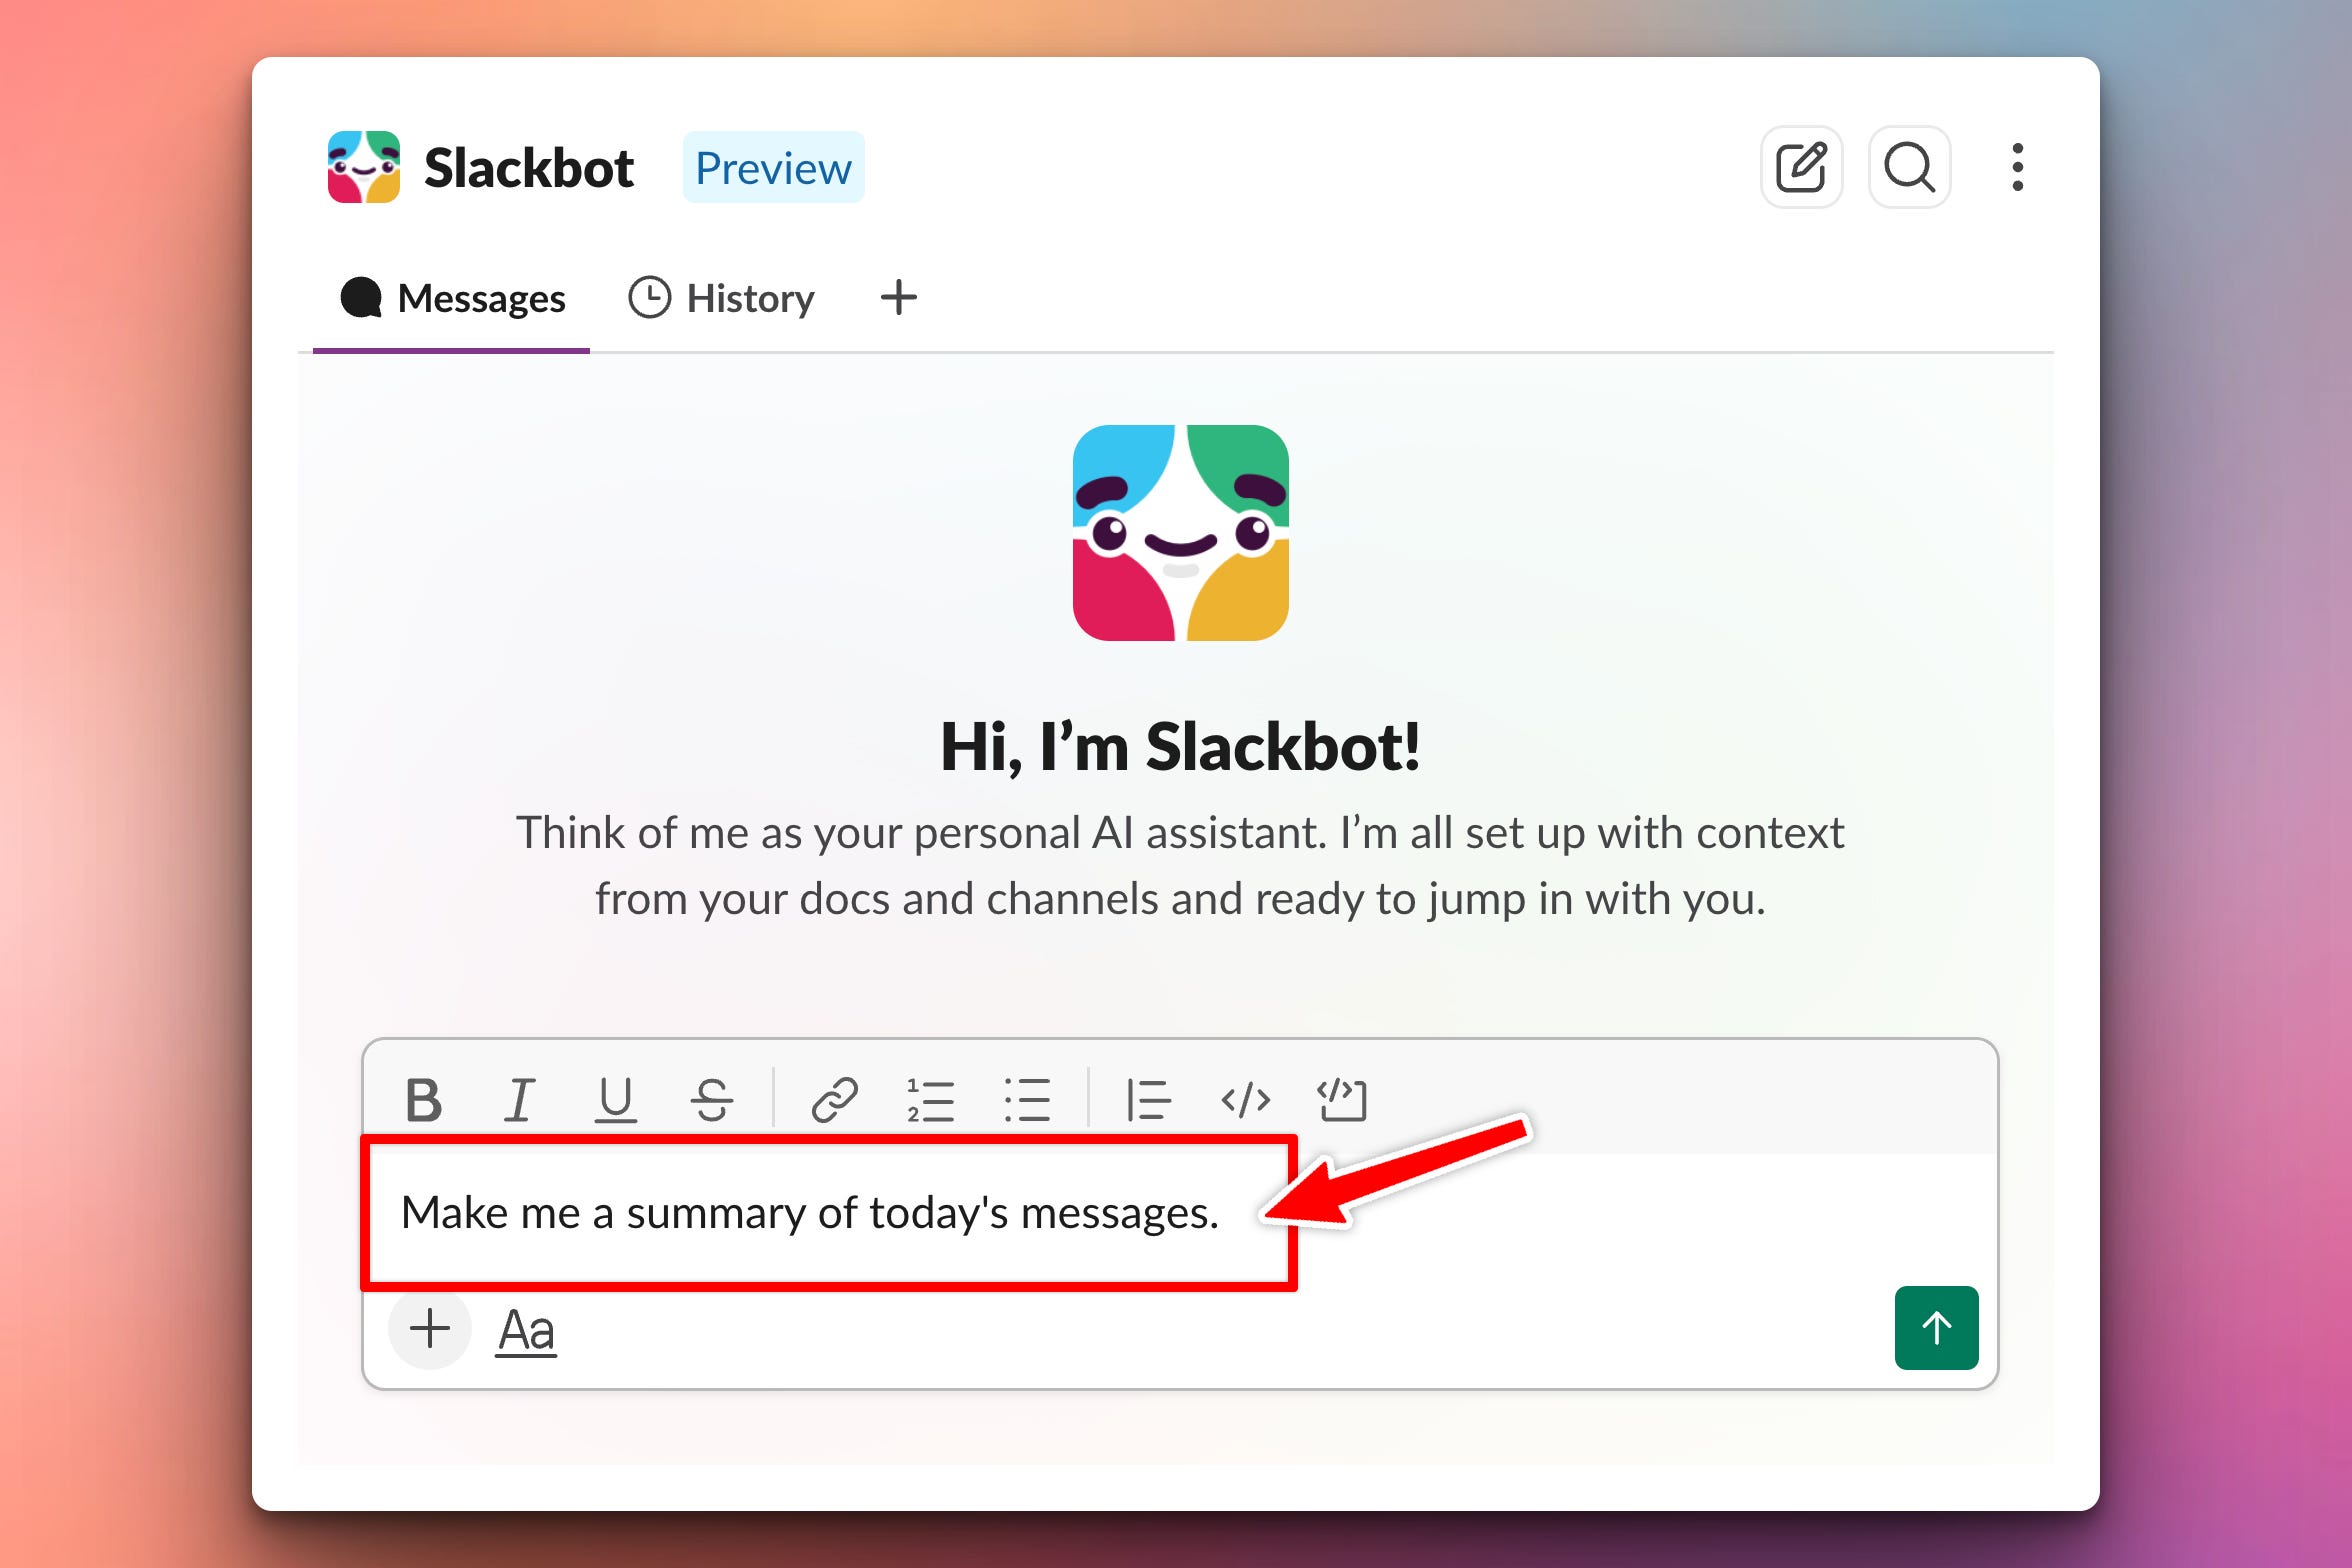
No terminal to switch to. No copy-paste. The exact same experience as Whisper Flow and Superwhisper, running fully offline on the user’s machine.
By Wednesday, you’ll have this:
You’re in Slack. Cursor in the message box. Press Right Key/ Right Option. Say “hey team, running 5 minutes late for standup.” Release. The words appear in the message box, typed by the app. No browser tab open, no cloud upload, no monthly fee.
Same in VS Code — you’re writing a code comment. Right Key / Right Option, dictate, release. Text lands in the file. Same in Google Docs, Notes, terminal, email — anywhere your cursor is. Nothing on your screen changes except the words appearing.
That’s Wednesday. Today we build the foundation that makes it possible: recording and transcribing audio locally, without touching the cloud.
Today’s Project
The CLI voice recorder.
Run the script. Press ENTER. Speak. Press ENTER again. Watch the transcript appear. The audio and text are auto-saved to ~/VoiceNotes/ for later reference.
Simple, useful, works entirely offline after the first run. And it teaches the full pipeline that Wednesday’s magic depends on:
Stream audio from the microphone into a numpy array
Save the array as a WAV file
Feed it to Whisper for transcription
Print + save the result
Wednesday just changes how those steps are triggered — from an ENTER prompt to a system-wide hotkey — and where the transcript goes: not to a file, but typed directly into whichever app has focus.
About Whisper (and Why “Faster”)
Whisper is an open-source speech recognition model from OpenAI, released in 2022. Trained on 680,000 hours of multilingual audio, it’s genuinely excellent — accurate, robust to accents, handles background noise, and works in 99 languages.
The original whisper library from OpenAI uses PyTorch and is somewhat slow on CPU. faster-whisper is a re-implementation using CTranslate2 — the same model, but 4x faster on CPU and using less memory. Same accuracy, better performance. It’s what nearly every real-world Whisper app uses today.
Model sizes:
tiny— 75 MB, fastest, less accuratebase— 150 MB, great balance for voice notes ← our defaultsmall— 500 MB, more accuratemedium— 1.5 GB, close to human paritylarge-v3— 3 GB, state of the art
For personal voice notes on a laptop, base is the sweet spot — fast enough to transcribe a 30-second note in ~1 second on a modern CPU, accurate enough for casual dictation.
Project Task
Build a CLI script that:
Loads a
faster-whispermodel on startupLoops: prompts the user, records audio, transcribes, saves, repeats
Uses
sounddeviceto stream from the microphone into anumpyarrayStreams audio through a thread-safe queue so recording keeps working while the main thread waits for input
Uses a
threading.Eventto signal “stop recording” from the main threadSaves each note as a timestamped pair of
.wav+.txtfiles in~/VoiceNotes/Handles Ctrl+C cleanly
Filters out accidental too-short recordings (under 0.3s)
This project gives you hands-on practice with sounddevice, thread-safe programming, threading.Event, queue.Queue, faster-whisper, and soundfile.
Setup Instructions
System dependencies (macOS + Linux):
macOS:
brew install portaudio
Linux:
sudo apt install portaudio19-dev
Windows: no system dependencies needed — sounddevice bundles PortAudio.
Python dependencies:
pip install sounddevice soundfile numpy faster-whisper
Run it:
python voice_notes.py
First run takes ~30 seconds to download the Whisper model. After that, model load is 2-3 seconds and everything works offline. You’ll see a startup banner, then a “Press ENTER to start recording” prompt. Speak, press ENTER again, and the transcript appears in the terminal — matching the screenshot at the top of this post.
A note on microphone permissions: on macOS, the first time you run this, macOS will pop up a dialog asking to grant microphone permission to whichever terminal you’re using. Grant it, then restart the script. This is a one-time setup.
Understanding sounddevice and Streaming Audio
Recording audio in real time is fundamentally different from reading a file. A file has a fixed size; a live audio stream has no end until you tell it to stop. So instead of “read all the audio,” we say “start a stream, and call this function every time a chunk of audio is available.”
sounddevice gives us exactly that — the InputStream with a callback:
import sounddevice as sd

def my_callback(indata, frames_count, time_info, status):
    # Called every ~10ms with a fresh chunk of audio.
    # indata is a numpy array of shape (frames, channels)
    print(f"Got {frames_count} frames")

with sd.InputStream(samplerate=16000, channels=1,
                    dtype="float32", callback=my_callback):
    time.sleep(3.0)  # let it run for 3 seconds
Three things worth internalizing:
The callback runs on a separate thread, managed by PortAudio internally. It fires at whatever rate the audio hardware ticks (usually every 10-30ms).
indatais a view into a stream-owned buffer that will be overwritten as soon as the callback returns. If you want to keep the data, you MUST.copy()it. Failing to do this is the #1 rookie sounddevice bug.The
withblock is what starts and stops the stream. As soon as you enter it, audio starts flowing; as soon as you exit, it stops. Clean lifetime management.
Understanding queue.Queue for Cross-Thread Data
Now we have a problem: the audio callback is running on the audio thread. We want to process the audio on the main thread. How do we get data safely from one thread to the other?
queue.Queue is the answer. It’s a thread-safe FIFO buffer. One thread puts items in, another thread takes them out. All the locking is handled internally.
import queue

audio_queue = queue.Queue()

def audio_callback(indata, frames_count, time_info, status):
    audio_queue.put(indata.copy())    # audio thread: producer

# Main thread: consumer
while not stop_event.is_set():
    try:
        block = audio_queue.get(timeout=0.1)
        frames.append(block)
    except queue.Empty:
        continue
Two habits worth forming:
.copy()before putting into the queue. Otherwise the audio thread will overwrite what you queued..get(timeout=0.1)instead of.get()— the timeout lets the main thread wake up periodically and checkstop_event, instead of blocking forever on an empty queue. 100ms is a good compromise between responsiveness and CPU wake-ups.
The producer-consumer pattern with a queue is foundational for any streaming-data work. Once you’ve done it with audio, you know how to do it with sensor data, live network feeds, real-time file monitoring, and everything in between.
Understanding threading.Event for Stop Signals
We need a clean way for the main thread to tell the recording thread “stop now, wrap it up.” A boolean flag would work but has subtle threading issues. threading.Event is the idiomatic answer:
import threading

stop_event = threading.Event()   # starts unset

# In recording thread:
while not stop_event.is_set():
    # ... record ...

# In main thread:
stop_event.set()                 # signal stop
recording_thread.join()          # wait for it to actually stop
An Event is essentially a thread-safe boolean with three operations:
.set()— turn it on.is_set()— check its state.wait(timeout)— block until it turns on
This is the pattern for graceful shutdown in any threaded Python program: web servers, background workers, real-time processors. Learn it once, use it forever.
Understanding the Main Loop Choreography
Now let’s zoom out and see how ENTER, the event, and the thread all coordinate:
while True:
    input("Press ENTER to start recording...")   # blocks main thread

    stop_event = threading.Event()               # fresh event per note
    result = {}                                  # place for thread's output

    def worker():
        result["audio"] = record_until_stopped(stop_event)

    recording_thread = threading.Thread(target=worker, daemon=True)
    recording_thread.start()                     # off it goes

    print("Recording... Press ENTER to stop.")
    input()                                       # blocks main thread again
    stop_event.set()                              # signal the worker
    recording_thread.join()                       # wait for actual shutdown

    audio = result["audio"]                       # retrieve results
    # ... transcribe, save, loop ...
Key ideas:
The
result = {}dict pattern — since Python functions can’t easily return values from athreading.Thread(target=...), we use a dict as a shared “result box.” The thread writes into it; the main thread reads after.join().daemon=True— daemon threads die automatically when the main program exits. If the user hits Ctrl+C during recording, the recording thread won’t linger.The two
input()calls block the main thread — but only the main thread. The recording thread keeps happily filling the queue during both waits. This is why threading is essential here: without it, ENTER would never work while recording was happening.
Read this section twice if it’s new. Understanding this dance is the difference between “I can use threading” and “I can design threaded programs.”
Understanding faster-whisper
faster-whisper is dead simple to use:
from faster_whisper import WhisperModel

# Load once. This takes 2-3 seconds and downloads the model on first run.
model = WhisperModel("base", device="cpu", compute_type="int8")

# Transcribe. audio is a 1-D float32 numpy array at 16 kHz.
segments, info = model.transcribe(audio, beam_size=5, vad_filter=True)

# segments is a generator. Consume it to get the text.
text = " ".join(seg.text.strip() for seg in segments)
Three parameters worth knowing:
compute_type="int8"— the fastest CPU inference mode. Slight accuracy loss vs. float32, but ~4x faster and half the RAM. Perfect for laptops.beam_size=5— how many candidate sequences the model considers. Bigger = more accurate, slower. 5 is a great default; you can drop to 1 for speed or bump to 10 for the last few percent of accuracy.vad_filter=True— Voice Activity Detection. Whisper’s biggest annoyance is that it “hallucinates” transcriptions in silent audio (”thank you for watching” is a common one, from YouTube training data). VAD drops silent segments before transcription, dramatically reducing this problem.
The info object tells you what language Whisper detected and how confident it was — a handy little UX detail.
Understanding Saving with soundfile
soundfile is our WAV writer. One function does everything:
import soundfile as sf

sf.write(wav_path, audio, SAMPLE_RATE, subtype="PCM_16")
subtype="PCM_16"— 16-bit signed integer WAV format. Widely compatible, ~half the size of float32 WAV.soundfilehandles the float→int conversion automatically.The path can be a string or
pathlib.Path— both work.
If you ever need to read an audio file, it’s the mirror:
audio, sample_rate = sf.read(wav_path)
Both soundfile and sounddevice use numpy arrays as their common language — no format juggling, no encoding conversions.
Understanding the Auto-Save Pattern
We save every note automatically with a timestamped filename:
from datetime import datetime

stamp = datetime.now().strftime("%Y%m%d_%H%M%S")
wav_path = NOTES_DIR / f"note_{stamp}.wav"
txt_path = NOTES_DIR / f"note_{stamp}.txt"
Two design choices worth explaining:
Timestamp format
YYYYMMDD_HHMMSS— sorts lexically the same as chronologically.note_20260721_143000.wavsorts beforenote_20260721_143500.wav. Bothlsand file explorers show them in order automatically.Paired WAV + TXT with the same stem — makes it trivial to find “the audio for this transcript” or “the transcript for this audio.”
Never save with just datetime.now().isoformat() — that produces strings like 2026-07-21T14:30:00.123456+00:00, which contain colons and special characters that break on Windows filenames. strftime with only safe characters is the right call.
Practical Use Cases
Personal dictation: Record thoughts on a walk, transcribe them later, paste into your journal.
Meeting notes: Record short “action item” reminders after a call. The transcripts feed right into your task list.
Language learning: Whisper is multilingual — record yourself speaking Spanish, get back the transcript to verify pronunciation.
Accessibility: Transcription for anyone who prefers speaking over typing. Fully local means it works on airplanes.
Foundation for Wednesday: The record + transcribe + save pipeline stays. Wednesday just changes what triggers it (a system-wide hotkey) and where the transcript goes (into whatever app you’re using).
Coming Wednesday
Wednesday: no ENTER prompt. No terminal you have to switch to. No copy-paste.
The app runs invisibly in the background. You press Right Key / Right Option anywhere on your system — inside Slack, inside VS Code, inside a Google Doc, inside your email. You speak. You release Right Key / Right Option. The transcription lands directly in whichever app you’re focused on, character by character, like you typed it yourself.
It’s the same experience as Whisper Flow and Superwhisper. It costs nothing. It runs on your laptop offline. And you’ll own every line of the code.
Wednesday’s the paid post — upgrade here if you’re not already a subscriber.
Solution
Below you will find both a downloadable skeleton.py file to help you code the project with comment guides and the downloadable solution.py file containing the correct solution.
Get the code skeleton here:
Get the code solution here: