

Build an AI Travel Itinerary Planner: Day 3 - Travel Planner Web App
Today we wrap both in a real web app. No more editing variables in a script — users open a page, type a destination, pick the trip length, list their interests, and click a button.

Projects in this week’s series:
This week, we build an AI Travel Itinerary Planner that turns a destination into a beautiful, interactive map you can explore and share — perfect for trip planning!
Day 1: Interactive Trip Map with Folium
Day 2: AI Itinerary Generator with Gemini
Day 3: Travel Planner Web App (Today)
Today’s Project
Welcome to the finale! We have a map engine and an AI itinerary generator. Today we wrap both in a real web app. No more editing variables in a script — users open a page, type a destination, pick the trip length, list their interests, and click a button. The AI plans the trip and the interactive map renders right on the page, ready to download and share.
We’re using Streamlit, so the whole app is pure Python — no HTML, CSS, or JavaScript.
Project Task
Build a travel planner web app that:
Provides a clean web interface (destination, days, interests inputs)
Generates the itinerary with Gemini when the user clicks a button
Renders the interactive Folium map directly in the page
Shows the itinerary as a readable day-by-day breakdown
Lets users download the map as a standalone HTML file
Uses session state so the map persists across interactions
Shows loading spinners and friendly error messages
Reuses the Day 2 AI engine and the Day 1 map engine unchanged
This project gives you hands-on practice with Streamlit, web app layout, session state, embedding interactive components, file downloads, and turning a script into a shareable product — essential skills for building and publishing data apps.
Expected Output
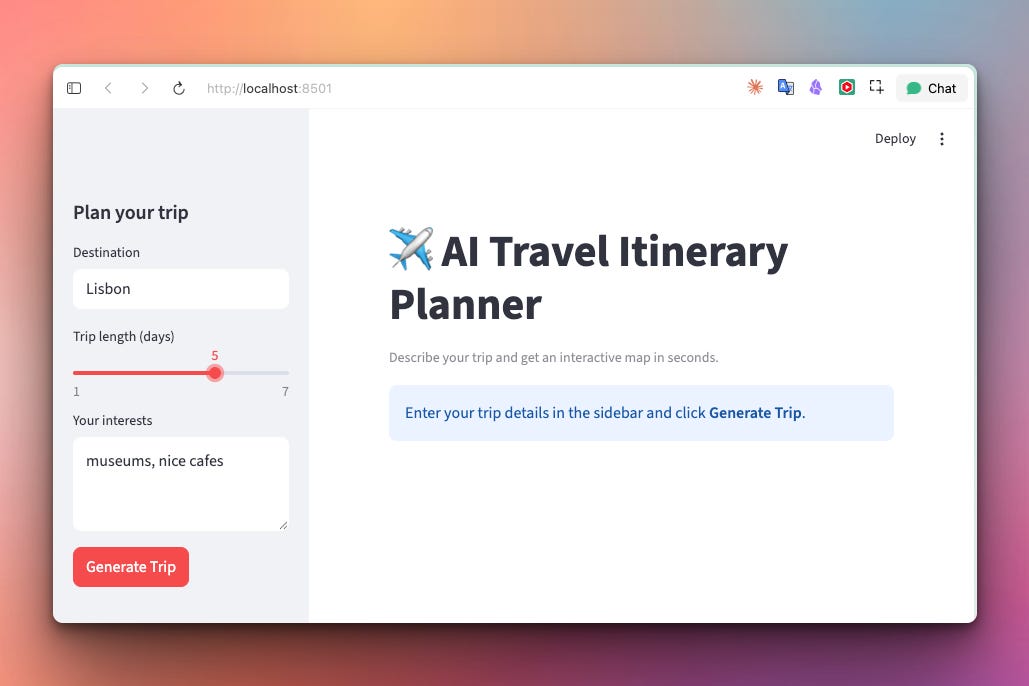
Running the web app:
streamlit run travel_app.pyA browser opens automatically at http://localhost:8501 and the user can set the preferences for their trip:
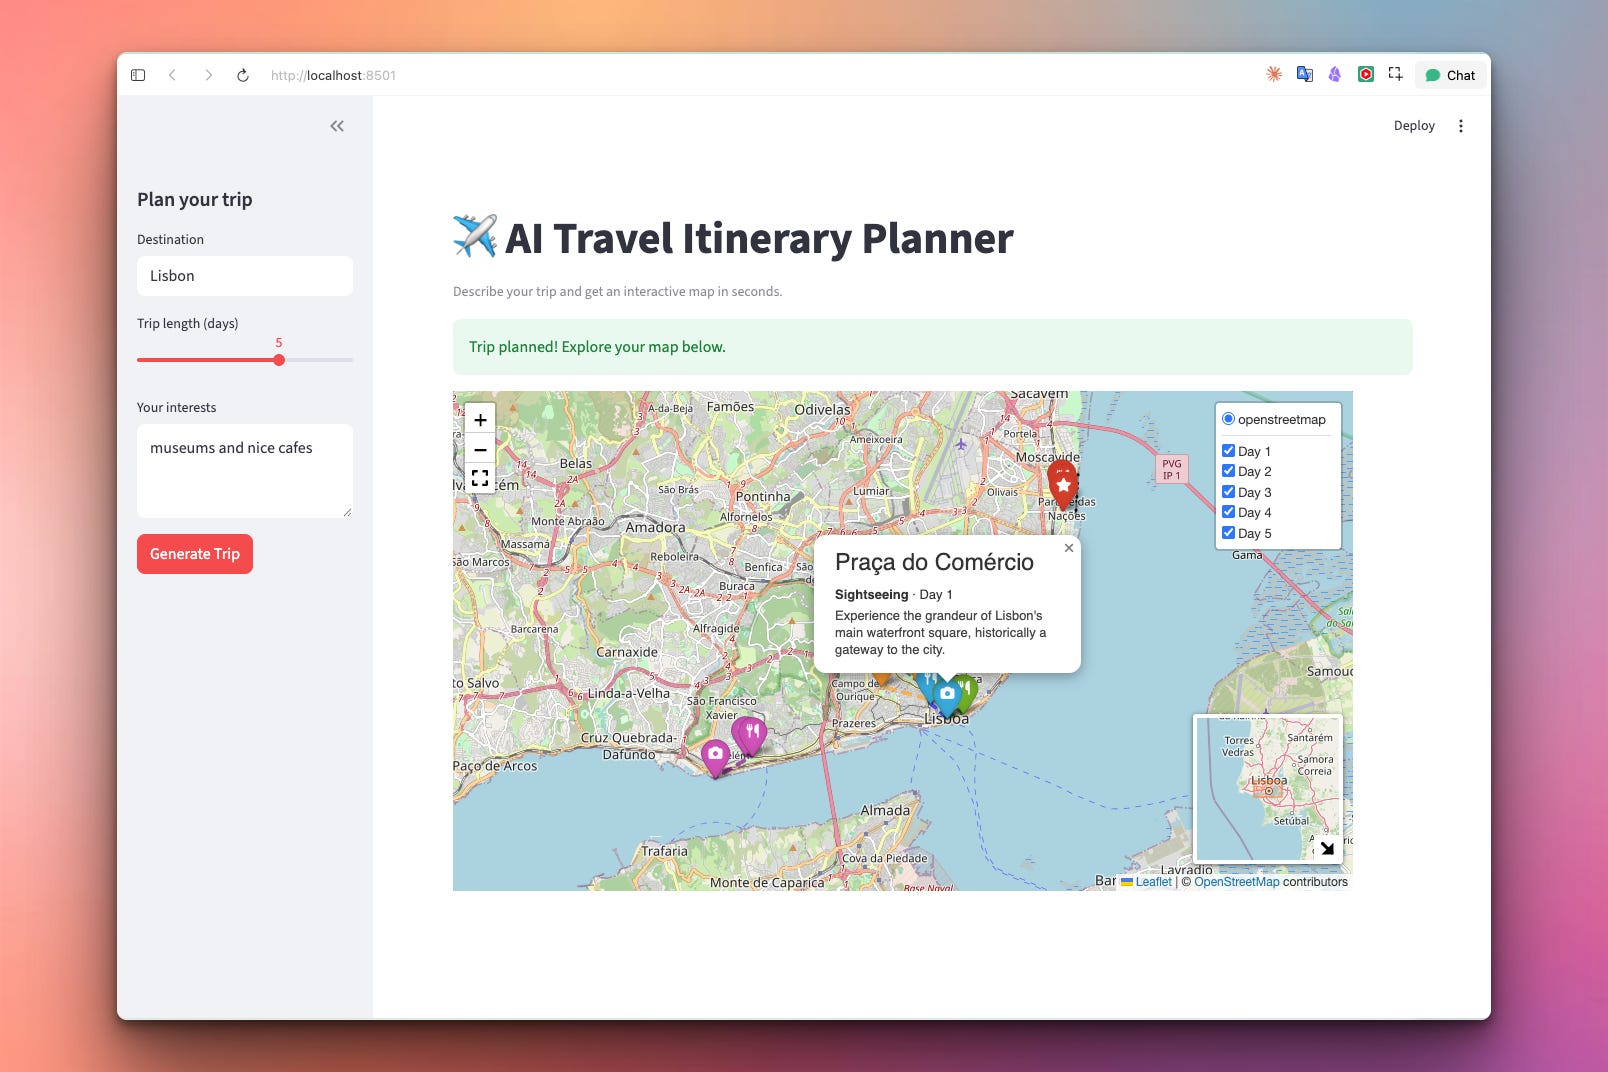
After they click “Generate Trip” they see their itinerary in an interactive map:
Setup Instructions
Install Required Packages:
pip install streamlit streamlit-folium langchain langchain-google-genai folium
Add Your Google API Key:
Open travel_app.py and paste your key into the GOOGLE_API_KEY line near the top:
GOOGLE_API_KEY = "your-key-here"
(Get a free key at Google AI Studio.)
Run the app:
streamlit run travel_app.py
Your browser opens automatically. To stop the app, press Ctrl+C in the terminal.
Security note: For simplicity, this project keeps the API key as a plain string in the script. That’s fine for learning and personal use, but if you share your code or push it to GitHub, your key would be exposed. The safer approach is to store the key in a
.envfile and load it with thepython-dotenvpackage, or — for a deployed Streamlit app — use Streamlit’s built-in secrets management. Both keep secrets out of your source code.
Understanding Streamlit
Streamlit turns a Python script into a web app. There’s no routing, no HTML templates, no frontend code — you call functions, and Streamlit renders widgets.
import streamlit as st

st.title("My App")                      # a heading
name = st.text_input("Your name")        # an input box
if st.button("Greet"):                   # a button
    st.write(f"Hello, {name}!")          # output text
The mental model that matters: Streamlit re-runs your entire script top to bottom every time the user interacts with anything. Click a button, move a slider, type in a box — the whole script runs again. That’s simple and predictable, but it has one big consequence we have to design around (see session state below).
Understanding the App Layout
We split the screen into a sidebar for inputs and a main area for the map. st.sidebar puts widgets on the left:
import streamlit as st

st.set_page_config(page_title="AI Travel Planner", page_icon="✈️", layout="wide")

st.title("✈️ AI Travel Itinerary Planner")
st.caption("Describe your trip and get an interactive map in seconds.")

# --- Sidebar inputs ---
with st.sidebar:
    st.header("Plan your trip")
    destination = st.text_input("Destination", value="Rome")
    days = st.slider("Trip length (days)", min_value=1, max_value=7, value=3)
    interests = st.text_area("Your interests", value="food, history, art")
    generate = st.button("Generate Trip", type="primary")
layout="wide" gives the map room to breathe. st.slider is a natural fit for trip length — bounded, no invalid input possible. type="primary" makes the button stand out.
Understanding the Download Button
A shareable map should be downloadable. Streamlit’s st.download_button lets users save a file — and Folium can render a map to an HTML string in memory with get_root().render():
def map_to_html(trip_map):
    """Render the Folium map to a standalone HTML string."""
    return trip_map.get_root().render()

st.download_button(
    label="📥 Download Map as HTML",
    data=map_to_html(st.session_state.trip_map),
    file_name="my_trip.html",
    mime="text/html",
)
No temp files, no disk writes — the HTML is generated in memory and streamed straight to the user’s browser as a download. The file they get is the same standalone map from Days 1 and 2.
Understanding the Itinerary Display
Below the map, we show the trip as readable text. We group stops by day and use an emoji per category for a friendly touch:
CATEGORY_EMOJI = {
    "food": "🍴",
    "sightseeing": "📷",
    "hotel": "🛏️",
    "activity": "⭐",
    "transport": "✈️",
}

def show_itinerary(itinerary):
    st.subheader("Your Itinerary")
    stops = itinerary_to_stops(itinerary)

    for day in get_days(stops):
        st.markdown(f"**Day {day}**")
        for stop in get_stops_for_day(stops, day):
            emoji = CATEGORY_EMOJI.get(stop["category"], "📍")
            st.markdown(f"{emoji} **{stop['name']}** — {stop['description']}")
st.markdown renders bold text and emoji cleanly. The same get_days and get_stops_for_day helpers from Day 1 organize the output — more reuse of code we already trust.
Understanding the Full Picture
Look at how the three days fit together:
Day 1 built
build_trip_map()— takes stop dicts, returns an interactive map.Day 2 built
generate_itinerary()anditinerary_to_stops()— turns plain English into stop dicts via Gemini.Day 3 added only the web layer — Streamlit widgets, session state,
st_folium, a download button.
The map engine and the AI engine were never rewritten. Day 3’s job was purely to wrap them in an interface. That’s the mark of well-structured code: each layer has one job, and new layers build on top without disturbing what’s below.
What You’ve Accomplished This Week
🎉 Congratulations! You’ve built a complete AI-powered travel planning web app!
Day 1: Interactive map engine with Folium
Day 2: AI itinerary generation with Gemini + LangChain v1
Day 3: A real web app that ties it together
You now have:
✅ Interactive maps — color-coded, route-drawn, popup-rich ✅ AI itinerary generation — plain English in, structured trip out ✅ A real web interface — no script editing required ✅ Downloadable, shareable maps — standalone HTML ✅ Clean architecture — layered engine, AI, and UI
Real-world applications:
Personal trip planning — your own travel tool
Travel blogs — let readers generate and explore routes
Travel agencies — rapid first-draft itineraries for clients
Portfolio project — AI + maps + web app in one
A product starting point — add accounts, saved trips, bookings
Next steps:
Deploy it free on Streamlit Community Cloud so anyone can use it
Let users edit or reorder stops before downloading
Add hotel and restaurant suggestions with booking links
Support multi-city trips
Add trip cost estimates
You’ve built the foundation for a real travel-tech product! 🚀
View Code Evolution
Compare today’s web app with the Day 2 generator and the Day 1 map engine — and see how a clean, layered design lets you add a whole new interface without touching the code beneath it.
Keep reading with a 7-day free trial
Subscribe to Daily Python Projects to keep reading this post and get 7 days of free access to the full post archives.