

Email Productivity Suite: Day 2 - Mail Merge from CSV
Yesterday we sent one email. Today we send a hundred — each personalized to its recipient.

Projects in this week’s series:
This week, we build an Email Productivity Suite — a complete set of tools for one of the most universal time-sinks in modern life: writing and sending email.
Day 1: Email Sender Desktop App
Day 2: Mail Merge from CSV (Today)
Day 3: AI Email Assistant (Gemini)
Today’s Project
Yesterday we sent one email. Today we send a hundred — each personalized to its recipient.
Mail merge is the technique behind every personalized email you’ve ever received: the company has a list of names and a template (”Hi {first_name}, your order #{order_id} has shipped”), and a script fills the blanks for each row and sends. Today you build that script. Load a CSV of recipients, write your email once with {placeholder} variables, hit Send All, and watch personalized emails go out one by one.
Same send_email() function from Day 1 — wrapped in a loop with smarter UI around it.
Project Task
Build a CSV-driven mail merge tool with Tkinter that:
Loads a CSV of recipients with at minimum an
emailcolumnAuto-detects the other columns as available template variables
Lets you write subject and body with
{column_name}placeholdersShows a live preview of how the email will look for the first recipient
Sends one personalized email per row when Send All is clicked
Adds a polite delay between sends to avoid Gmail rate-limiting
Reports progress per recipient (sent / failed / row count)
Continues to the next row if one fails — never crashes mid-batch
Logs every send with status to a scrollable log box
This project gives you hands-on practice with csv.DictReader, Python’s str.format() for templating, batch processing with error recovery, real-time progress reporting in Tkinter, and turning a single-use function into a reusable engine.
Expected Output
Running the tool:
python mail_merge.py
Here is what you will see when you run the program.
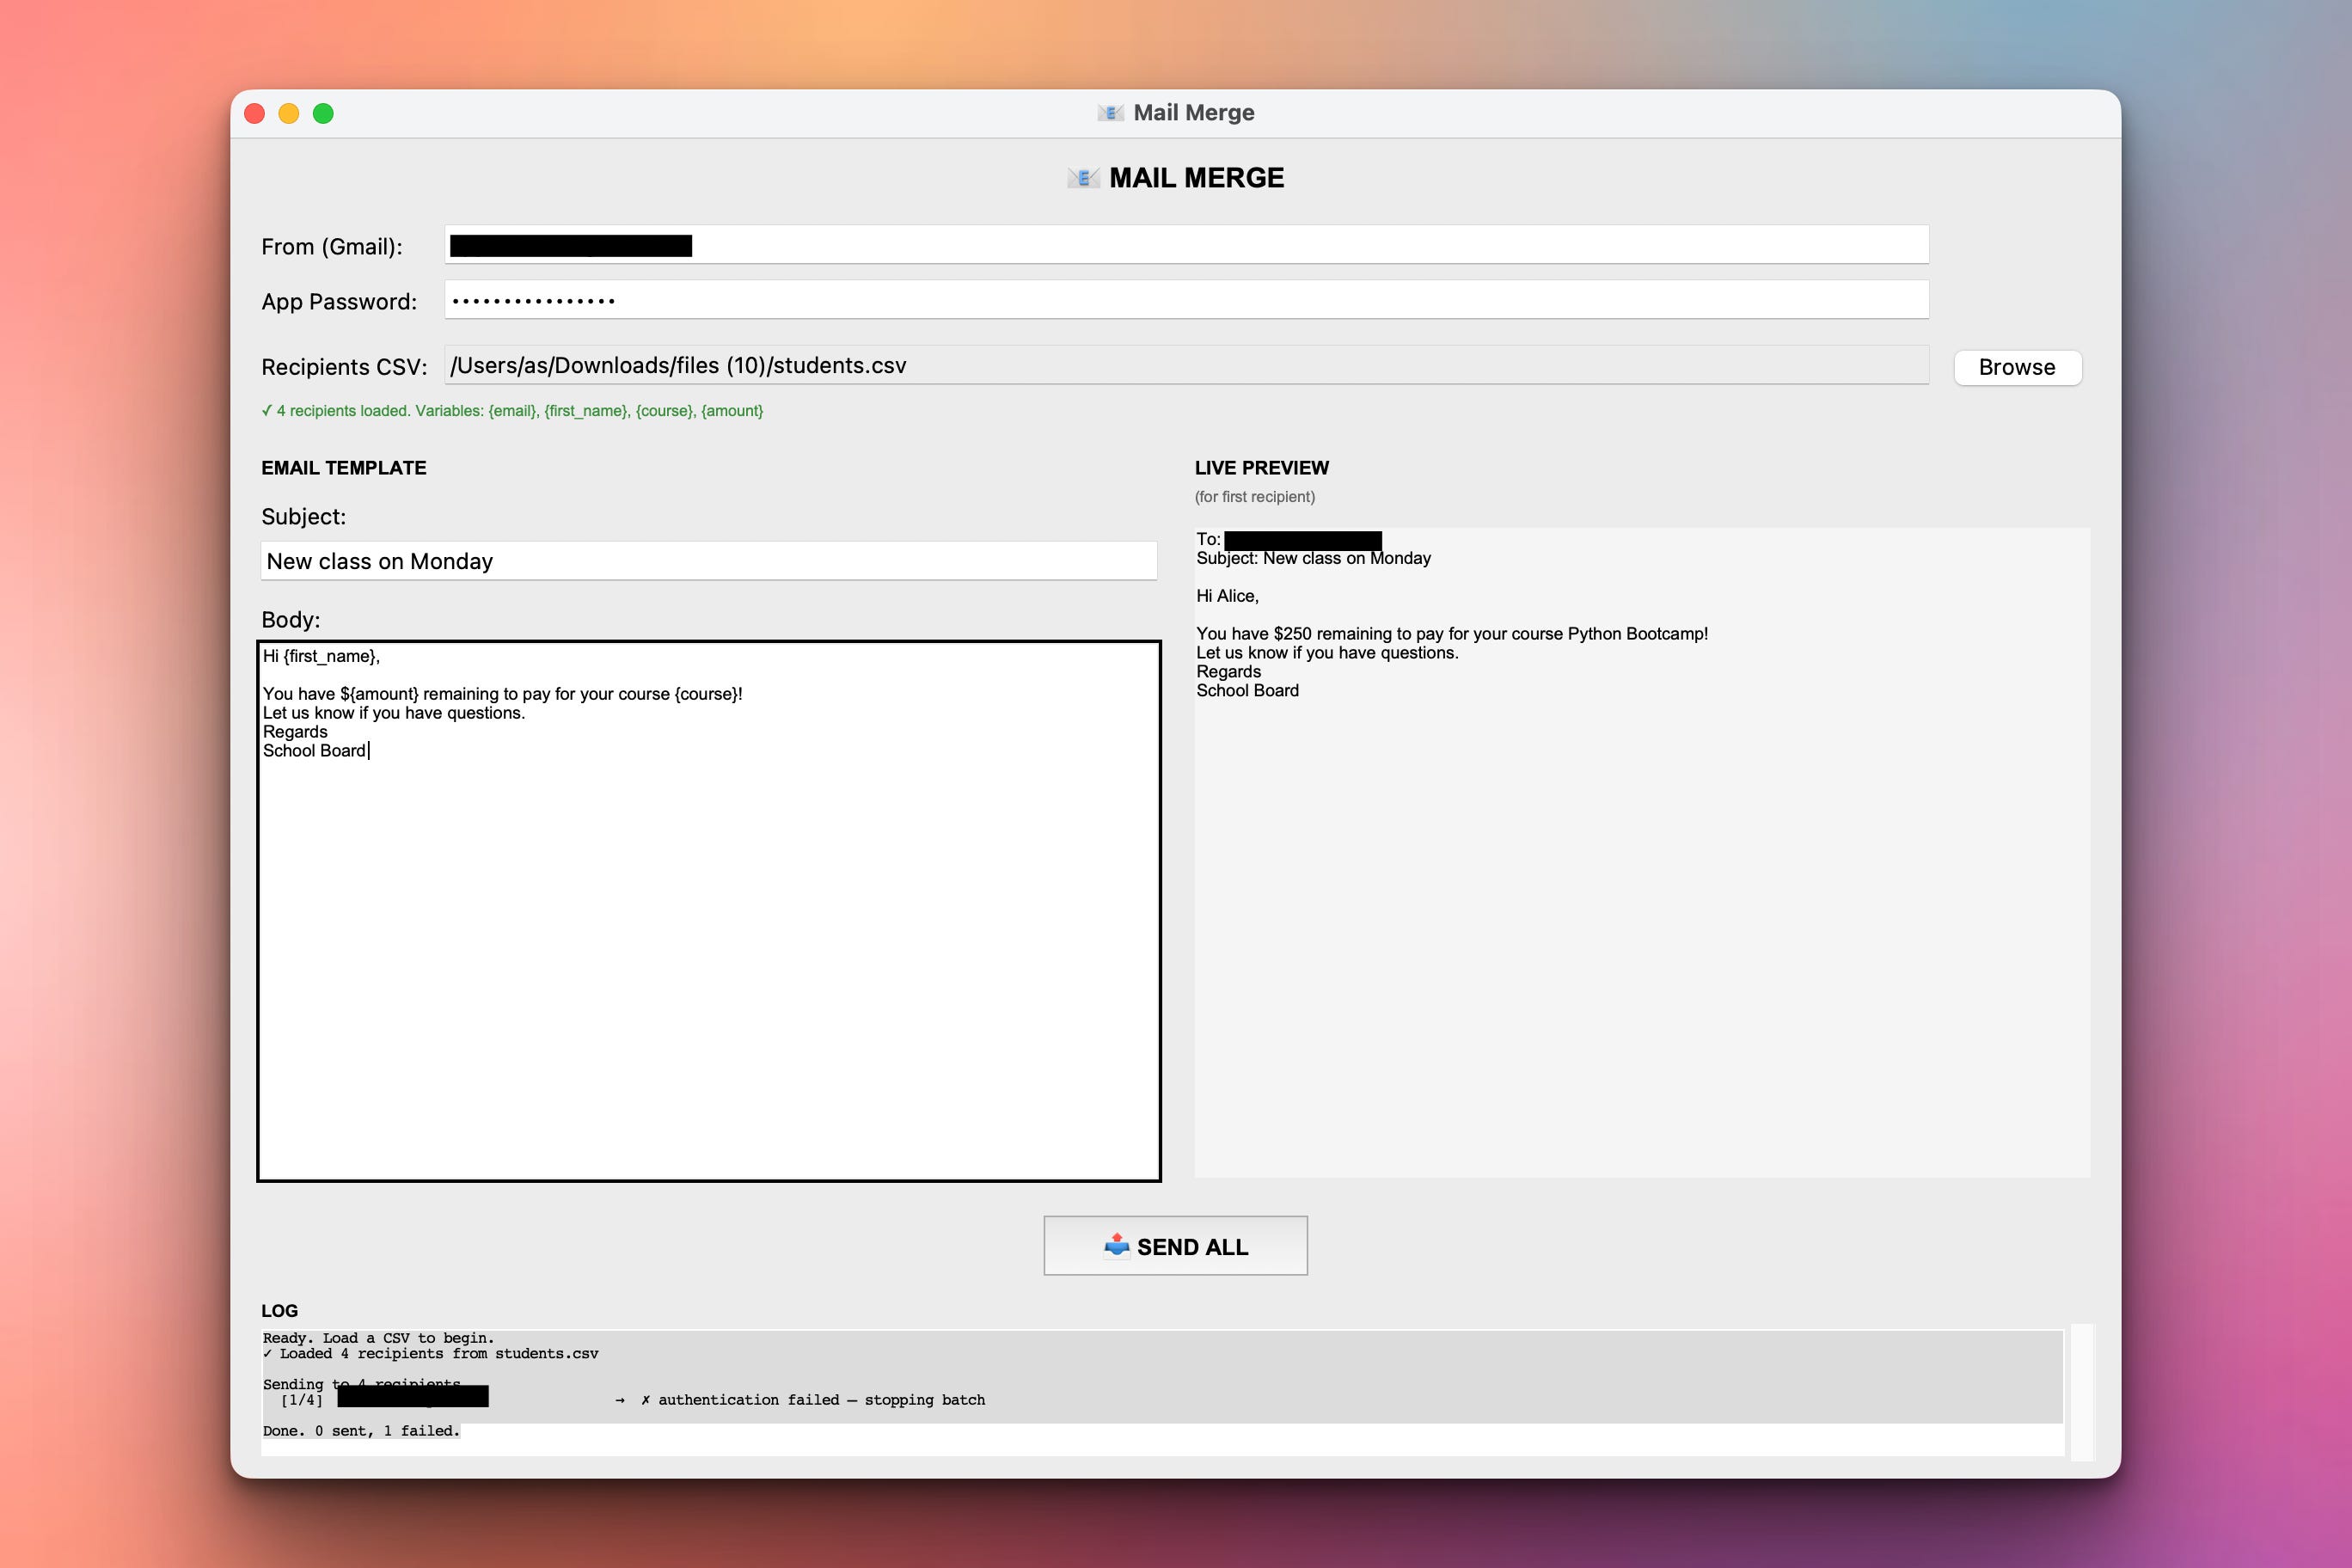
You can write an email in the GUI and use variables such as {first_name} and {course} in the email:
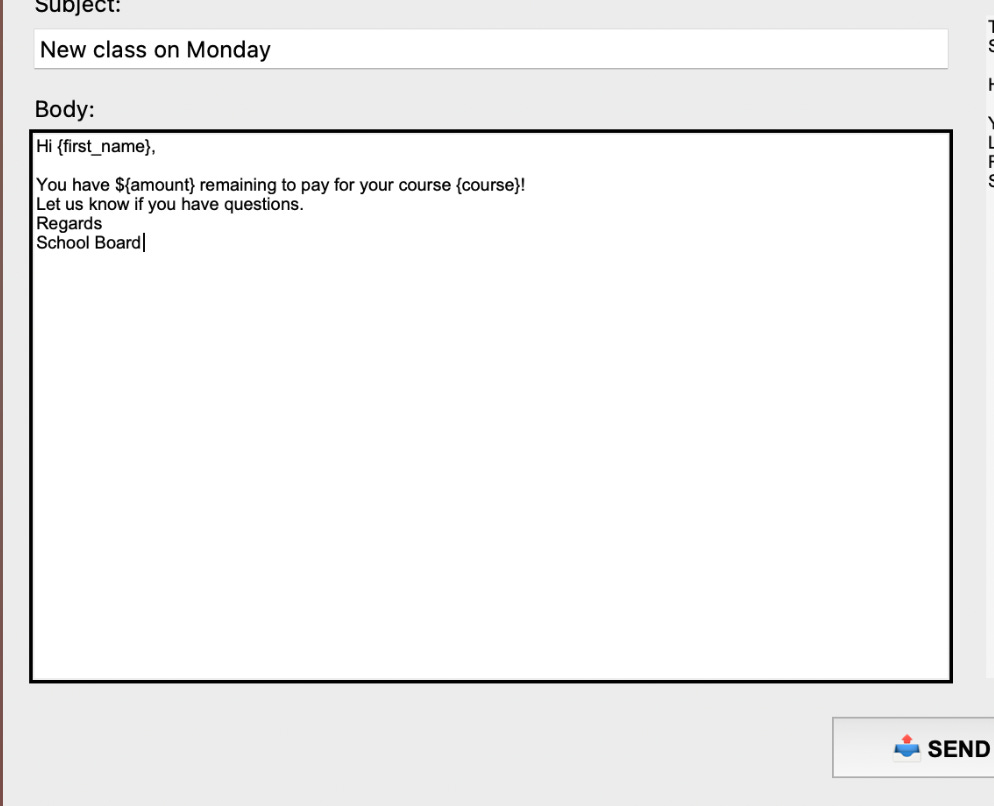
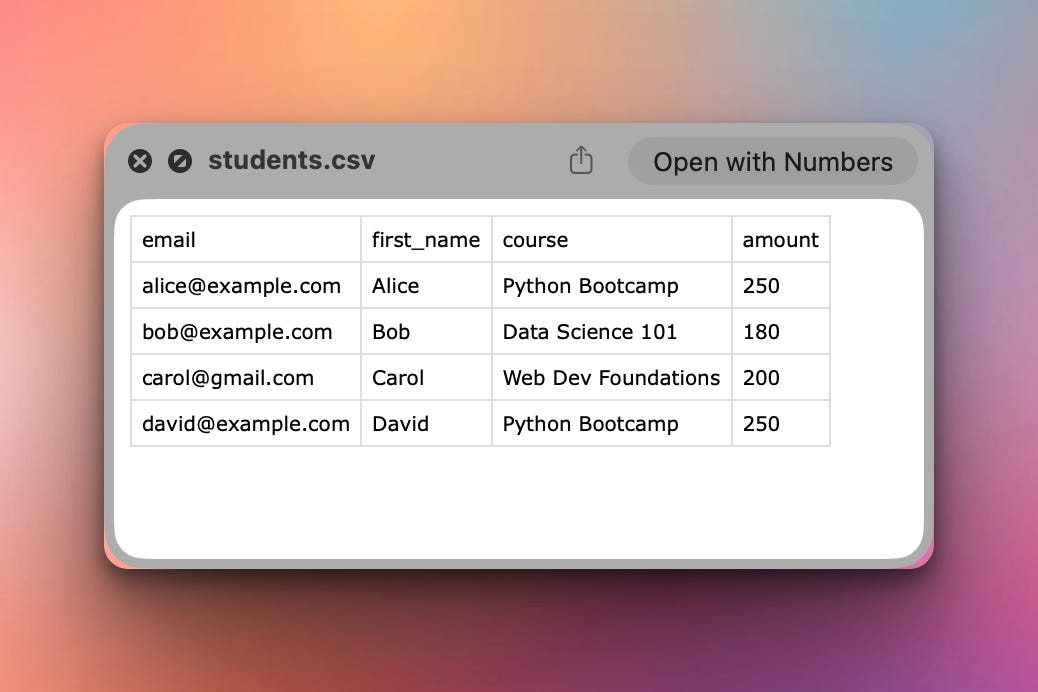
When you press SEND ALL, the app will pull the actual value from the respective column (i.e., first_name and course) in the CSV file for each row:
Each person in the CSV will get a personalized email. Here is the email Carol received:
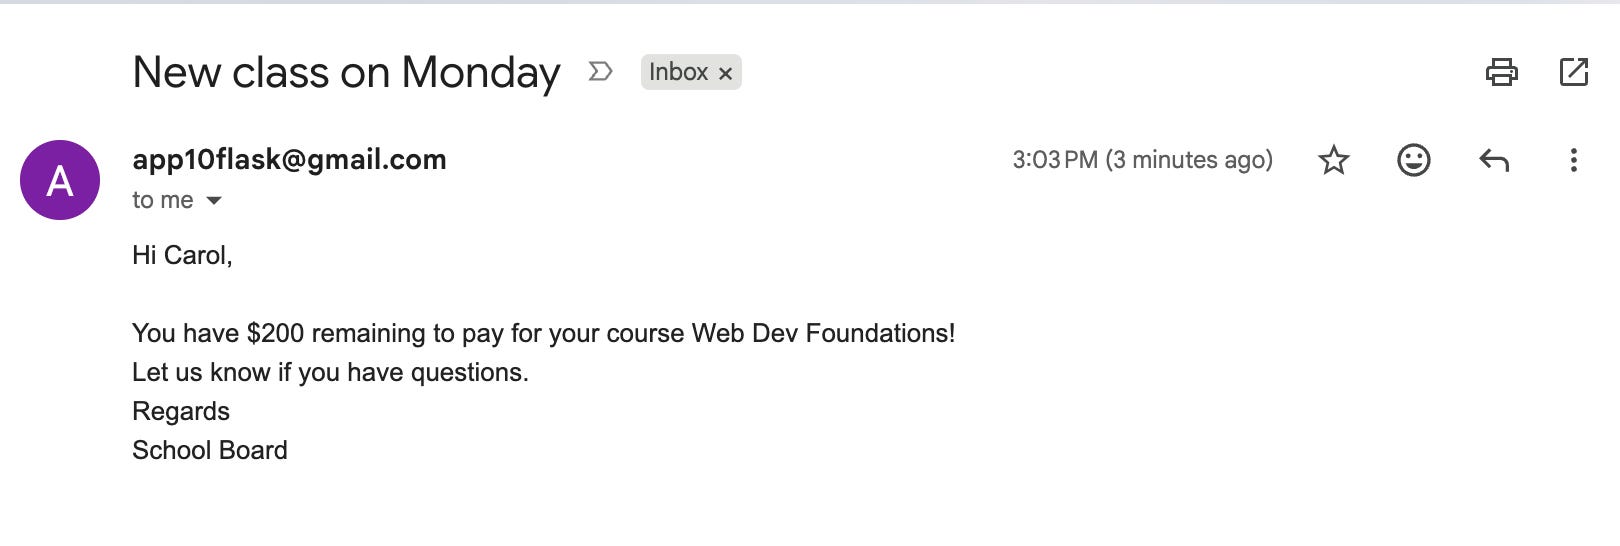
Each member receives an email with their own data fetched from the CSV.
Setup Instructions
Install (nothing new):
Same as Day 1 — pure standard library (smtplib, csv, tkinter). No pip install.
Prepare a recipients CSV:
A sample students.csv is provided with this project. The format is simple:
email,first_name,course,amount
alice@example.com,Alice,Python Bootcamp,250
bob@example.com,Bob,Data Science 101,180
carol@example.com,Carol,Web Dev Foundations,200
david@example.com,David,Python Bootcamp,250
You can copy the above, paste it in an empty text file and save as students.csv.
Run the program:
python mail_merge.py
Understanding csv.DictReader
The CSV-handling workhorse for today is csv.DictReader. It reads the header row, then yields each subsequent row as a dictionary keyed by column name:
import csv

with open("students.csv", encoding="utf-8") as f:
    reader = csv.DictReader(f)
    fieldnames = reader.fieldnames           # ['email', 'first_name', ...]
    recipients = list(reader)                # [{'email': 'alice@...', ...}, ...]
Two things to know:
reader.fieldnames— the column headers. We’ll use these to tell the user which{variables}they can put in their template.list(reader)— materializes all rows into memory. Fine for hundreds of rows; for hundreds of thousands you’d iterate the reader directly.
DictReader gives us a clean shape: a list of dicts, each one perfectly ready to feed into .format(**row).
Understanding Python’s str.format with **kwargs
Templating in Python is built into the language — no Jinja, no Mustache, just str.format():
template = "Hi {first_name}, your {course} starts soon."
row = {"first_name": "Alice", "course": "Python Bootcamp"}

personalized = template.format(**row)
# "Hi Alice, your Python Bootcamp starts soon."
The **row syntax unpacks the dict into keyword arguments. So template.format(**row) is equivalent to template.format(first_name="Alice", course="Python Bootcamp", ...).
It works for any number of variables. The template grabs whichever placeholders it needs and ignores the rest. The dict can have 10 columns — your template might only use 2 of them; that’s fine.
Understanding Safe Personalization
What happens if your template has {first_name} but a CSV row is missing that column? format() raises KeyError. That’s exactly what you want for a typo — but you want it to fail cleanly for the user, not crash the script:
def personalize(template, row):
    """Fill {placeholders} in template with values from row dict."""
    try:
        return template.format(**row)
    except KeyError as e:
        raise ValueError(f"Template references {e} but the CSV has no such column.")
Wrapping in a function with a clearer error means the GUI can show “Template references ‘first_name’ but the CSV has no such column” instead of a stack trace. Errors as messages, not crashes.
Understanding the Live Preview
The live preview shows how the first recipient’s email will look — it runs the same personalize() function the batch will use:
def refresh_preview(self):
    if not self.recipients:
        self.preview_text.delete("1.0", "end")
        return

    first = self.recipients[0]
    try:
        subject = personalize(self.subject_var.get(), first)
        body = personalize(self.body_text.get("1.0", "end-1c"), first)
    except ValueError as e:
        self.preview_text.delete("1.0", "end")
        self.preview_text.insert("1.0", f"⚠️ {e}")
        return

    preview = f"To: {first['email']}\nSubject: {subject}\n\n{body}"
    self.preview_text.delete("1.0", "end")
    self.preview_text.insert("1.0", preview)
Bind it to keystrokes on the subject and body widgets:
subject_entry.bind("<KeyRelease>", lambda _e: self.refresh_preview())
self.body_text.bind("<KeyRelease>", lambda _e: self.refresh_preview())
The user types {first_name} — the preview instantly shows “Alice.” Type {first_nam} (typo) — the preview shows a clear warning before they hit Send. This is the small UX detail that separates I built a script from I built a tool.
Understanding the Send-All Loop
The batch loop wraps yesterday’s send_email() in a for loop with three additions: a delay between sends, per-row error handling, and progress logging:
import time

def send_all(self):
    sender = self.from_var.get().strip()
    password = self.password_var.get()
    subject_template = self.subject_var.get()
    body_template = self.body_text.get("1.0", "end-1c")

    successes = 0
    failures = 0
    total = len(self.recipients)

    self.log(f"Sending to {total} recipients...")

    for i, row in enumerate(self.recipients, 1):
        recipient = row.get("email", "").strip()

        try:
            subject = personalize(subject_template, row)
            body = personalize(body_template, row)
            send_email(sender, password, recipient, subject, body)
            self.log(f"  [{i}/{total}]  {recipient:<30}  →  ✓ sent")
            successes += 1
        except Exception as e:
            self.log(f"  [{i}/{total}]  {recipient:<30}  →  ✗ {e}")
            failures += 1

        time.sleep(1)   # be polite to Gmail

    self.log(f"\nDone. {successes} sent, {failures} failed.")
Three patterns to internalize:
time.sleep(1)— one second between sends. Gmail’s free tier rate-limits at around 100/day; even at the limit, one-second pacing keeps you well under any per-minute throttle. Tomorrow’s AI version can use 2-3 seconds for extra safety.try/exceptper row — one bad recipient doesn’t stop the batch. The failure is logged; the next row goes out.successesandfailurescounters — the user sees a useful summary at the end, not a wall of green checkmarks.
Understanding Reusing send_email from Day 1
We don’t rewrite send_email. We import it:
# At the top of mail_merge.py
from email_sender import send_email
This is the architecture lesson of the week. Day 1’s send_email() was a pure function — no Tkinter, no I/O outside of the SMTP call — exactly so this would work. Day 3 will import it again.
If you wrote send_email() as a method on the Day 1 EmailSenderApp class, today’s loop would be much harder. Pure functions compose; methods on classes don’t.
Understanding the Architecture
The whole app is built on three layers:
send_email()— the SMTP primitive (imported from Day 1)personalize()— template + dict → final stringsend_all()— the loop that ties them together
Each layer does one thing. Each layer is reusable. Day 3’s AI assistant will reuse the same three — Gemini produces the body, personalize() fills in any placeholders, send_email() sends it. That’s the discipline that makes week-by-week projects compose.
Practical Use Cases
1. Notify a class / team / customer list:
Drop the names into a CSV, write your email once, hit Send All.
2. Send personalized invoices, certificates, receipts:
{first_name}, {amount}, {invoice_id} - one email per row.
3. Course communications:
Reminders, deadline alerts, assignment feedback — anywhere you'd otherwise BCC.
4. Event RSVPs and follow-ups:
"Hi {name}, thanks for attending {event}! Your certificate is at {link}."
5. Foundation for Day 3:
Tomorrow's AI assistant uses the same send_email() function and the same personalize() trick.
Coming Tomorrow
Tomorrow we add AI. The AI Email Assistant takes a quick rough draft — “tell my boss I’ll be out tomorrow morning, doctor’s appointment” — and Gemini rewrites it as a polished email in your chosen tone (polite / firm / concise / apologetic). One click and it’s ready to send via the same send_email() you built on Day 1.
View Code Evolution
Compare today’s mail merge tool with Day 1’s single sender — and see how a small for loop, a templating helper, and per-row error handling turn one email into a personalized hundred.
Keep reading with a 7-day free trial
Subscribe to Daily Python Projects to keep reading this post and get 7 days of free access to the full post archives.