

Image Toolkit App with Pillow: Day 1 - Photo Filters Studio (Tkinter)
Build a GUI app that loads a photo and has buttons and sliders to transform the image in real time, and save the result

Projects in this week’s series:
This week, we build an Image Toolkit with Pillow that lets you edit photos in a desktop app, watermark whole folders of images at once, and turn photos into shareable memes and collages.
Why build this? Because image manipulation is one of the most fun and visible domains in Python. Click a button, see your photo transform — instant feedback you can’t get with text-based tools. Plus the skills transfer everywhere: any time you need to resize, watermark, filter, or generate images, this is the foundation.
What you’ll learn: This series teaches you Pillow (the modern PIL), Tkinter GUI design with image previews, color and pixel manipulation, image filters and convolutions, batch processing, EXIF orientation handling, and the classic bridges between PIL and Tkinter.
Why this matters: By Day 3, you’ll have built a meme generator and collage maker that produces images you’d actually post. That’s portfolio-level fun.
Day 1: Photo Filters Studio (Tkinter) (Today)
Day 2: Batch Watermarker
Day 3: Meme Generator & Collage Maker
Today’s Project
We start with the visual heart of any image toolkit: a filter studio. Load a photo, see it on screen, click filter buttons or drag sliders, watch the image transform in real time, and save the result. By the end you’ll have a polished little Photoshop-lite — and the Pillow fundamentals to do anything image-related in Python.
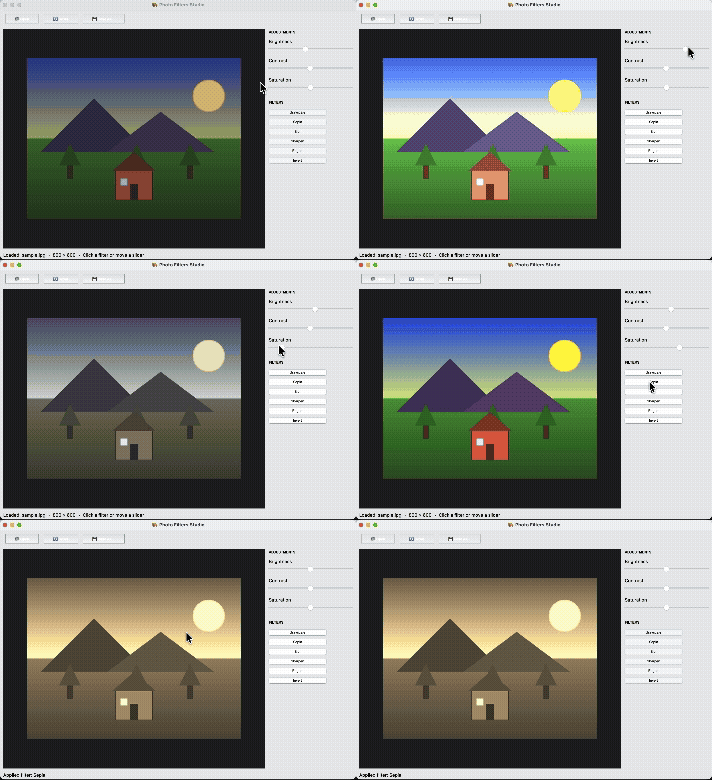
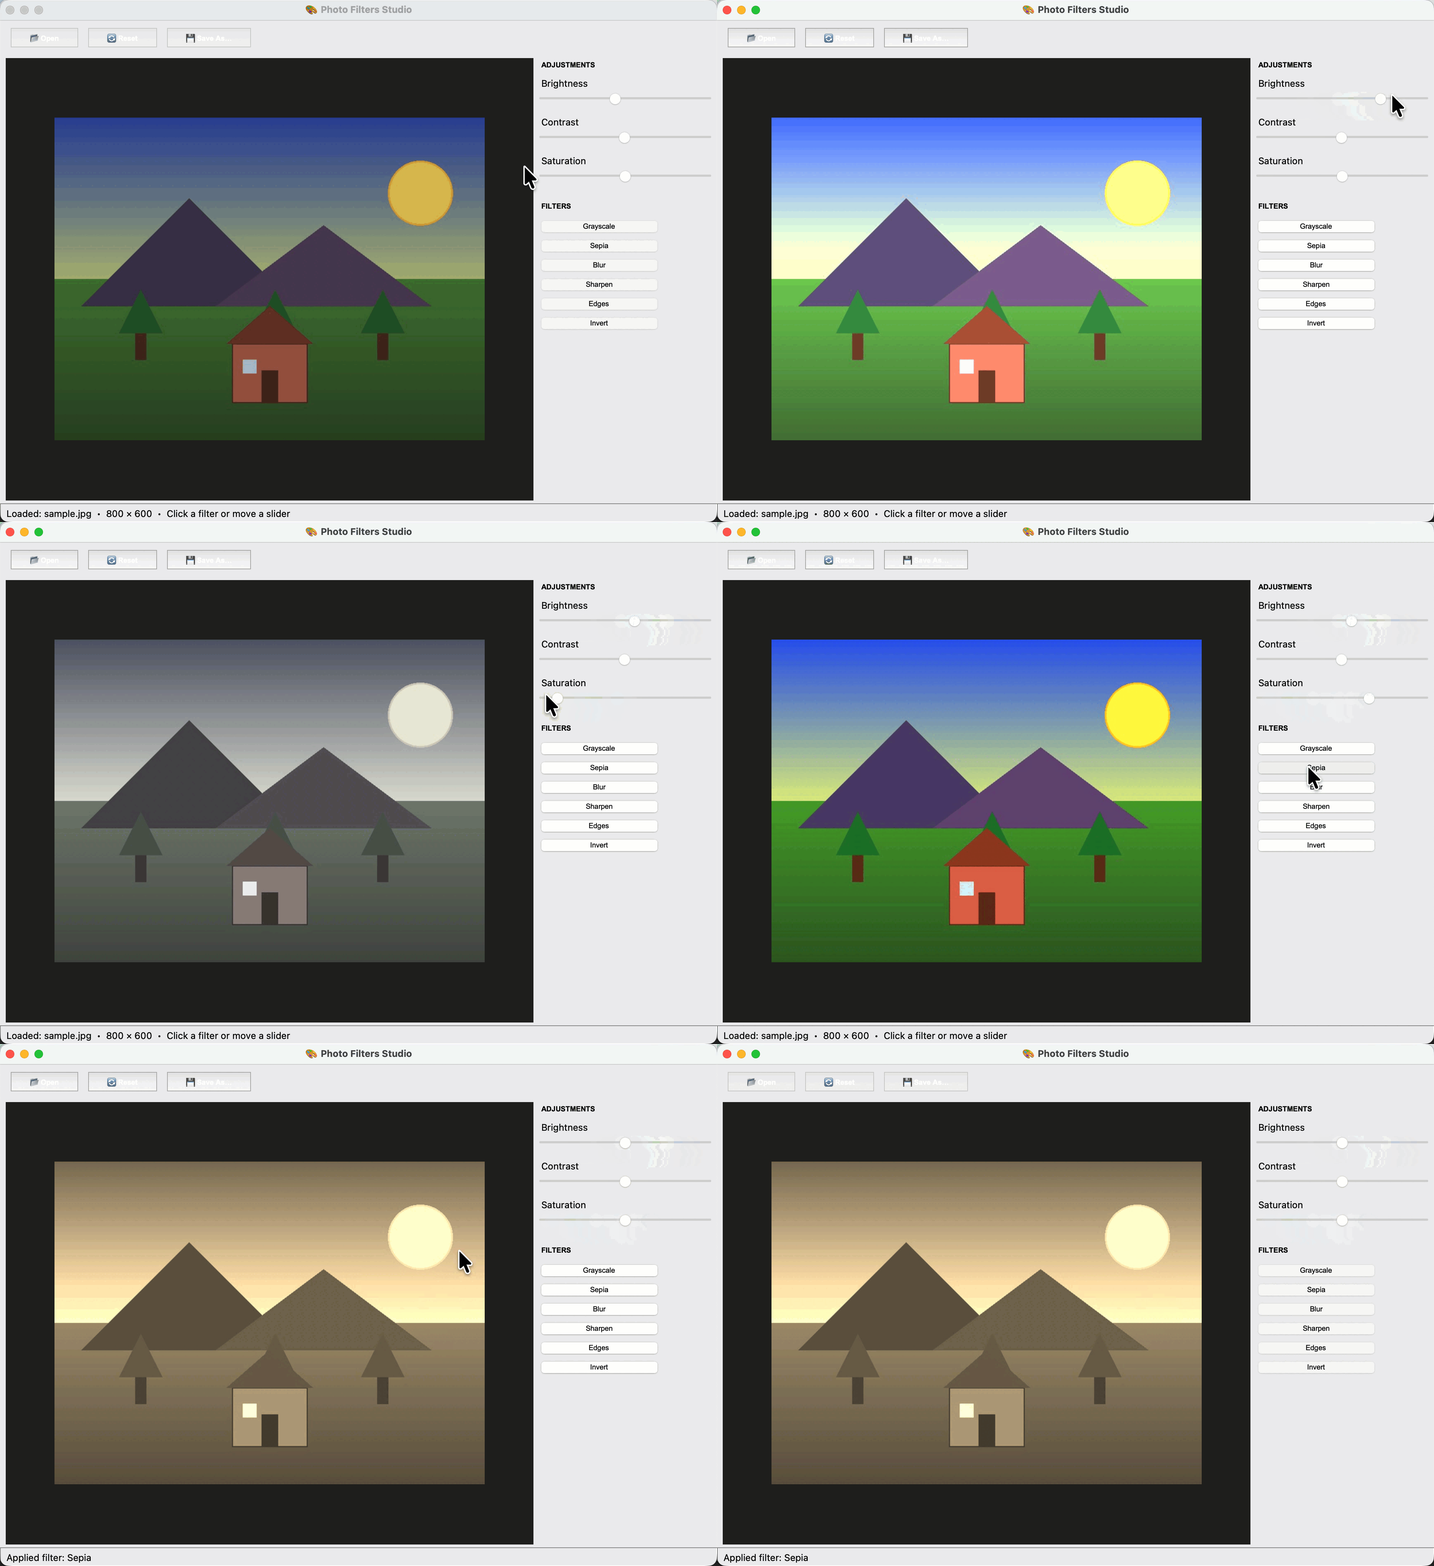
The classic six one-click filters (Grayscale, Sepia, Blur, Sharpen, Edge Detect, Invert) plus three live sliders (Brightness, Contrast, Saturation). Reset returns to the original. Save writes a new file — your original is never touched.
Project Task
Build a photo filter desktop app with Tkinter and Pillow that:
Loads an image via a file dialog (JPG, PNG, etc.)
Displays the image in a preview area, resized to fit
Correctly handles phone-photo rotation (EXIF orientation)
Applies one-click filters: Grayscale, Sepia, Blur, Sharpen, Edge Detect, Invert
Provides live sliders for Brightness, Contrast, and Saturation
Re-renders the preview every time the user changes something
Has a Reset button to return to the original
Saves the edited image as a new file (Save As…)
Never modifies the original — every edit happens on a copy
This project gives you hands-on practice with Pillow’s Image, ImageFilter, ImageEnhance, and ImageOps modules, Tkinter file dialogs, scales/sliders, the ImageTk bridge for previewing PIL images in a GUI, and the small architecture choices that keep an image editor sane.
Expected Output
Running the app:
python photo_filters.py
Application Window:
Here is a snapshot of how the finished app looks like:
Setup Instructions
Install Pillow:
pip install Pillow
That’s it — Tkinter ships with Python. (On Linux: sudo apt-get install python3-tk if it isn’t already there.)
Get a test image:
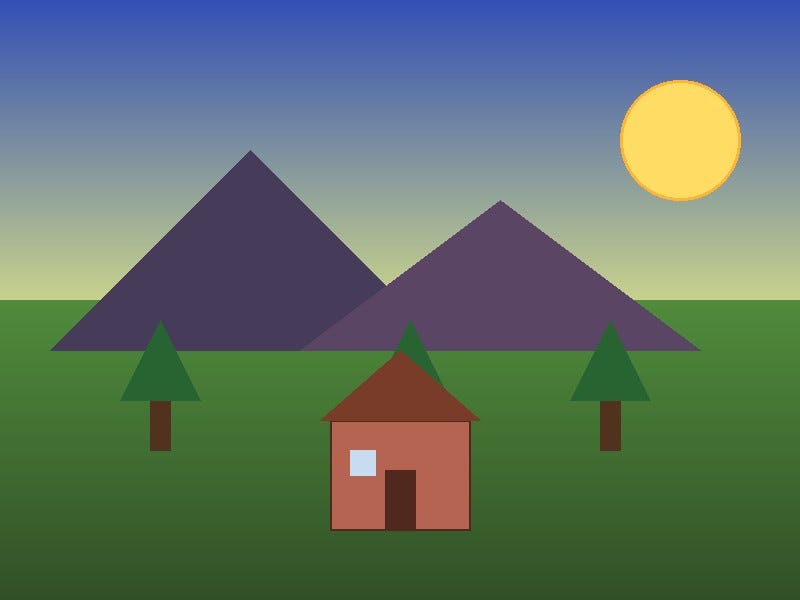
A sample.jpg is provided below — a colorful generated scene that shows off every filter beautifully. You can also use any photo from your computer.
Run the app:
python photo_filters.py
Understanding the Image-Editing Architecture
Before any code, the architecture matters. There are three images alive at all times:
self.original   →  The image as loaded from disk. NEVER touched again.
self.edited     →  The current edited version. This is what gets saved.
self.preview    →  A small, screen-sized copy of `edited` for display only.
Two rules fall out of this:
Filters and slider changes modify
edited— they never touchoriginal.Every change is followed by a
refresh_preview()— which creates a freshpreviewfromeditedand updates the GUI.
Reset is then trivial: self.edited = self.original.copy() — and refresh. This separation prevents the most common bugs in image editors (irreversible damage, slow re-renders, getting “stuck” on a filter).
Understanding Pillow Basics
Pillow’s central object is Image. Opening, copying, and saving look like this:
from PIL import Image

img = Image.open("sample.jpg")   # lazy load — actual pixels read on demand
edited = img.copy()              # always work on a copy
edited.save("output.jpg")        # save anywhere with any supported extension
Three habits worth forming on day one:
Always
.copy()before editing. Pillow’s filters often return new images, but it’s safer to think of the original as immutable.Don’t worry about format on open. Pillow detects JPG/PNG/BMP/GIF/WebP/HEIC automatically.
The format on save is taken from the extension —
output.pngwrites PNG,output.jpgwrites JPEG.
Understanding EXIF Orientation
Here’s a real-world trap: photos taken on a phone often look correct in Photos but appear rotated 90° when opened with Pillow. That’s because the camera saves the image in its native sensor orientation and stores the intended rotation as EXIF metadata — and Pillow doesn’t apply it automatically.
The fix is one line:
from PIL import ImageOps

img = Image.open("photo.jpg")
img = ImageOps.exif_transpose(img)   # apply the EXIF rotation
exif_transpose reads the EXIF orientation tag and physically rotates/flips the image to match what the user expects. Without it, your “perfectly working” app will mysteriously fail on the first phone selfie someone tries. Call it once, right after opening — done.
Understanding ImageTk: PIL → Tkinter Bridge
Tkinter’s widgets can’t display a PIL Image directly. The bridge is ImageTk.PhotoImage, which wraps a PIL image into a Tkinter-compatible image object:
from PIL import ImageTk

self.tk_image = ImageTk.PhotoImage(self.preview)
self.preview_label.config(image=self.tk_image)
The classic gotcha: if you don’t keep a reference to self.tk_image, Python garbage-collects it and the image vanishes from the screen with no error. Always store it on self. — never as a local variable inside a method.
This is the #1 most common “my image won’t show” bug in Pillow+Tkinter code. Now you’ll never write it.
Understanding Resizing for Preview
A 4000×3000 photo can’t be shown at full size — and resizing on every slider tick would be sluggish. The pattern: resize once, when the image changes, to a screen-friendly version.
Pillow’s thumbnail() method resizes in place and preserves aspect ratio:
preview = self.edited.copy()
preview.thumbnail((600, 600), Image.Resampling.LANCZOS)
self.preview = preview
Two details that matter:
thumbnailis in-place. It doesn’t return a new image — it modifies the one you call it on. So wecopy()first.Image.Resampling.LANCZOSis the modern constant for the high-quality downsampling filter. Older code usesImage.LANCZOS(deprecated) orImage.ANTIALIAS(removed). LANCZOS is the right choice for shrinking photos.
Understanding ImageFilter: One-Click Filters
For Blur, Sharpen, and Edge Detect, Pillow ships built-in convolution kernels in ImageFilter:
from PIL import ImageFilter

self.edited = self.edited.filter(ImageFilter.BLUR)
self.edited = self.edited.filter(ImageFilter.SHARPEN)
self.edited = self.edited.filter(ImageFilter.FIND_EDGES)
A “convolution” is just: for each pixel, look at its neighbors, compute a weighted average. Blur averages neighbors. Sharpen subtracts a blurred version from the original. Edge detect amplifies differences between neighbors. You don’t need to write the math — ImageFilter has clean, named presets.
Understanding ImageOps: Grayscale and Invert
For pure color transformations, ImageOps is the right toolbox:
from PIL import ImageOps

self.edited = ImageOps.grayscale(self.edited).convert("RGB")
self.edited = ImageOps.invert(self.edited)
A subtlety with grayscale: ImageOps.grayscale returns a single-channel (”L” mode) image. Converting back to “RGB” keeps the rest of the pipeline happy — later filters and the ImageTk display expect 3-channel images.
invert simply flips every pixel value (255 − v), giving you that classic film-negative look.
Understanding Sepia: Custom Per-Channel Math
Sepia isn’t built in — and that’s a good thing, because it’s the perfect excuse to teach per-pixel/per-channel manipulation. The standard sepia formula transforms each pixel’s RGB values:
new_R = 0.393·R + 0.769·G + 0.189·B
new_G = 0.349·R + 0.686·G + 0.168·B
new_B = 0.272·R + 0.534·G + 0.131·B
Implemented in Pillow:
def apply_sepia(img):
    img = img.convert("RGB")
    pixels = img.load()         # an indexable pixel grid

    for y in range(img.height):
        for x in range(img.width):
            r, g, b = pixels[x, y]
            tr = int(0.393 * r + 0.769 * g + 0.189 * b)
            tg = int(0.349 * r + 0.686 * g + 0.168 * b)
            tb = int(0.272 * r + 0.534 * g + 0.131 * b)
            pixels[x, y] = (min(tr, 255), min(tg, 255), min(tb, 255))

    return img
img.load() returns a pixel-access object you can read and assign with pixels[x, y]. The min(..., 255) clamps values that overflow the 0–255 range. Slow for huge images but perfectly fine for the screen-sized previews we’re editing.
Aside: for large images and production code, you’d use numpy or
Image.point()for vectorized math. But the pixel loop is the canonical way to teach what every image filter is doing under the hood, so we use it here. Worth the few seconds.
Understanding ImageEnhance: Adjustable Effects
Brightness, Contrast, and Saturation aren’t on/off filters — the user dials them. That’s what ImageEnhance is for:
from PIL import ImageEnhance

enhancer = ImageEnhance.Brightness(self.edited)
self.edited = enhancer.enhance(1.4)   # 1.0 = unchanged; >1 brighter, <1 darker
The number is a factor, not an amount:
1.0— leave as is1.5— 50% brighter / more contrast / more saturated0.5— 50% darker / flatter / desaturated0.0— completely black / no contrast / fully grayscale
This factor pattern is uniform across Brightness, Contrast, Color (saturation), and Sharpness. Once you know one, you know all four.
Understanding the Slider Refresh Pattern
Sliders fire continuously as the user drags. To keep the UI snappy, each slider re-applies all three enhancements from the original, every time:
def update_adjustments(self, _event=None):
    img = self.original_for_adjust.copy()

    img = ImageEnhance.Brightness(img).enhance(self.brightness_var.get())
    img = ImageEnhance.Contrast(img).enhance(self.contrast_var.get())
    img = ImageEnhance.Color(img).enhance(self.saturation_var.get())

    self.edited = img
    self.refresh_preview()
The key choice: we start each update from self.original_for_adjust, a snapshot taken when the user last clicked a filter. That way the sliders work on top of “grayscale”, “sepia”, etc., but moving a slider doesn’t accumulate enhancements every frame (which would amplify them out of control).
This snapshot-based pattern is the small architectural trick that makes the studio feel like a real editor instead of a glitchy demo.
Understanding Saving
Pillow infers the output format from the file extension:
def save_as(self):
    path = filedialog.asksaveasfilename(
        defaultextension=".jpg",
        filetypes=[("JPEG", "*.jpg *.jpeg"),
                   ("PNG",  "*.png"),
                   ("All",  "*.*")],
    )
    if not path:
        return
    self.edited.save(path)
Two important details:
JPEG can’t store transparency. If the user has applied filters that introduce an alpha channel (rare here, but possible), save to PNG. Otherwise force RGB before saving JPEG:
self.edited.convert("RGB").save(path).JPEG quality defaults to 75. For photos worth sharing, add
quality=92to the save call.
Our app saves whatever PIL deems best for the extension, which works for the 95% case.
Coming Tomorrow
Tomorrow we go from one photo to a whole folder. The Batch Watermarker adds a text or logo watermark to every image in a folder, with position controls, opacity, and a live preview — turning today’s manual workflow into a one-click batch operation.
Skeleton and Solution
Below you will find both a downloadable skeleton.py file to help you code the project with comment guides and the downloadable solution.py file containing the correct solution.
Get the code skeleton here:
Get the code solution here: