

Image Toolkit App with Pillow: Day 2 - Batch Watermarker
Building a program that takes a folder of images, applies a text watermark and writes the watermarked copies to an output folder

Projects in this week’s series:
This week, we build an Image Toolkit with Pillow that lets you edit photos in a desktop app, watermark whole folders of images at once, and turn photos into shareable memes and collages.
Day 1: Photo Filters Studio (Tkinter)
Day 2: Batch Watermarker (Today)
Day 3: Meme Generator & Collage Maker
Today’s Project
Yesterday we edited one photo at a time. Today we process hundreds at once.
The Batch Watermarker takes a folder of images, applies a text watermark with the position, opacity, and color you pick, and writes the watermarked copies to an output folder. Live preview while you tune the settings, then one click processes the whole batch — leaving every original untouched.
This is where image processing gets useful. Photographers protecting their work, content creators branding their screenshots, ecommerce sellers labeling product photos — the workflow is the same, and you can build it in 200 lines of Python.
Project Task
Build a batch text watermarker with Tkinter and Pillow that:
Lets the user pick an input folder of images and an output folder
Lets the user type the watermark text
Lets the user choose the position: one of 5 anchor points (corners + center)
Lets the user adjust opacity (0–100%) and font size with sliders
Shows a live preview of the watermark on the first image in the folder
Processes the whole folder when “Apply to All” is clicked
Preserves EXIF orientation and original quality
Reports progress per file and continues on errors
Never overwrites originals — writes to a separate output folder
This project gives you hands-on practice with Pillow’s ImageDraw and ImageFont, RGBA compositing for proper transparency, working with image folders, anchor-based positioning, and turning a single-image operation into a batch pipeline.
Expected Output
Running the watermarker:
python batch_watermarker.py
Application Window:
The user can pick an input folder where the images are and an output folder to save the watermarked images.
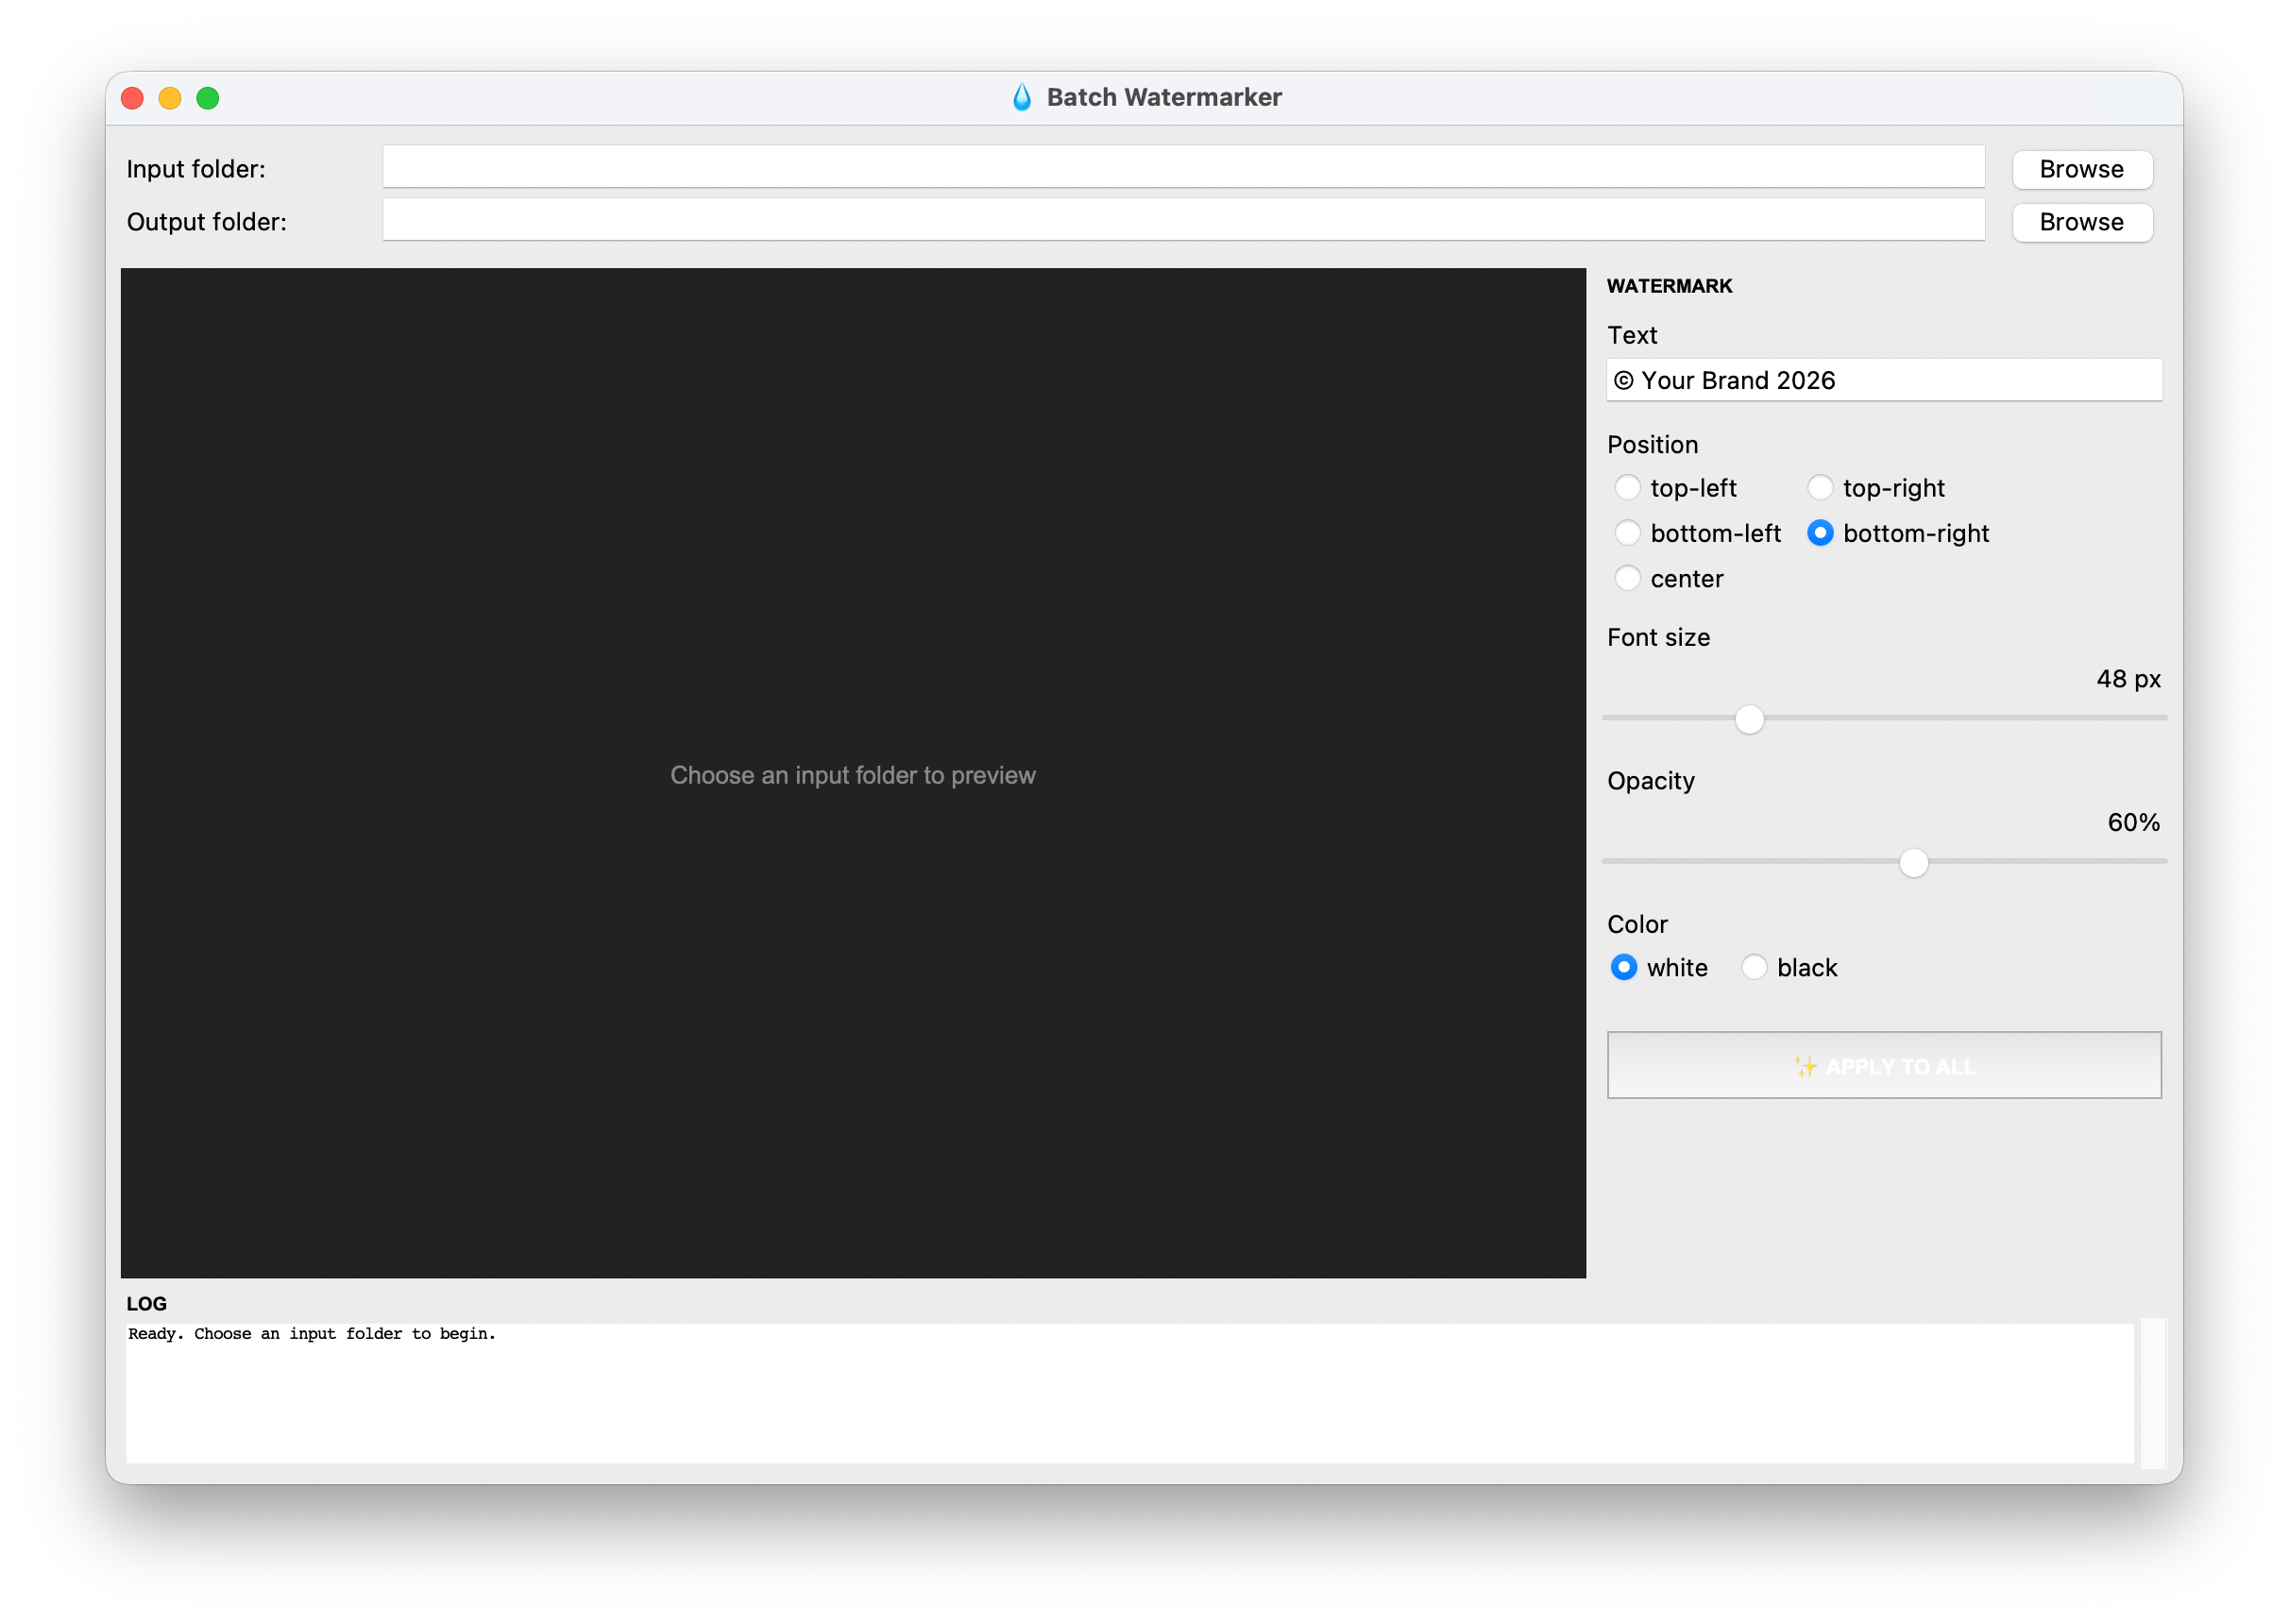
Once the user has selected the folder the program already applies watermarks and displays the first image in the GUI.
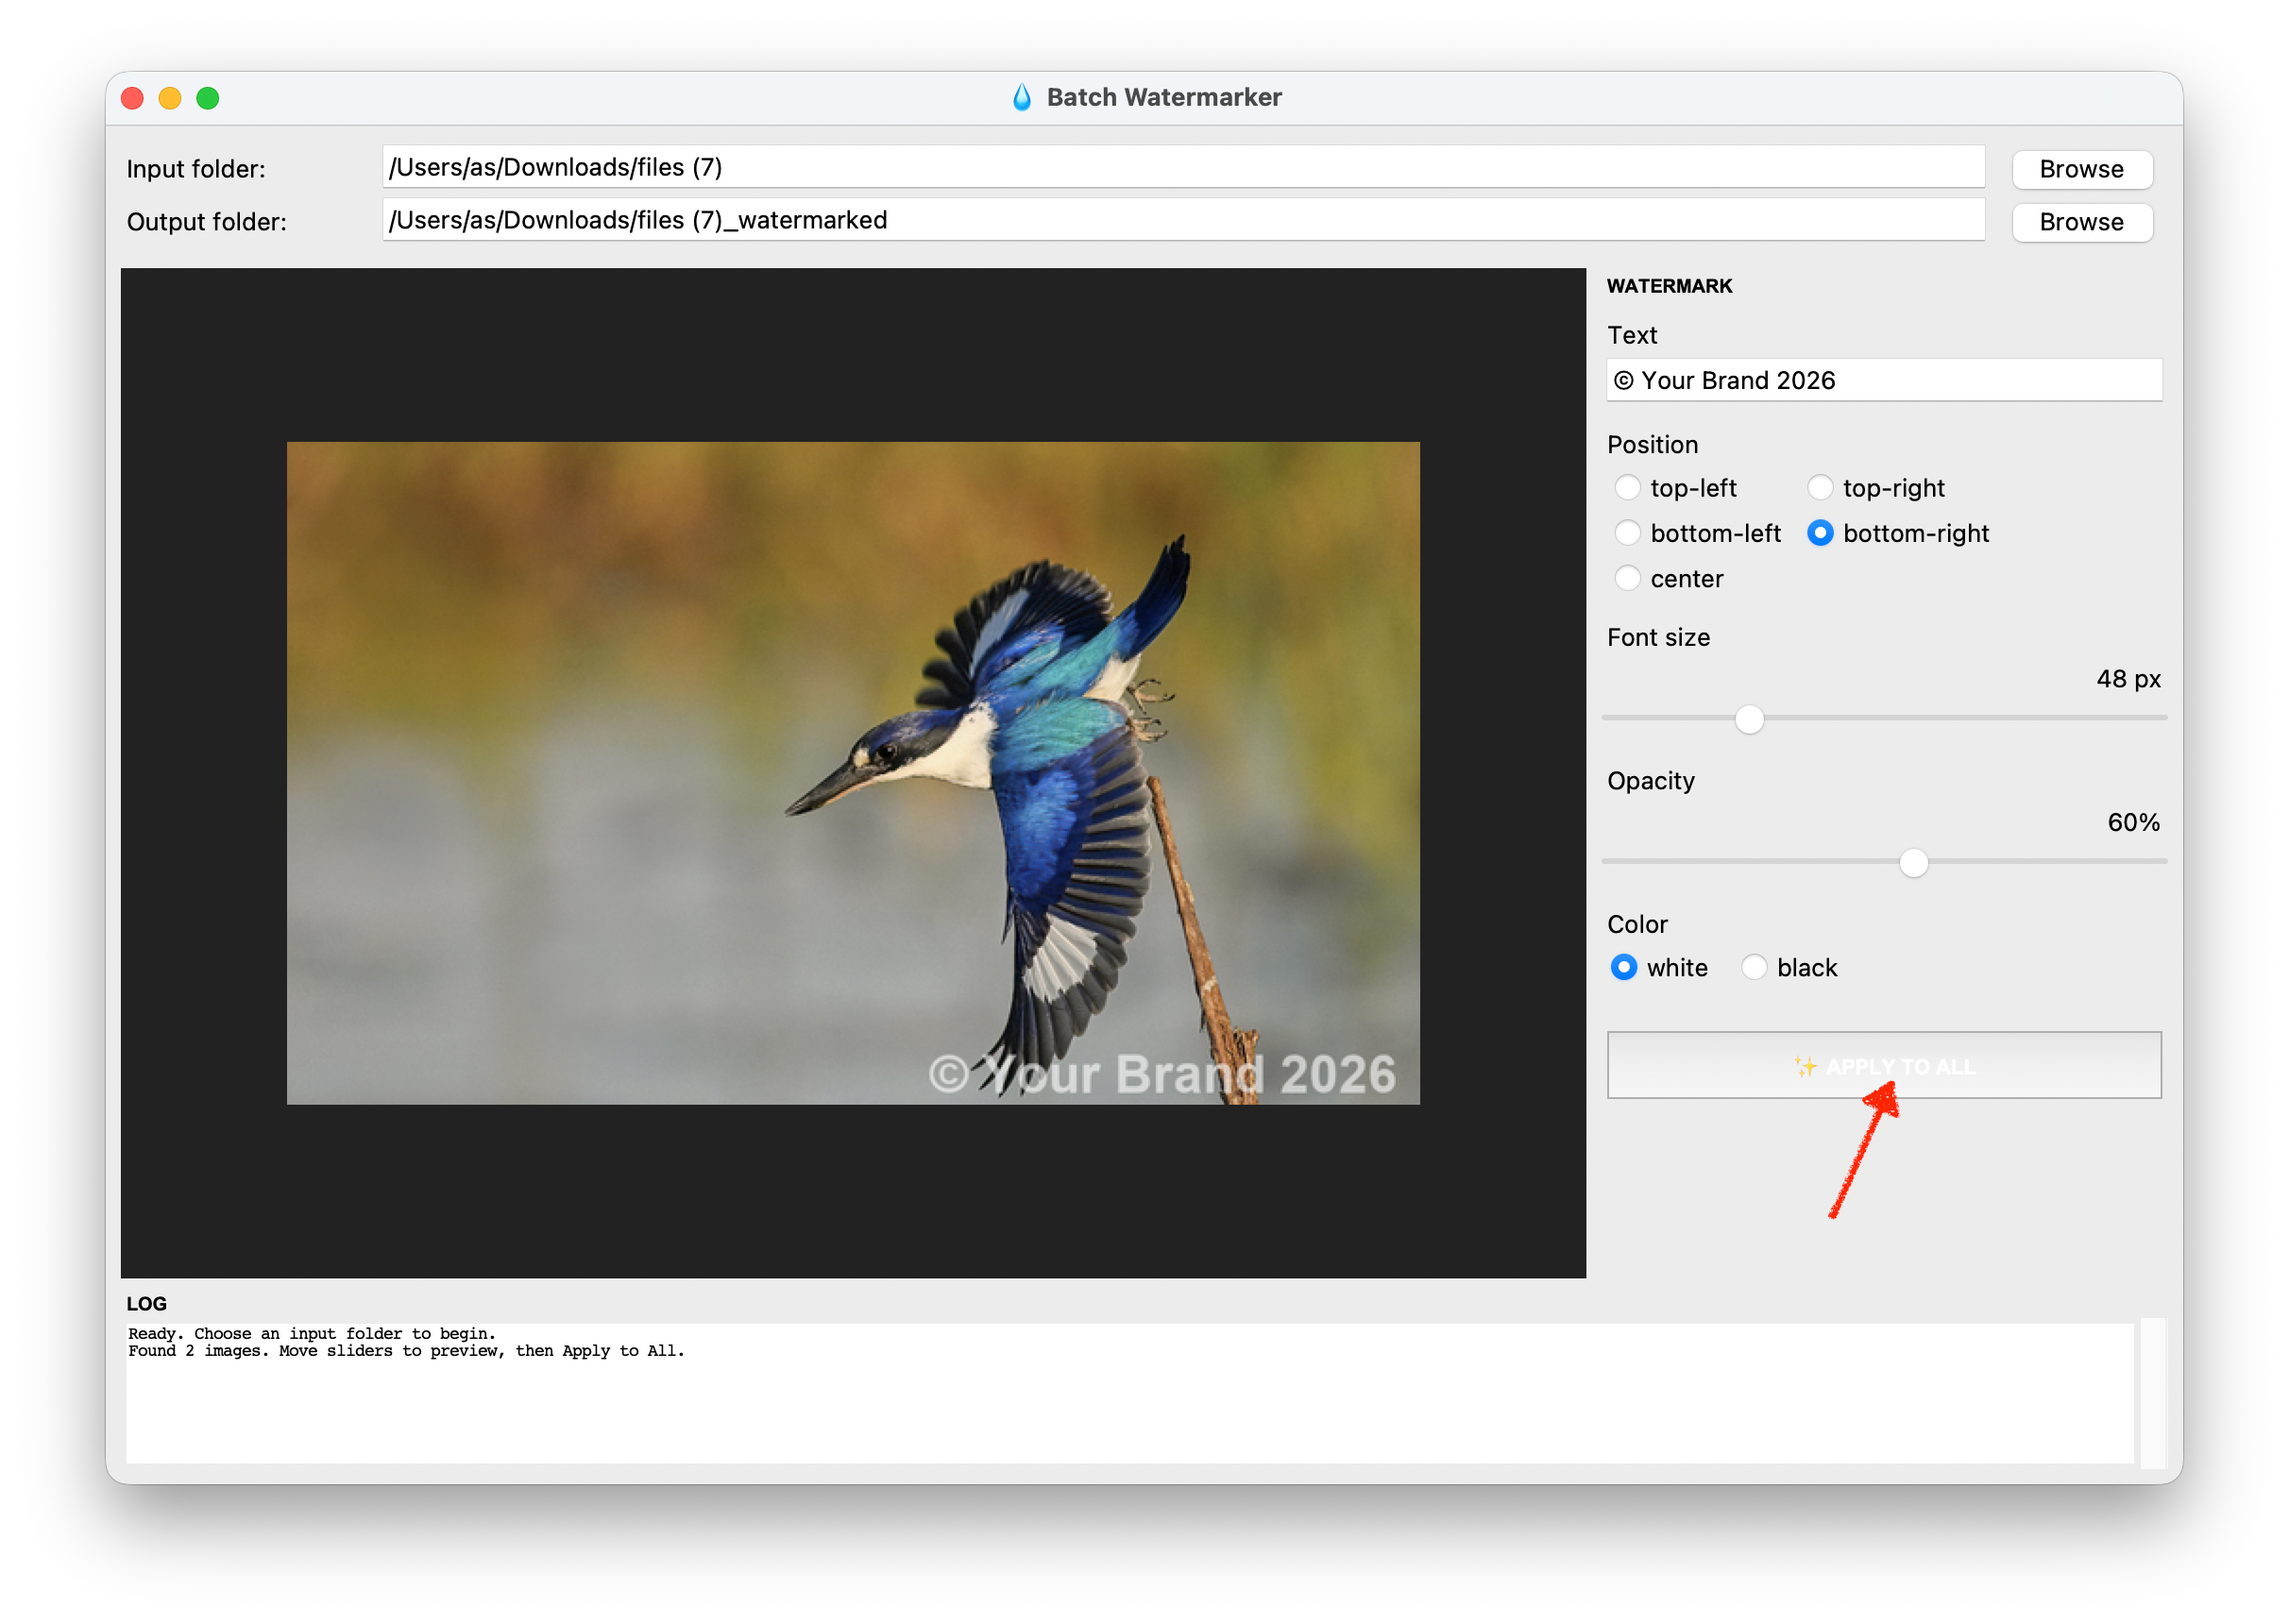
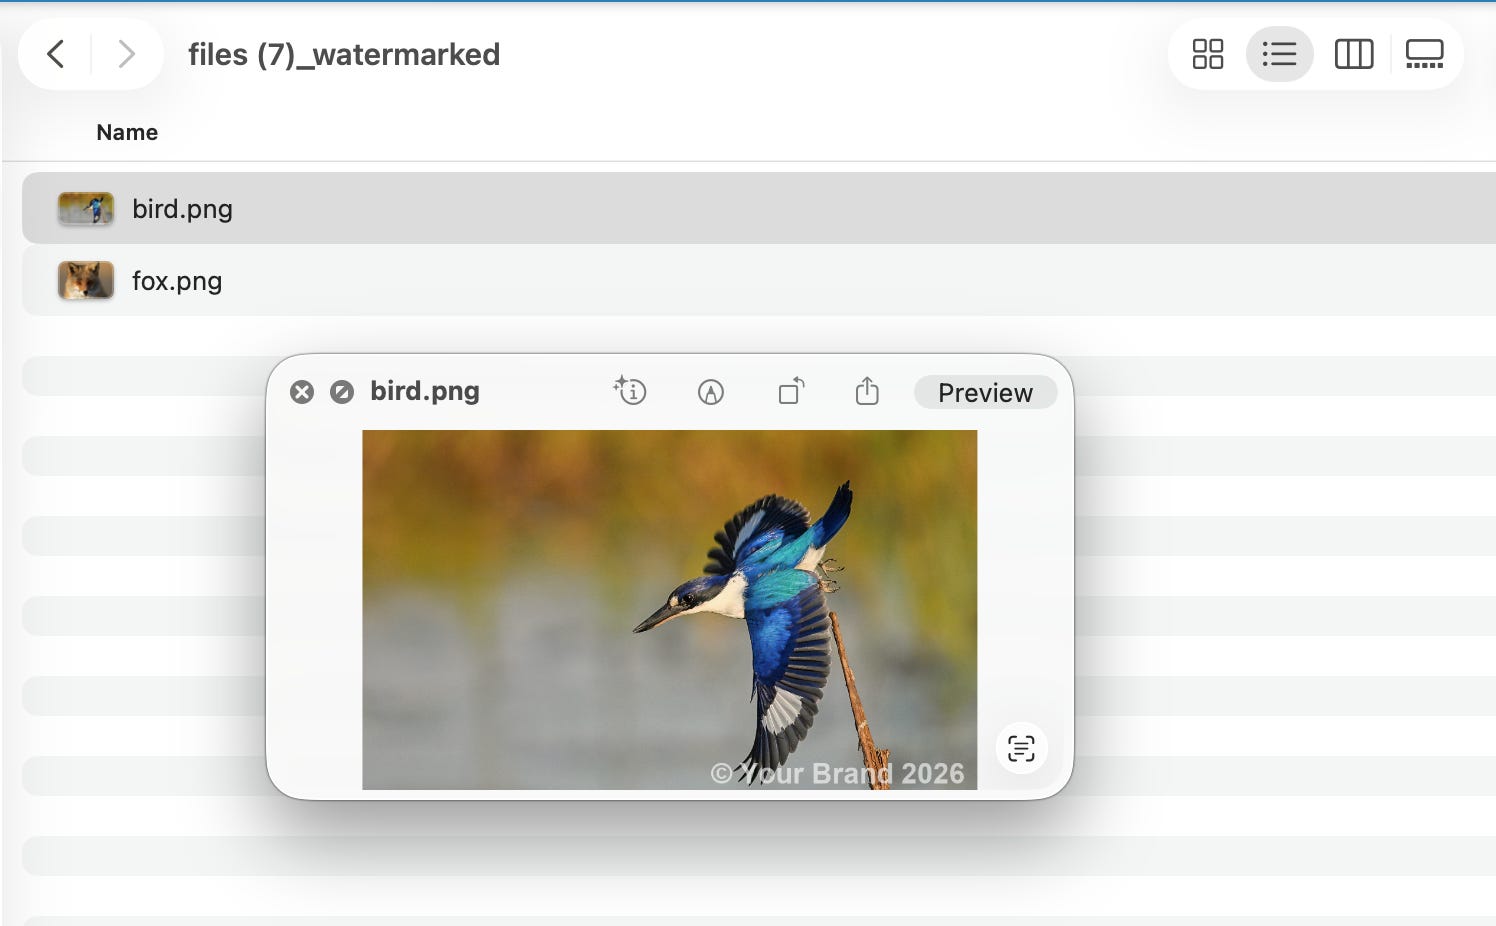
The user can click the APPLY TO ALL button to process all images and a new output folder with the generated images will be generated. Here is a snapshot of that folder:
Setup Instructions
Install Pillow:
pip install Pillow
(Same single dependency as Day 1.)
Run it:
python batch_watermarker.py
You’ll need a folder of images to point at. To try it quickly, copy sample.jpg from Day 1 into a folder a few times — even one image works.
Understanding the Two-Step Architecture
The whole app is built around one simple split:
apply_watermark(image, settings)  →  the pure image operation
process_folder(input, output, settings)  →  the batch loop
The first function takes a single PIL image plus a dict of settings and returns a watermarked copy. The second function walks the input folder, calls the first function for each image, and saves the result.
This split is the whole point of today’s lesson. Once you have a clean single-image function, batching it is just a for loop with error handling around it. Days 1, 2, and 3 of this week all reuse the same shape: do one thing well, then loop.
Understanding RGBA Compositing
A watermark isn’t just text drawn on top of an image — it’s text with transparency. If you set opacity to 60%, that means “60% white text, 40% whatever pixel is underneath.” That’s RGBA compositing, and it’s the foundation of every transparency effect in Pillow.
The pattern:
Convert the photo to RGBA (so it can mix with transparent things).
Create a separate transparent overlay the same size as the photo.
Draw the text onto the overlay with an alpha channel set by opacity.
Composite the overlay onto the photo with
Image.alpha_composite.
def apply_watermark(image, text, position, font_size, opacity, color):
    # 1. Force RGBA so compositing works
    base = image.convert("RGBA")

    # 2. Transparent overlay
    overlay = Image.new("RGBA", base.size, (0, 0, 0, 0))
    draw = ImageDraw.Draw(overlay)

    # 3. Compute the alpha (0-255) from opacity (0.0-1.0)
    fill_rgb = (255, 255, 255) if color == "white" else (0, 0, 0)
    fill_rgba = (*fill_rgb, int(opacity * 255))

    # 4. Position the text and draw it
    font = ImageFont.truetype(...)  # see below
    x, y = compute_position(text, font, base.size, position)
    draw.text((x, y), text, font=font, fill=fill_rgba)

    # 5. Composite and return
    return Image.alpha_composite(base, overlay)
The critical move is drawing the text onto a separate transparent overlay, not directly onto the photo. Drawing directly works for fully opaque text, but the moment you want partial transparency, the alpha values in fill get ignored unless the canvas itself supports alpha. The overlay does.
Understanding ImageDraw and ImageFont
ImageDraw is Pillow’s drawing API. You wrap a canvas image and call drawing methods on it:
from PIL import ImageDraw, ImageFont

draw = ImageDraw.Draw(overlay)
draw.text((50, 50), "Hello", font=font, fill=(255, 255, 255, 200))
For text, you need a font — and this is where things get a little fiddly across platforms. The cleanest approach: try a likely system font, fall back to Pillow’s built-in if it isn’t found:
def load_font(size):
    candidates = [
        "DejaVuSans-Bold.ttf",                       # Linux
        "/Library/Fonts/Arial Bold.ttf",             # macOS
        "C:/Windows/Fonts/arialbd.ttf",              # Windows
    ]
    for path in candidates:
        try:
            return ImageFont.truetype(path, size)
        except (OSError, IOError):
            continue
    # Last resort: a tiny built-in font (size is not adjustable on this one)
    return ImageFont.load_default()
The truetype paths are platform-specific, so we try a few. load_default() always works but the size is fixed — only acceptable as a fallback.
Understanding Text Measurement and Positioning
To anchor a watermark to a corner, you need to know how big the text actually is in pixels. The modern way in Pillow is textbbox:
# Measure the rendered size of the text
bbox = draw.textbbox((0, 0), text, font=font)
text_w = bbox[2] - bbox[0]
text_h = bbox[3] - bbox[1]
textbbox((x, y), text) returns (left, top, right, bottom) — the bounding box of where the text would be drawn if you called draw.text((x, y), ...). Subtract to get width and height.
With that, anchor positioning is just math:
def compute_position(text_w, text_h, img_w, img_h, position, pad=20):
    if position == "top-left":     return (pad, pad)
    if position == "top-right":    return (img_w - text_w - pad, pad)
    if position == "bottom-left":  return (pad, img_h - text_h - pad)
    if position == "bottom-right": return (img_w - text_w - pad, img_h - text_h - pad)
    if position == "center":       return ((img_w - text_w) // 2, (img_h - text_h) // 2)
    return (pad, pad)
The pad of 20 px keeps the text off the very edge — a small touch that makes a huge visual difference. Without padding, watermarks look glued to the corner; with padding, they look intentionally placed.
Understanding Folder Iteration
Listing images in a folder needs care. Folders contain hidden files, non-image files, subfolders. pathlib makes it tidy:
from pathlib import Path

IMAGE_EXTS = {".jpg", ".jpeg", ".png", ".bmp", ".gif", ".webp"}

def list_images(folder):
    return sorted(
        p for p in Path(folder).iterdir()
        if p.is_file() and p.suffix.lower() in IMAGE_EXTS
    )
Three small choices that matter:
Set lookup for extensions —
O(1)membership and easy to extend.p.suffix.lower()— match.JPGas well as.jpg.sorted(...)— predictable order in the progress log, instead of whatever the filesystem coughs up.
Understanding Saving and Format
The watermarked image is in RGBA mode. That’s fine for PNG, but JPEG can’t store transparency. So before saving JPEG, we flatten the alpha:
def save_image(img, path):
    if path.suffix.lower() in {".jpg", ".jpeg"}:
        # Flatten to RGB so JPEG can save it
        img = img.convert("RGB")
        img.save(path, quality=92)
    else:
        img.save(path)
convert("RGB") drops the alpha channel by blending against black — fine for our case because the photo underneath has no transparent areas. (If you needed to preserve transparency with JPEG-style compression, you’d save WebP or PNG instead.)
The quality=92 is genuinely worth setting — Pillow’s JPEG default is 75, which is enough for thumbnails but visibly lossy on photos. 92 keeps the output looking essentially identical to the input.
Coming Tomorrow
Tomorrow we make things fun. The Meme Generator & Collage Maker uses today’s text drawing skills for meme captions (the classic top + bottom text in white-with-black-outline) and adds a collage builder that arranges multiple photos into a single grid image. Two image tools, one app, ready to share.
View Code Evolution
Compare today’s batch watermarker with yesterday’s filters studio and see how the single-image transformation pattern scales to whole folders with one loop and a little error handling.
Keep reading with a 7-day free trial
Subscribe to Daily Python Projects to keep reading this post and get 7 days of free access to the full post archives.